Operation Jupiter (1944)

Operation Jupiter was an offensive by VIII Corps of the British Second Army on 10 July 1944 during the Battle of Normandy in the Second World War. The objective of the 43rd (Wessex) Infantry Division (Major-General Ivo Thomas), was to capture the villages of Baron-sur-Odon, Fontaine-Étoupefour, Chateau de Fontaine and to recapture Hill 112. An attached brigade of the 15th (Scottish) Infantry Division would take Éterville, Maltot and the ground up to the River Orne and then the tanks of the 4th Armoured Brigade, supported by infantry, would advance through the captured ground and secure several villages to the west of the River Orne. It was hoped that the initial objectives could be captured by 9:00 a.m., after which the 4th Armoured Brigade would exploit the success.
The British advance went well at first but fighting for Hill 112 took all day and Maltot changed hands several times. On 11 July, counter-attacks by the 9th SS Panzer Division Hohenstaufen, 10th SS Panzer Division Frundsberg and the schwere-SS Panzer Battalion 102 in the afternoon, forced the British off the top of Hill 112 to positions on the north-facing slope.[3] The operation was a tactical failure for VIII Corps but a strategic success for the Allies, attrition having reduced the II SS Panzer Corps to a condition from which it never recovered. British operations of the Second Battle of the Odon conducted in the Odon valley continued in July and the 53rd (Welsh) Infantry Division occupied Hill 112 almost unopposed on 4 August, after the Germans withdrew during Operation Cobra and Operation Bluecoat further west. A stone memorial to the 43rd Division was built on the hill in the late 1940s.
Background
Operation Epsom
The first battle for Hill 112 was fought at the end of Operation Epsom, when the tanks of 11th Armoured Division broke out from a bridgehead established by the 2nd Battalion, Argyll and Sutherland Highlanders, part of 227th (Highland) Infantry Brigade 15th (Scottish) Infantry Division, at Tourmauville. Hill 112 was an intermediate objective on the way to the River Orne crossings but such was the German reaction, that the 23rd Hussars were only able to capture and hold the hill with difficulty.[4] Hill 112, at the end of a narrow salient, was held by the infantry of the 8th Battalion, Rifle Brigade (Prince Consort's Own). Here they remained under shell and mortar fire until Ultra decryption of German radio traffic, showed that the II SS Panzer Corps was arriving.[5] Before the German reinforcements could attack, General Bernard Montgomery ordered a withdrawal from the hilltop.[5] Montgomery intended to hold the Panzer divisions (approximately seven), on the British-Canadian front, while the First US Army continued the Battle of Cherbourg and broke out from the beachhead. The American objective was feasible, because they had only the equivalent of 1 1⁄2 panzer divisions facing them, despite German attempts to disengage panzer units from the east end of the bridgehead.[6]
Operation Charnwood
Operation Charnwood took place from 8–9 July, to capture Caen and prevent the transfer of German armoured units from the Anglo-Canadian front in the east to the American sector. Three infantry divisions supported by three armoured brigades, attacked behind a creeping barrage and made gradual progress against the 12th SS Panzer Division Hitlerjugend and the 16th Luftwaffe Field Division. By the end of the day the 3rd Canadian Division, the British 3rd Infantry Division and the 59th (Staffordshire) Infantry Division had reached Caen. At dawn, the attackers met the remnants of German units which were retreating across the Orne; Carpiquet airfield had fallen to the Canadians during the morning and by 6:00 p.m., the British and Canadians had secured the north bank of the Orne. With the remaining bridges fortified or impassable and with German reserves close by, the British I Corps closed the operation. Charnwood was mutually costly but a tactical success for the Allies. The Germans were expelled from north of the Orne but established a defensive line south of the city and continued to transfer formations to the American front.[7]
Prelude
Plan of attack
The 43rd (Wessex) Infantry Division, the attached 31st Tank Brigade with the 141st Regiment Royal Armoured Corps (141st RAC), Crocodiles from the 79th Armoured Division and the 4th Armoured Brigade were supported by the 3rd and 8th Army Group Royal Artillery (AGRA) for an attack in three stages. In phase I, the 130th Infantry Brigade and 9th Royal Tank Regiment (9th RTR) were to occupy a German salient around Les Duanes and capture Château de Fontaine as the 129th Brigade with the 7th Royal Tank Regiment (7th RTR) attacked Hill 112. In phase II, the 129th Infantry Brigade would form a defensive flank along the northern slope of Hill 112 facing Évrecy to the south-west.[8] The 130th Brigade, 9th RTR and Churchill Crocodiles would attack Éterville and Maltot and if the attack succeeded an advance south-east of Hill 112 towards St. Martin was to follow. In phase III, the 129th Brigade was to stay on Hill 112, while the 130th Brigade dug in from Éterville to Maltot facing east. The 4th Armoured Brigade and the 214th Infantry Brigade of the 43rd Division would then advance between the 129th and 130th brigades, south to the Orne and form a bridgehead. The 46th (Highland) Brigade of the 15th (Scottish) Division and a squadron of the 7th RTR would then clear the ground between the Odon, the Orne and the western suburbs of Caen.[8]
Battle
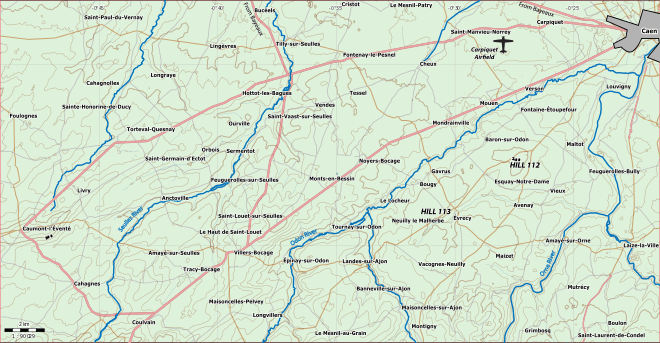
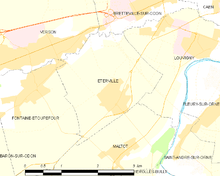
Operation Jupiter began from the Odon bridgehead, which ran from Verson to Baron, after the 214th Brigade crossed the river during the night of 8/9 July. After a preliminary bombardment the first battalions of the 43rd Division reached Éterville and the north slope of Hill 112 by 8:00 a.m. and the advance to Maltot began. The village was entered but determined German defenders, mortar-fire and armoured counter-attacks made the British position in the village untenable, without control of Hill 112. The German defenders on the hill were dug into cornfields and tanks were hidden in copses. The Germans stopped the British advance at the Caen–Évrecy road and below the crest on the flanks. In the evening the 5th Battalion, Duke of Cornwall's Light Infantry (5th DCLI) of 214th Brigade and the 7th Royal Tank Regiment (7th RTR) attacked the hill and reached the hilltop and woods nearby, which brought the four 43rd Division brigades onto the ridge. To the north of Éterville, troops of the 3rd Canadian Division had crossed the Odon and extended the salient to the east.[9]
German counter-attacks began around midnight and got into Éterville several times; on the hill, the 5th DCLI was forced back to the Caen–Évrecy road, after all its anti-tanks guns were destroyed and 240 casualties had been incurred. During the battle, General Heinrich Eberbach, the commander of Panzergruppe West had made the defence of Hill 112 the priority (Schwerpunkt) of the II SS Panzer Corps but the British advance had taken the north slope and got half-way across the hilltop.[10] The German defenders had been subject to naval bombardment, air attack and artillery fire but held much of their ground, with the support of Tiger tanks of schwere SS-Panzer Abteilung 102, which had arrived in Normandy two days previous.[11][lower-alpha 1]
Aftermath
Analysis
Exploitation of a German retirement from Caen after Operation Charnwood had not been possible, since the Germans only withdrew to the south bank of the Orne. The British had attacked up open slopes to reach the top of Hill 112, commanded by dug in German units and tanks on the reverse slope. Narrow front attacks were tactically unwise but lack of troops and circumstances had made them unavoidable, despite congestion behind the British front line and the delays this caused in delivering supplies and reinforcements.[13] Lieutenant-General Richard O'Connor, the VIII Corps commander, recommended that more account be taken of topography in the selection of objectives and that the occupation of high ground be favoured over attacks on villages. The British and Canadians had used their increasing experience and kept the initiative but the Germans had not withdrawn despite the cost of such defensive operations.[14] The commanding views from Hill 112 were of great tactical importance but the highest point of the hill was relinquished by the British and left as a no-man's-land, with the opponents dug in on either side.[15]
Several villages in the vicinity had been taken (although the British were pushed out of Éterville) and the Germans had been provoked into counter-attacking British penetrations. The 9th SS Panzer Division, which had been moving out of the line to form an operational reserve, was brought back to contain the attack and the Germans were exposed to Allied naval and ground artillery and attack from the air, which inflicted severe casualties and deprived the German defence of the ability to conduct a counter-offensive.[16] Tank-versus-tank engagements continued to take place at fewer than 1,000 yd (910 m), at which the 150 mm (5.9 in) armour of Churchill tanks, was insufficient to resist hand-held hollow-charge weapons or the German high-velocity 75 mm and 88 mm anti-tank guns. British tank-mounted, medium-velocity 75 mm guns could not penetrate the frontal armour of a Panther or a Tiger from any direction.[17]
Casualties and commemoration
The 43rd (Wessex) Division lost 2,000 men in the operation and 7,000 casualties from 10–22 July.[18] The 31st Tank Brigade lost 39 tanks, some 25 percent of its strength.[13][16] The importance of the battles for Hill 112 is remembered by the erection by the 5th DCLI in August 1944 of a memorial labelled Cornwall Wood. A larger wooden memorial to the 43rd (Wessex) Division was built by the residents of Normandy to the combatants and civilians who were killed soon afterwards.[19] A stone memorial was built at Hill 112 by the 43rd Division in the late 1940s (carved by German masons) and similar memorials are at Wynyard's Gap in North Dorset, Castle Hill, Mere in Wiltshire and Rough Tor in Cornwall.[20]
Subsequent operations
11 July
At dusk on 11 July, the 4th Battalion, Somerset Light Infantry (SLI) of the 129th Infantry Brigade made a silent attack on the crest of Hill 112. D Company attacked in the centre to re-occupy the orchard with A Company on the right and C Company on the left.[21][lower-alpha 2] A Company crossed the Caen–Évrecy road and tried to dig in but found the ground too hard for their tools and then the Germans were alerted by British machine-gun fire. D Company got to the edge of Cornwall Wood where they received machine-gun fire much of which ricochetted from derelict tanks; one platoon strayed to the right and disappeared. Troops of the 19th SS Panzergrenadier Regiment discovered the advance and managed to repulse the British, then found that the German troops on the other side of the orchard had retired. Constant artillery, mortar and machine-gun fire swept the top of Hill 112 and made it untenable for both sides and positions below the crest, where troops could assemble for an attack, were frequently bombarded. Small parties of the 5th DCLI remained in the orchard, not having heard of the retirement and after four days, a group which sent four German prisoners down the hill were ordered back.[22]
Operation Greenline, 15–17 July
The crossroads at le Bon Repos and the higher ground overlooking Esquay-Notre-Dame were attacked by the 2nd Battalion, Glasgow Highlanders of the 227th Infantry Brigade, supported by Churchill tanks of the 107th Regiment Royal Armoured Corps (107th RAC) from the 34th Tank Brigade and the 141st RAC of the 79th Armoured Division, with Churchill Armoured Vehicle Royal Engineers (AVRE) and Churchill Crocodile flame-thrower tanks. The Highlanders advanced from the north-east of Hill 112, south-westwards over the northern slope, towards the defences of the III Battalion, 21st SS-Panzergrenadier Regiment. As the infantry emerged from dead ground they were met by massed mortar fire, which temporarily disorganised the battalion, as did a smoke screen placed on Hill 112, which had merged with fog and covered the area. The Highlanders managed to cross the start line on time at 9:30 p.m. and captured the SS survivors of a flame attack by the Crocodiles on the Caen–Évrecy road, between Croix des Filandriers and le Bon Repos. The advance continued downhill under Monty's Moonlight (illumination from searchlight beams reflected by clouds) and covering fire from the 107th RAC Churchills on the higher ground just south of Baron.[23]
Esquay was raided around 11:00 p.m. but not held, as its position below a saucer of higher ground made it a shell-trap. The troops dug in on the rises north of Esquay at positions determined earlier using reconnaissance photographs. Tiger tanks of schwere SS-Panzer Abteilung 102 were sent up the southern slope of Hill 112 to repulse an attack that never came. Further west, the rest of the 15th (Scottish) Division had captured Point 113 but not Évrecy, which left the 2nd Glasgow Highlanders overlooked from both flanks. German counter-attacks by infantry of the 21st SS-Panzergrenadier Regiment and tanks of the 10th SS-Panzer Regiment at first concentrated on Esquay, which had already been evacuated. The German counter-attack then fell on the positions around le Bon Repos, where two Panzer IV were knocked out by 6-pounder anti-tank guns. The Scottish were pushed back several times, only for the medium artillery of XII Corps to force the Germans back out. On 18 July, the 107th RAC skirmished with dug‑in Tigers and two 88 mm self-propelled guns, losing four tanks on the ridge.[24] The Highlanders maintained their positions for two days before being relieved by a battalion of the 53rd (Welsh) Infantry Division.[25]
Operation Express, 22 July
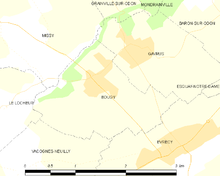
Operation Express was to jump-off from the village of Louvigny. The 5th Battalion, Wiltshire Regiment (5th Wilts), of the 129th Infantry Brigade, and B Squadron of the 9th RTR from the 31st Tank Brigade, were to capture the village and orchards north of the road from Louvigny; the 4th Wilts with A Squadron, 9th RTR were to attack the woods, orchards and a spur south-east of Maltot. The 4th Somerset Light Infantry (SLI) were kept in reserve, ready to exploit any success.[26] On the east bank of the Orne, the 5th Canadian Infantry Brigade, 2nd Canadian Division raided Etavaux with two companies moving along the railway close to the river, supported by a creeping barrage and tanks from the Sherbrooke Fusiliers on higher ground. Several Canadian soldiers rushed German machine-gun nests and enabled the advance to continue to the village, where they fought with the German garrison until the British barrage was due and then retired. After Maltot was captured, the Canadians returned to occupy the village and took c. 100 prisoners from the 272nd Infantry Division, for a loss of 108 casualties.[27]
Operation Express began at 5:30 p.m. and the 5th Wilts advanced behind a smoke screen and an artillery barrage on the right side of the road. The Germans were surprised and at first were stunned by the bombardment. As the British moved through the village, some defenders recovered and hand-to-hand fighting took place. Grenadiers from the 10th SS-Panzer Division and Tiger tanks from the schwere SS-Panzer Abteilung 102 began a counter-attack as the British entered Maltot and knocked out several Churchills of B Squadron. A British Forward Air Controller saw the German tanks and called in Hawker Typhoon Fighter-bombers which forced the Tigers back to Hill 112, while the grenadiers reinforced the German infantry in the village. On the other side of the Louvigny road, the 4th Wilts advanced with A Squadron, through woods and farms to the final objective south of the village. The infantry went first, two sections in front of each tank, with the squadron commander on foot, accompanying the infantry commanders.[28]
When the 15th Wilts saw that the 4th Wilts across the road had been delayed by the garrison in Lieu de France Farm at the east end of Maltot, Churchill and Churchill Crocodile tanks advanced, bombarded and flamed the defenders and then overran the position. As the British moved into the woods, small parties of British and German infantry stalked each other through trees, small quarries and trenches. The defenders were overrun in about two hours and mopping up began but some German troops were still holding out as dark fell. Most of the remaining defenders retired to Château Maltot on the far side of the road and were cut off and as the 4th Wilts moved forward to the Rau de Maltot stream, they were stopped by fire from the château. Bombardment by the Churchills prompted a German medic to request a truce, which the British were willing to accept, in return for the surrender of all German troops in the château an offer the Germans declined. At dusk, the British attacked and broke into the ground floor but were held back by showers of hand grenades. Overnight the outbuildings were captured and the château was kept under fire by the tanks.[29]
From 9:30–10:00 p.m., both battalions reached the final objectives to the west of Maltot and the woods to the south. The British tanks withdrew, having lost eight vehicles and just after dawn, the remaining Germans in the château gave up. By the end of the operation, the 10th SS-Panzer Division had been reduced from c. 15,000 men to 2,289 and could only counter-attack the most vital positions. At dawn, the British were met by the sight of the dead from Operation Jupiter and by long-range fire from German tanks and guns on the south-east slope of Hill 112. The Wilts had taken more than 400 prisoners in what they called a "text-book" operation. Commanders had studied maps, photographs and sand models, had been given time to establish infantry-tank co-operation with 7th RTR and conduct a reconnaissance of the terrain.[30] The 43rd (Wessex) Division was withdrawn and the ground taken over by the 53rd (Welsh) Division.[31] The Germans withdrew from Hill 112 in August, during Operation Cobra and Operation Bluecoat further west; the 53rd (Welsh) Division occupied the feature with barely a fight on 4 August.[31]
Notes
- ↑ A tank of the Royal Scots Greys hit a Panther four times at 800 yd (730 m) and the shells bounced off.[12]
- ↑ A silent attack was a stealthy infantry advance without artillery support until the defenders discovered that they were being attacked.[21]
Footnotes
- ↑ Reynolds 2009, pp. 48–49.
- ↑ Reynolds 2009, p. 50.
- ↑ Reynolds 2009, pp. 46–50.
- ↑ Jackson 2006, pp. 39–40.
- 1 2 Hinsley 1994, p. 495.
- ↑ Hinsley 1994, p. 498.
- ↑ Buckley 2006, pp. 30–31.
- 1 2 Saunders 2001, pp. 49–50.
- ↑ Ellis 2004, p. 317.
- ↑ Ellis 2004, pp. 317–318.
- ↑ Jackson 2006, pp. 61–63.
- ↑ Buckley 2006, p. 33.
- 1 2 Buckley 2006, p. 32.
- ↑ Buckley 2014, pp. 92–93.
- ↑ Saunders 2001, p. 7.
- 1 2 Buckley 2014, p. 92.
- ↑ Buckley 2006, pp. 32–33.
- ↑ Delaforce 2015, p. 70.
- ↑ How 1984, pp. 212–213.
- ↑ Saunders 2001, p. 184.
- 1 2 Saunders 2001, p. 156.
- ↑ Saunders 2001, pp. 156–160.
- ↑ Saunders 2001, pp. 160–162.
- ↑ Anon 1946.
- ↑ Saunders 2001, pp. 162–163.
- ↑ Saunders 2001, pp. 165–166.
- ↑ Copp 1992, pp. 60–62.
- ↑ Saunders 2001, pp. 166–170.
- ↑ Saunders 2001, pp. 170–172.
- ↑ Buckley 2014, p. 147.
- 1 2 Saunders 2001, pp. 172–176.
References
- Buckley, J. (2006) [2004]. British Armour in the Normandy Campaign 1944 (Routledge ed.). London: Frank Cass. ISBN 978-0-415-40773-1.
- Buckley, J. (2014) [2013]. Monty's Men: The British Army and the Liberation of Europe (2014 ed.). London: Yale University Press. ISBN 978-0-300-20534-3.
- Copp, T. (2007) [1992]. The Brigade: The Fifth Canadian Infantry Brigade in WWII (Stackpole ed.). Stoney Creek, Ont: Fortress Books. ISBN 978-0-8117-3422-6.
- Delaforce, P. (2015) [1996]. Red Crown & Dragon: 53rd Welsh Division in North-West Europe 1944–1945 (Thistle ed.). Brighton: Tom Donovan. ISBN 978-1-910198-63-6.
- Ellis, Major L. F.; et al. (2004) [1st HMSO 1962]. Butler, J. R. M., ed. Victory in the West: The Battle of Normandy. History of the Second World War, United Kingdom Military Series. I. Naval & Military Press. ISBN 978-1-84574-058-0.
- Hinsley, F. H. (1994) [1993]. British Intelligence in the Second World War. Its influence on Strategy and Operations. History of the Second World War. abridged edition (2nd rev. ed.). London: HMSO. ISBN 978-0-11-630961-7.
- How, J. J. (1984). Hill 112: Cornerstone of the Normandy Campaign. London: William Kimber. ISBN 978-0-7183-0540-6.
- Jackson, G. S. (2006) [1945]. Operations of Eighth Corps: Account of Operations from Normandy to the River Rhine. Staff, 8 Corps (MLRS ed.). London: St. Clements Press. ISBN 978-1-905696-25-3.
- Reynolds, M. (2009). Sons of the Reich: 2nd SS Panzer Corps. Barnsley: Pen and Sword. ISBN 978-1-84884-000-3.
- Saunders, T. (2006) [2001]. Hill 112: Battles of the Odon 1944. Battleground Europe: Normandy (Pen & Sword ed.). Leo Cooper. ISBN 978-0-85052-737-7.
- Story of 34 Armoured Brigade (Naval & Military Press ed.). Privately published. 2014 [1946]. ISBN 978-1-78331-101-9.
Further reading
- Baron, J. A. (2010) [1948]. From the City, from the Plough, a novel (Black Spring ed.). London: Jonathan Cape. ISBN 978-0-948238-44-4.
- Elstob, P. (1974) [1960]. Warriors for the Working Day, a novel (Corgi ed.). London: Jonathan Cape. ISBN 978-0-552-09524-2.
External links
| Wikimedia Commons has media related to Operation Jupiter (1944). |
- Hill 112 memorial
- Brtitish Library map, Caen–Falaise
- 9th RTR in Operation Jupiter, 10 July
- [* Transcription of The Story of 34 Armoured Brigade (1946)