Mount Barker Road
| Mt Barker Road South Australia | |
|---|---|
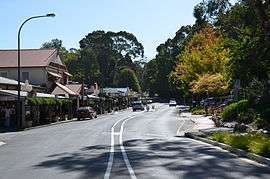 | |
| Mount Barker Road looking northwest in Aldgate | |
| General information | |
| Type | Road |
| Route number(s) |
|
| Major junctions | |
| northwest end | Glen Osmond |
| |
| southeast end | Mount Barker |
| Location(s) | |
| Region | Adelaide Hills |
| LGA(s) | |
| Major suburbs | |
Mount Barker Road was once the main road from Adelaide through the Adelaide Hills to Mount Barker on the eastern slopes of the Mount Lofty Ranges. The main route has now been replaced by part of the South Eastern Freeway, but most of it remains in some form. The remaining sections of Mount Barker Road are still classified as state roads.[1]
Route
Mount Barker Road starts from the "Old Toll Gate" at Glen Osmond. It has been completely replaced by the South Eastern Freeway as far as the Devil's Elbow. Mount Barker Road turns a sharp hairpin and has a winding uphill through Eagle On The Hill and rejoins the South Eastern Freeway near Measday's Hill.[1][2]
Mount Barker Road resumes from the south side of the Stirling exit from the freeway. It passes through the main shopping strips of Stirling and Aldgate[1] as State Route B33. From Aldgate, Route B33 continues on Strathalbyn Road, while Mount Barker Road follows the railway line as Tourist Route 57 to Bridgewater and under the freeway at Verdun where it joins State Route B34 (from Onkaparinga Valley Road) for a little over 3 kilometres (1.9 mi) through Hahndorf. At the south end of Hahndorf Route B34 turns under the freeway towards Echunga and Mount Barker Road continues on the north side to end at the Mount Barker Interchange.[1]
History
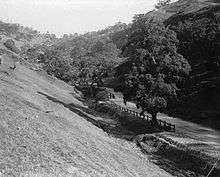
The last part of the South Eastern Freeway to be built reconstructed the Adelaide end of Mount Barker Road including a grade-separated intersection at Mount Osmond Road. It replaced the infamous Devil's Elbow hairpin with a partial interchange. The new freeway passes through the Heysen Tunnels and rejoins the former alignment the other side of a steep ridge. Mount Barker Road itself climbs over and around the ridge. Since the four-lane dual carriageway is no longer required, part of the uphill side has been replaced with a bike path used as part of a popular cycling route to Mount Lofty and all motor traffic uses the former downhill carriageway. The section between the Measdays interchange and Crafers was also completely replaced by the freeway being built on the same alignment at a lower level in a deep cutting.[3]
Mount Barker Road between Crafers and Stirling was replaced by the first stage of the Freeway to be built, in the late 1960s. Mount Barker Road remains as the main street of Stirling, continuing to Aldgate, Bridgewater, under the freeway at Verdun, then through Hahndorf to end near the Mount Barker interchange of the freeway. The road on the other end of the bridge over the interchange is "Adelaide Road", reflecting the reverse journey.
The Toll House
In 1841 a special Act "... for the making, and maintaining the Great Eastern Road" was passed, and construction of the first section from Glen Osmond to Crafers begun at public expense. It was soon realised that this undertaking would be hugely expensive, so a novel (for the day) plan was hatched to relieve the Government of all expense by vesting the management of the road in a private company. The successful tenderer would have the responsibility of completing and maintaining the road, and have the right to levy tolls on users of the road. As this was the only route to and from the burgeoning agricultural districts around Mount Barker, not to mention all road traffic to the eastern colonies, this had all the hallmarks of a great money-maker. The author of The History and Topology of Glen Osmond, Under-Treasurer Tom Gill, no stranger to public finances, described this a 'curiosity in road legislation'.
A toll gate and accommodation for the gate-keeper were erected and one Samuel Selby appointed keeper of the toll-bar, which was to be staffed 24 hours, seven days a week. The tolls levied were: —
- For every coach, chariot, chaise, gig, hearse, caravan, or other carriage, and every cart, wagon, dray, or other vehicle, if drawn by one horse or two bullocks, 1/.
- 'For 'such carriage or vehicle' drawn by two horses or four bullocks, 1/6; by four horses or six bullocks, 2/; by six or more horses, or eight or more' bullocks, 3/;
- by one pony, mule, or ass not exceeding 13 hands high, 6d.; by two or more such ponies,' mules, or asses, 1/; for every saddle or led horse, mule, or ass, 6d.; for horses, mules, asses, oxen, cows, or other neat cattle driven, per head 1d.; and for sheep, lambs, calves, dogs, swine, or goats driven, each ½d.
- Only one full toll in any one day might be demanded for any animal or vehicle, except stage coaches or carriages plying for hire.
- Exempt from payment were: the Governor, survey, and police, also agricultural produce not bought or sold, but going to be sold or disposed of, also persons travelling to and from Divine Service on Sundays.
The tolls were vexatious and led to a great deal of ill-feeling and were abolished in 1847 by the Legislative Council on the motion of Samuel Davenport. The company failed to reap the rewards anticipated, partly on account of the increased cost of labour as a result of the exodus of able-bodied men to the Victorian goldfields.[4]
The octagonal toll-house, much restored, still stands at Glen Osmond, between the up and down tracks at the start of the Mount Barker Road, now the South-Eastern Freeway.
References
- 1 2 3 4 Department of Planning, Transport and Infrastructure (22 December 2010). Rack Plan 868: Naming of State Rural Roads – Adelaide Hills and Fleurieu Peninsula (PDF) (Map). Government of South Australia. Archived from the original (PDF) on 16 September 2014. Retrieved 3 April 2015.
- ↑ Google (21 September 2015). "Mount Barker Road" (Map). Google Maps. Google. Retrieved 21 September 2015.
- ↑ "The Adelaide Crafers Highway Project". Government of South Australia, Department for Transport, Energy and Infrastructure. 13 August 2004. Archived from the original on 1 September 2007. Retrieved 21 September 2015.
- ↑ Tom Gill (1902). History and Topography of Glen Osmond. p. 20–. facsimile pub. State Library of South Australia 1974