2nd Infantry Division (United Kingdom)
The 2nd Infantry Division was a Regular Army infantry division of the British Army, with a long history. Its existence as a permanently embodied formation dated from 1809, when it was established by Lieutenant General Sir Arthur Wellesley (later to become the Duke of Wellington), as part of the Anglo-Portuguese Army, for service in the Peninsular War. (Prior to this, it was common for formations with the same number to be temporarily established for a single campaign and disbanded immediately afterwards; divisions remained a permanent part of the British Army's structure only after the Napoleonic Wars).
| 2nd Division 2nd Infantry Division | |
|---|---|
 | |
| Active | 1809–2012 |
| Country | |
| Branch | |
| Type | Infantry/Combined arms |
| Role | Training and Administration Military Aid to the Civil Community Military Aid to the Civil Power |
| Size | One Garrison Four Brigades |
| Part of | Land Forces |
| Garrison/HQ | Craigiehall, near Edinburgh |
| Engagements | Peninsula War Crimean War First World War Second World War |
| Insignia | |
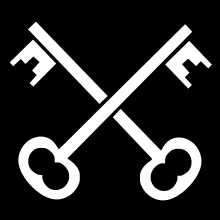
| Identification symbol |  World War 1 Division sign.[2] |
The division was associated with the north of England. The divisional insignia, the Crossed Keys of Saint Peter, were originally part of the coat of arms of the Diocese of York, and were adopted before or during the First World War. It was disbanded on 1 April 2012.
Peninsular War
The first commander of the 2nd Division was Major General Rowland Hill. Under his command, the division took part in the Second Battle of Porto and the battles of Talavera and Bussaco.[3]
In 1811, Major General the Hon. William Stewart became commander of the division. Stewart was apparently a magnificent Lieutenant Colonel, but a disastrous General. The division suffered heavy casualties at the Battle of Albuera. For the rest of 1812, the division was part of a detachment (essentially a corps) under Rowland Hill which covered the southern flank of Wellington's main army. It thus acquired the nickname of the "Observing Division", but was also known as the "Surprisers", after taking the French by surprise in engagements at Arroyo Molinos and Almaraz.[4]
In 1813 and 1814, the division remained part of Hill's detachment. It contained three British brigades and one Portuguese brigade. It took part in the Battle of Vitoria on the right flank of Wellington's army. It subsequently was briefly driven from a position at the Battle of Maya after Stewart retired the division prematurely to camp, but fought in the later engagements of the Battle of the Pyrenees and the battles in southern France.[5]
Peninsular War Formation
The order of battle was as follows (Battle of Albuera, 16 May 1811):[6]
Commanding General: Major General William Stewart
- 1st Brigade: commanded by Lieutenant Colonel John Colborne
- 1/3rd (East Kent) Regiment of Foot (The Buffs)
- 2/31st (Huntingdonshire) Regiment of Foot
- 2/48th (Northamptonshire) Regiment of Foot
- 2/66th (Berkshire) Regiment of Foot
- 2nd Brigade: commanded by Major General Daniel Hoghton
- 3rd Brigade: commanded by Lieutenant Colonel Abercromby
- 3 Coys, 5/60th Regiment of Foot
(from January 1813)
- 1st Brigade: Major General Cadogan
- 1/50th (West Kent) Regiment of Foot
- 1/71st (Glasgow Highland) Regiment of Foot (Light Infantry)
- 1/92nd Regiment of Foot (Gordon Highlanders)
- 1 Coy., 3/95th Regiment of Foot (Rifles)
- 2nd Brigade: Major General Byng
- 1/3rd (East Kent) Regiment of Foot (The Buffs)
- 1/57th (West Middlesex) Regiment of Foot
- 1st Provisional Battalion (2/31st and 2/66th Regiments of Foot)
- 2 Coys., 5/60th Regiment of Foot
- 3rd Brigade: Major General Wilson
- 2/28th (North Gloucestershire) Regiment of Foot
- 2/34th (Cumberland) Regiment of Foot
- 1/39th (Dorsetshire) Regiment of Foot
- 2 Coys., 5/60th Regiment of Foot
- Portuguese Brigade: Brigadier General Charles Ashworth
- 1/6th Portuguese Line Regiment
- 2/6th Portuguese Line Regiment
- 1/18th Portuguese Line Regiment
- 2/18th Portuguese Line Regiment
- 6th Caçadores
Waterloo
The division fought at the Battle of Waterloo, part of Wellington's II Corps commanded again by Rowland Hill. It consisted at Waterloo of a brigade of British light infantry and riflemen, a brigade of the King's German Legion and a brigade of Hanoverian Landwehr. The division began the day in reserve behind Wellington's right flank, but took part in the defeat of Napoleon's attacks later in the day.[7]
Waterloo formation
Commander: Lieutenant General Sir Henry Clinton
3rd British Brigade Major-General Frederick Adam
- 52nd (Oxfordshire) Regiment of Foot (Light Infantry) Lt-Colonel. Sir John Colborne[8]
- 71st (Glasgow Highland) Regiment of Foot (Light Infantry)
- 2nd Battalion, 95th Regiment of Foot (Rifles)
- 3rd Battalion, 95th Regiment of Foot (Rifles)
1st King's German Legion Brigade Lieutenant-Colonel George Charles Du Plat
- 1st Line Battalion, KGL
- 2nd Line Battalion, KGL
- 3rd Line Battalion, KGL
- 4th Line Battalion, KGL
3rd Hanoverian Brigade Lieutenant-Colonel Hugh Halkett
- Landwehr Battalion Bremervörde
- Landwehr Battalion 2nd Duke of York's (Osnabrück)
- Landwehr Battalion 3rd Duke of York's (Quakenbrück)
- Landwehr Battalion Salzgitter
Artillery Lieutenant-Colonel Charles Gold
- Bolton's Battery R. A.
- Sympher's Horse Battery King's German Legion
Crimean War
The division formed part of the British army under Lord Raglan which landed in the Crimea and attempted to capture the port of Sebastopol. It was commanded by Lieutenant General Sir George de Lacy Evans, and fought at the battles of the Alma and Inkerman, where it suffered heavy casualties.[9]
Crimean War Formation
Commanding General: Lieutenant General Sir George de Lacy Evans
- 3rd Brigade: Brigadier General Adams
- 41st (Welsh) Regiment of Foot
- 47th (Lancashire) Regiment of Foot
- 49th (Princess Charlotte of Wales's) (Hertfordshire) Regiment of Foot
- 4th Brigade: Brigadier General John Lysaght Pennefather
- Two field batteries Royal Artillery
Anglo-Egyptian War
In 1882, the division formed part of the Expeditionary Force under Lieutenant General Sir Garnet Wolseley which was sent to Egypt after a rebellion (the Urabi Revolt) threatened British control of the Suez Canal. During the subsequent 1882 Anglo-Egyptian War, the division was commanded by Major General Edward Bruce Hamley. One of its brigades was used as a garrison of Alexandria, and did not take part in the main actions of the war, but the other brigade and the divisional headquarters took part in the decisive Battle of Tel-el-Kebir.[10]
Anglo-Egyptian War formation
Commander: Lieutenant General Sir Edward Bruce Hamley
3rd (Highland) Infantry Brigade (Major General Sir Edward Alison)
- 1st Battalion, Black Watch (Royal Highlanders)
- 2nd Battalion, Highland Light Infantry
- 1st Battalion, Gordon Highlanders
- 1st Battalion, Queen's Own Cameron Highlanders
4th Infantry Brigade (Major General Sir Evelyn Wood VC)
- 1st Battalion, Royal Sussex Regiment
- 1st Battalion, South Staffordshire Regiment
- 1st Battalion, Princess Charlotte of Wales's (Berkshire Regiment)
- 1st Battalion, King's (Shropshire Light Infantry)
Divisional Troops
- 19th Hussars (2 Sqns)
- 3rd Battalion, The King's Royal Rifle Corps
- I Battery, 2nd Field Brigade, Royal Artillery
- N Battery, 2nd Field Brigade, Royal Artillery
- 26 Field Company, Royal Engineers
- 11 Company, Army Commissariat and Transport Corps
- 2 Bearer Company, Army Hospital Corps (Half)
- 4 Field Hospital, Army Hospital Corps
- 5 Field Hospital, Army Hospital Corps
Boer War
The division was part of an Army Corps called the Natal Field Force under General Sir Redvers Buller which was sent to South Africa when the Boer War broke out in 1899. The division's commander was Lieutenant General Sir Francis Clery. The division, or parts of it, suffered defeats at the Battle of Colenso and the Battle of Spion Kop[11] before gaining victory at the Battle of the Tugela Heights during the Relief of Ladysmith. It subsequently took part in operations which drove the Boers from Natal and the eastern Transvaal.[12]
In 1902 the army was restructured, and a 2nd Infantry division was established permanently as part of the 1st Army Corps, comprising the 3rd and 4th Infantry Brigades.[13]
First World War
The division was subsequently stationed on Salisbury Plain, and designated to be part of the British Expeditionary Force (BEF) which would be despatched to the continent in the case of a general European war. When the First World War broke out, in August 1914, the BEF was sent to support the French and Belgian armies. The division's commander at this point was Major General Charles Monro. The division took part in the Battle of Mons and the subsequent retreat, and, along with most of the rest of the original BEF, suffered heavy casualties in the First Battle of Ypres in November.[14]
The division served on the Western Front for the duration of the war. Although most of the division's regulars became casualties or were transferred to other formations, the division never lost its standing and reputation as a Regular Army formation. The 2nd Division fought in most the major battles on the Western Front.[15]

After the war the division was part of the occupation force stationed at Cologne.[15]
First World War Order of Battle
The order of battle was as follows:[15]
- 2nd Battalion, Grenadier Guards
- 2nd Battalion, Coldstream Guards
- 3rd Battalion, Coldstream Guards
- 1st Battalion, Irish Guards
- 1/1st Battalion, Hertfordshire Regiment (to 6th Bde. August 1915)
The brigade left the division on 20 August 1915 to join the Guards Division and was renamed as the 1st Guards Brigade.
- 2nd Battalion, Worcestershire Regiment (transferred to 33rd Division on 15 December 1915)
- 2nd Battalion, Oxfordshire and Buckinghamshire Light Infantry
- 2nd Battalion, Highland Light Infantry
- 2nd Battalion, Connaught Rangers (transferred to 3rd (Lahore) Division on 26 November 1915)
- 17th (Service) Battalion, Royal Fusiliers (from 99th Bde. December 1915, to 6th Bde. in February 1918)
- 24th (Service) Battalion (2nd Sportsman's), Royal Fusiliers (from 99th Bde. December 1915)
The following battalions were part of the brigade during 1915.
- 1/7th Battalion, King's Regiment (Liverpool) (September 1915 to November 1915)
- 2nd Battalion, Royal Inniskilling Fusiliers (January 1915 to July 1915)
- 1/9th Battalion (Glasgow Highlanders), Highland Light Infantry (November 1914 to January 1916)
- 1st Battalion, Queen's Royal Regiment (West Surrey) (July 1915 to December 1915)
- 1st Battalion, King's (Liverpool Regiment)
- 2nd Battalion, South Staffordshire Regiment
- 13th (Service) Battalion (West Ham), Essex Regiment
- 1st Battalion, King's Royal Rifle Corps (to 99th Bde. December 1915)
The following battalions were part of the brigade during 1915.
- 1st Battalion, Royal Berkshire Regiment (August 1914 to December 1915)
- 1/5th Battalion, King's (Liverpool Regiment) (February 1915 to December 1915)
- 1/7th Battalion, King's (Liverpool Regiment) (March 1915 to September 1915)
- 1/1st Battalion, Hertfordshire Regiment (August 1915 to June 1916)
The 17th Battalion of the Royal Fusiliers joined the brigade from the 5th Brigade in February 1918.
19th Brigade (19 August 1915 to 25 November 1915) :
- 2nd Battalion, Royal Welch Fusiliers
- 1st Battalion, Cameronians (Scottish Rifles)
- 1/5th Battalion, Cameronians (Scottish Rifles)
- 1st Battalion, Middlesex Regiment
- 2nd Battalion, Argyll and Sutherland Highlanders
The brigade joined the division in August 1915 from the 27th Division and left in November for the 33rd Division, where it swapped with the 99th Brigade.
- 22nd (Service) Battalion (Kensington), Royal Fusiliers
- 23rd (Service) Battalion (1st Sportsman's), Royal Fusiliers
- 1st Battalion, Royal Berkshire Regiment (from 6th Bde. December 1915)
- 1st Battalion, King's Royal Rifle Corps (from 6th Bde. December 1915)
The brigade joined the division from the 33rd Division in November 1915. The following battalions left the brigade shortly afterwards:
- 17th (Service) Battalion, Royal Fusiliers (to 5th Bde. December 1915)
- 24th (Service) Battalion, Royal Fusiliers (to 5th Bde. December 1915)
- 1/5th Battalion, King's (Liverpool Regiment) (from 6th Bde. December 1915)
Second World War
France and Belgium
Following its return from Germany, the division continued to be a regular army formation stationed in Britain. The division saw numerous changes in units and composition during the interwar period. In September 1939, shortly after the outbreak of the Second World War, it once again became part of a British Expeditionary Force (BEF), under Field Marshal Lord Gort, sent to fight alongside the French Army. Its General Officer Commanding (GOC) was Major-General Charles Loyd, who had taken command of the division earlier in the year. The division was sent to the Franco-Belgian border, arriving on 21 September 1939, where it came under command of I Corps, and was to remain there for the next few months.[16]
In May 1940, the BEF, including the 2nd Infantry Division, was driven from France during the retreat to Dunkirk, where the division (from 20 May commanded by Major-General Noel Irwin) was evacuated to England, with few casualties but losing almost all its equipment. During the retreat, two members of the division were awarded the Victoria Cross: Second Lieutenant Richard Annand of the 2nd Battalion, Durham Light Infantry and Company Sergeant Major George Gristock of the 2nd Battalion, Royal Norfolk Regiment. They were the first two of three to be awarded to members of the division throughout the war.[17]
India and Burma
The 2nd Infantry Division was re-equipped in Britain and soon brought up to strength in numbers, although, like most of the British Army after Dunkirk, pitifully short of equipment. The division was stationed in Yorkshire, serving again under I Corps control and in training to repel the expected German invasion, codenamed Operation Sea Lion.[18]
In December 1941, Japan entered the war. After British and Commonwealth forces in the Far East suffered disastrous defeats in late 1941 and early 1942, the division, under War Office control and commanded now by Major-General John Grover,[18] was sent to India, which was threatened by Japanese advances and internal disorder. For some time, the division was involved in internal security operations and training for amphibious operations. In late October 1942 the 6th Infantry Brigade was temporarily detached from the division and reorganised as an independent brigade group, complete with its own supporting units, and served in the failed Arakan Campaign, rejoining the rest of the division in India in June 1943.[19]
In 1944, the Japanese launched an invasion of India. In early April 1944 the 2nd Division was sent to join the Fourteenth Army's XXXIII Corps at Dimapur to fight its way down the road to relieve the besieged position at Kohima. Kohima was relieved on 18 April but heavy fighting continued in the disputed position until under increasing pressure from a buildup in Allied forces (2nd Division had been joined by the 7th Indian Infantry Division in early May) the Japanese, having run out of food and supplies, were forced to withdraw and the Battle of Kohima was to all intents concluded at the end of May. XXXIII Corps then tasked the 2nd Division to advance south down the road towards Imphal with the 7th Indian Division following up the retreating Japanese forces over the rough terrain to the east of the road. On 22 June the 2nd Division made contact with the 5th Indian Infantry Division advancing northwards from Imphal and the siege of Imphal was relieved. Both battles were some of the fiercest fighting of the war with Kohima labelled a miniature Stalingrad, due to the ferocity of the fighting on both sides. The epitaph carved on the memorial of the 2nd Division in the large cemetery for the Allied war dead at Kohima reads,[20]
When You Go Home, Tell Them Of Us And Say,
For Your Tomorrow, We Gave Our Today
The division continued to serve as part of the Fourteenth Army, commanded by Lieutenant-General Sir William "Bill" Slim, during its offensive into Burma which resulted in another Victoria Cross for the division. Captain John Randle of the 2nd Battalion, Royal Norfolk Regiment was the recipient.[21] The division, now commanded by Major-General Cameron Nicholson (Major-General Grover had been relieved the previous July), was withdrawn to India at the end of April 1945.[22]
The division transferred to the command of HQ Allied Land Forces South East Asia on that date, moving back to the Southern Army on 7 June 1945. The 5th Brigade left the division in October 1945 (following reorganisation) to become part of the Brinjap Division within the British Commonwealth Occupation Force in Japan. The 6th Brigade (again reorganised) sailed to Singapore in December 1945. The division was disbanded in India in October 1946.[23]
Second World War Order of Battle
The 2nd Infantry Division was constituted as follows during the war:[24]
4th Infantry Brigade (detached between 25 July 1944 to 20 September 1944)[25]
- 1st Battalion, Royal Scots (detached between 3 November 1942 and 3 July 1943)
- 2nd Battalion, Royal Norfolk Regiment
- 1st Battalion, Border Regiment (left 4 May 1940)
- 4th Infantry Brigade Anti-Tank Company (disbanded 14 December 1940)
- 1/8th Battalion, Lancashire Fusiliers (from 4 May 1940)
- 2nd Battalion, Royal Warwickshire Regiment (left 2 May 1940)
- 2nd Battalion, Dorsetshire Regiment
- 1st Battalion, Queen's Own Cameron Highlanders
- 5th Infantry Brigade Anti-Tank Company (formed 3 September 1939, disbanded 14 December 1940)
- 7th Battalion, Worcestershire Regiment (from 2 May 1940)
6th Infantry Brigade (detached between 31 October 1942 to 1 June 1943, left 18 April 1945)[19]
- 1st Battalion, Royal Welch Fusiliers
- 1st Battalion, Royal Berkshire Regiment
- 2nd Battalion, Durham Light Infantry
- 6th Infantry Brigade Anti-Tank Company (formed 3 September 1939, disbanded 14 December 1940)
- 1st Battalion, East Lancashire Regiment (from 9 September 1941 until 19 October 1941)
Divisional Troops
- 2nd Reconnaissance Regiment, Reconnaissance Corps
- 2nd Battalion, Manchester Regiment - (Machine Gun Battalion)
- 3rd Carabiniers (Prince of Wales's Dragoon Guards)
- 10th Field Regiment, Royal Artillery
- 16th Field Regiment, Royal Artillery
- 115th Field Regiment, Royal Artillery (assigned from 1 Corps on 1 May 1940 until 11 May and then reassigned to them on 20–21 May 1940)
- 99th (Buckinghamshire Yeomanry) Field Regiment, Royal Artillery
- 100th (8th Gordon Highlanders) Anti-Tank Regiment, Royal Artillery
- 5th Field Company, Royal Engineers
- 208th (Sussex) Field Company, Royal Engineers
- 506th Field Company, Royal Engineers
- 21st Field Park Company, Royal Engineers
- 4th Field Ambulance, Royal Army Medical Corps
- 5th Field Ambulance, Royal Army Medical Corps
- 6th Field Ambulance, Royal Army Medical Corps
- 143rd Special Service Company, Royal Army Service Corps
Post-Second World War
The division was amalgamated with the 36th Division and reformed at St. David's Barracks in Hilden in Germany in February 1947.[27] It also amalgamated with the disbanding 6th Armoured Division in 1958 and moved to Tunis Barracks at Lübbecke in September 1959.[28] In the early 1970s, it consisted of the 4th Armoured Brigade and 12th Mechanised Brigade, but in 1976 2nd Division was re-roled as 2nd Armoured Division.[29]
In a major reorganisation of British forces in 1982 and 1983, the 2nd Armoured Division converted back to become 2nd Infantry Division again. Its new headquarters was at Imphal Barracks in York,[27] and it consisted of three infantry brigades: the regular 24th Airmobile Brigade, and the 15th Brigade and 49th Brigade from the Territorial Army.[30]
Each of its two TA brigades had a Fox-equipped reconnaissance regiment. These two yeomanry regiments were regarded as 'mobile anti-armour' reserves for their respective brigades in the Corps rear area.[31]
Following the end of the Cold War, the division disbanded in 1992.[32]
1995–2012
.png)
The 2nd Division was reformed as an administrative division – effectively a military district – from North East District and North West District on 1 April 1995.[33] The 1998 Strategic Defence Review led to a reorganisation of Land Command. The 2nd Division absorbed Scotland District and its headquarters moved to Craigiehall, near Edinburgh in April 2000.[34]
The division HQ controlled Catterick Garrison and by 2000 comprised the following Regional Brigades:[35]
- 15th (North East) Brigade
- 42nd (North West) Brigade
- 51st (Scottish) Brigade
- 52nd Infantry Brigade
Following further reshuffling, 52nd Infantry Brigade was reformed as an operational, rather than regional, brigade consisting of several light infantry battalions, and left the formation to join 3 Division on 1 April 2007.[36] 38th (Irish) Brigade came under command of the 2nd Division on 1 January 2009.[37]
The Division reported to Army Headquarters at Andover from 2010.[38] The new HQ Support Command in Aldershot began operation in January 2012 when HQ 4th Division in Aldershot disbanded.[39] HQ 2nd Division in Edinburgh and HQ 5th Division in Shrewsbury were disbanded in April 2012.[40]
Despite the closure of HQ 2nd Division in Edinburgh the Army retained a General Officer Scotland, in addition to a small number of staff, in order to maintain the level of senior representation in Scotland required to oversee the rebasing changes.[39]
General officers commanding
Recent Commanders have been:[41]
GOC 2nd Division
- 1899–1901 Major-General Francis Clery[42]
- 1902–1904 Major-General Charles Douglas[43]
- 1904–1907 Lieutenant-General Sir Bruce Hamilton
- 1907–1910 Major-General Theodore Stephenson
- 1910–1914 Major-General Henry Lawson
- Aug-Dec 1914 Major-General Charles Monro
- 1914–1915 Major-General Henry Horne
- 1915–1916 Major-General William Walker
- 1916–1919 Major-General Sir Cecil Pereira
- 1919–1923 Major-General Sir Richard Butler
- 1923–1926 Major-General Sir Peter Strickland
- 1926–1928 Major-General Sir Edmund Ironside
- 1928–1935 Major-General Thomas Cubitt
- 1931–1935 Major-General Henry Jackson
- 1935–1937 Major-General Archibald Wavell
- 1937–1939 Major-General Henry Wilson
- 1939–1940 Major-General Charles Loyd
- May-Aug 1940 Major-General Noel Irwin
- 1940–1941 Major-General Daril Watson
- 1941–1944 Major-General John Grover
- 1944–1946 Major-General Cameron Nicholson
- 1946 Major-General Robert Arkwright
- 1946 Major-General John Churcher
- 1947–1949 Major-General Philip Balfour
- 1949–1951 Major-General Colin Callander
- 1951–1954 Major-General Basil Coad
- 1954–1956 Major-General John Wilsey
- 1956–1958 Major-General Cosmo Nevill
- 1958–1960 Major-General William Stirling
- 1960–1962 Major-General Edward Williams
- 1962–1964 Major-General Mervyn Butler
- 1964–1966 Major-General Norman Wheeler
- 1966–1967 Major-General John Sharp
- 1968–1970 Major-General Chandos Blair
- 1970–1972 Major-General Rollo Pain
- 1972–1974 Major-General John Archer
- 1974–1976 Major-General Desmond Mangham
- 1976–1977 Major-General Frank Kitson
- Note: from 1977 to 1983 2nd Division operated as an Armoured Division: see 2nd Armoured Division
GOC 2nd Infantry Division
- 1983–1984 Major-General Patrick Palmer
- 1984–1986 Major-General Peter Inge
- 1986–1987 Major-General Charles Guthrie
- 1987–1989 Major-General Murray Naylor
- 1989–1991 Major-General Michael Rose
- 1991–1992 Major-General Michael Walker
GOC 2nd Division
- 1995–1996 Major General Patrick Cordingley
- 1996–1999 Major General Dair Farrar-Hockley
- 1999–2002 Major General Robert Gordon
- 2002–2004 Major General Nick Parker
- 2004–2007 Major General Euan Loudon
- 2007–2009 Major General David McDowall
- May 2009-September 2009 Major General Andrew Mackay[44] o
- October 2009-January 2012 Major General David Shaw[45]
- January 2012-March 2012 Major General Nick Eeles[46]
Deputy Commanders
- 2006–2009 Brigadier Joseph Gerard d'Inverno
- 2009–2012 Brigadier Simon Bell
See also
- List of British divisions in World War I
- List of British divisions in World War II
- British Army Order of Battle (September 1939)
References
- Cole p. 36
- Chappell pps. 30, 46
- Chartrand, René (2001). "Bussaco 1810: Wellington defeats Napoleon's Marshals". Osprey. p. 75. ISBN 978-1841763101.
- napoleon-series.org
- Fletcher, Ian (2016). "Voices from the Peninsula: Eyewitness Accounts by Soldiers of Wellington's Army". Frontline Books. ISBN 978-1848328044.
- Oman, Sir Charles (1911), A History of the Peninsular War: Volume IV, December 1810 to December 1811, Appendix XVI, Greenhill Books (published 2004), ISBN 1-85367-618-7
- Glover, Gareth (2015). Waterloo: The Defeat of Napoleon's Imperial Guard: Henry Clinton, the 2nd Division and the end of a 200-year-old controversy. Frontline Books. p. xi. ISBN 978-1848327443.
- Moorsom, W S, (ed). "Historical Record of the Fifty-Second Regiment (Oxfordshire Light Infantry) from the year 1755 to the year 1858". 2nd edition. London: Richard Bentley, 1860 p267 (facsimile printed by The Naval & Military Press Ltd, East Sussex, England)
- Raugh, Harold E. (2004). The Victorians at War, 1815-1914: An Encyclopedia of British Military History. ABC-Clio. p. 186. ISBN 978-1576079256.
- Maurice, Colonel J. F. (1887). The Campaign of 1882 in Egypt. Naval and Military Press. p. 151.
- Thomas Pakenham, The Boer War, p. 284
- Creswicke, Louis (2019). "South Africa and the Transvaal War, Vol. 3 from the Battle of Colenso, 15 December 1899 to Lord Roberts's advance into the free state 12 February 1900". Alpha Editions. ISBN 978-9353708153.
- Rinaldi, p. 30
- Smith, Ted; Spagnoly, Tony (1998). Salient Points Two: Ypres Sector, 1914–18. Pen and Sword. ISBN 978-0850526103.
- "2nd Division". The Long, Long Trail. Retrieved 20 May 2020.
- Smart, p. 196
- "No. 34928". The London Gazette (Supplement). 23 August 1940. p. 5137.
- Joslen, p. 40
- Joslen, p. 240-241
- "'When you go home, tell them of us and say, for your tomorrow'". Times of India. 26 July 2014. Retrieved 20 May 2020.
- "No. 36833". The London Gazette (Supplement). 8 December 1944. p. 5673.
- Luto, James (2013). Fighting with the Fourteenth Army in Burma: Original War Summaries of the Battle Against Japan 1943–1945. Pen and Sword. p. 8. ISBN 978-1783030316.
- Palmer, Rob. "2 Infantry Division (1944–45)" (PDF). britishmilitaryhistory.co.uk. Archived from the original (PDF) on 23 April 2012. Retrieved 4 April 2012.
- Joslen, p. 39-49
- Joslen, p. 234
- Joslen, p. 237
- "St. David's Barracks". BAOR locations. Retrieved 28 October 2015.
- "Tunis Barracks". BAOR Locations. Retrieved 28 October 2015.
- Watson, Graham (2005). "The British Army in Germany: An Organisational History 1947–2004". Tiger Lily. p. 74.
- Black, Harvey. "The Cold War Years. A Hot War in reality. Part 6".
- Sanders, T J, "Reconnaissance in the 2020s: An open letter to the author of our article in the May 1989 issue, from Brigadier T J Sanders CBE" Tank: The Journal of the Royal Tank Regiment, p. 8, (February 1990, Vol.72, No.711)
- "2nd Division". Kohima Museum. Retrieved 20 May 2020.
- "TA Command Structure 1967–2000". Archived from the original on 8 June 2011. Retrieved 2 February 2013.
- "Shots fired at Scottish Army headquarters near Edinburgh". Daily Record. 22 June 2011. Retrieved 20 May 2020.
- Heyman, Charles (2001). The British Army: a pocket guide. Pen & Sword Books. ISBN 9780850527100.
- Dannatt, Richard (2016). Boots on the Ground: Britain and her Army since 1945. Profile Books. ISBN 978-1781253809.
- Tanner, James (2014). "The British Army since 2000" (PDF). Osprey. p. 13. ISBN 978-1782005933.
- "New Army's HQ Land Forces base is opened in Andover". BBC News. 9 September 2010. Retrieved 2 February 2013.
- First tranche of Army unit moves confirmed Defence News, 10 November 2011
- House of Commons Library: Standard Note: SN06038
- "Army Commands" (PDF). Retrieved 1 June 2020.
- The Catholic Who's Who by Francis Cowley Burnand, p.10
- "No. 27442". The London Gazette. 13 June 1902. p. 3900.
- Service appointments
- "New Head of the Army in Scotland". Archived from the original on 26 December 2009. Retrieved 24 October 2009.
- "Scotland's Army Head installed as Edinburgh Castle Governor". Ministry of Defence. 30 March 2012. Retrieved 8 April 2012.
Sources
- Cole, Howard (1973). Formation Badges of World War 2. Britain, Commonwealth and Empire. London: Arms and Armour Press.
- Chappel M. (1986) British Battle Insignia (1). 1914-18 Osprey Publishing ISBN 9780850457278
- Joslen, Lt-Col H.F. (2003) [1960]. Orders of Battle: Second World War, 1939–1945. Uckfield: Naval and Military Press. ISBN 978-1-84342-474-1.
- Rinaldi, Richard (2008). Order of Battle of the British Army 1914. General Data. ISBN 978-0982054116.
- Smart, Nick (2005). Biographical Dictionary of British Generals of the Second World War. Barnesley: Pen & Sword. ISBN 1844150496.
Further reading
- Latimer, Jon, (2004) Burma: The Forgotten War, London: John Murray, ISBN 0-7195-6576-6
- Pakenham, Thomas, (1979), The Boer War, New York: Random House.
- Wyrall, E. (2002) [1921]. The History of the Second Division, 1914–1918. I (N & M Press ed.). London: Thomas Nelson and Sons. OCLC 827208685. Retrieved 31 July 2014.
- Wyrall, E. (2002) [1921]. The History of the Second Division, 1914–1918. II (N & M Press ed.). London: Thomas Nelson and Sons. ISBN 1-84342-207-7. Retrieved 31 July 2014.
External links
- 2nd Division Website
- "2 Infantry Division". Orders of Battle.com.
- History
- British Unit History Site
- The British Army in the Great War: The 2nd Division
- British Military History: 2 Division (1930–38)
- British Military History: 2 Infantry Division (1939)
- British Military History: 2 Infantry Division (1940)
- British Military History: 2 Infantry Division (1944–45)