Battle of Goose Green

The Battle of Goose Green (28–29 May 1982) was an engagement between British and Argentine forces during the Falklands War. Goose Green and its neighbouring settlement Darwin on East Falkland lie on Choiseul Sound on the east side of the island's central isthmus. They are about 13 miles (21 km) south of the site where the major British amphibious landings took place in San Carlos Water (Operation Sutton) on the night of 21–22 May 1982.
Prelude
Times and nomenclature
British forces worked on UTC (Zulu) time and many reports and sources quote the timing of events based on Zulu time. All times stated in this page are reflected as local, Falkland Island time (UTC−3), the same as Argentine time. On the day of the battle, sunrise was at 08:39 and sunset at 16:58.[21] To avoid confusion between similar company designations, Argentine companies are referred to in the form "Company A" while British forces are referred to as "A Company."
Terrain and conditions


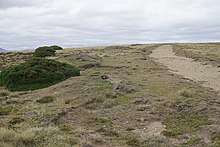
Goose Green and Darwin are on a narrow isthmus connecting Lafonia on the south to Wickham Heights, which together form the large eastern island of the Falkland Islands. The terrain is rolling and treeless and is covered with grass outcrops, areas of thick gorse and peat bogs making effective camouflage and concealment extremely difficult. From May to August, the southern hemisphere winter, the ground is sodden and frequently covered with brackish water, causing movement to be slow and exhausting, especially at night. The isthmus has two settlements, both on the eastern coastal edge with Darwin settlement to the north and Goose Green to the south. The islands have a cold, damp climate and light, drizzly rains occur two out of every three days with continuous winds. Periods of rain, snow, fog, and sun change rapidly, and sunshine is extremely limited, leaving few opportunities for troops to warm up and dry out.[22]
Reasons for the attack
The bulk of the Argentine forces were in positions around Port Stanley about 50 miles (80 km) to the east of San Carlos. The Argentine positions at Goose Green and Darwin were well defended by a force of combined units equipped with artillery, mortars, 35 mm cannon and machine guns.[23] British intelligence indicated that the Argentine force presented limited offensive capabilities and did not pose a major threat to the landing area at San Carlos. Consequently, Goose Green seemed to have no strategic military value for the British in their campaign to recapture the islands and initial plans for land operations had called for Goose Green to be isolated and bypassed.[24]
After the British landings at San Carlos on 21 May and while the bridgehead was being consolidated, no offensive ground operations had been conducted and activities were limited to digging fortified positions, patrolling and waiting;[25] during this time Argentine air attacks caused significant loss of and damage to British ships in the area around the landing grounds. These attacks, and the lack of movement of the landed forces out of the San Carlos area, led to a feeling among senior commanders and politicians in the UK that the momentum of the campaign was being lost.[26] As a result, British Joint Headquarters in the UK came under increasing pressure from the British government for an early ground offensive of political and propaganda value.[27] There were also fears that the United Nations Security Council would vote for a cease-fire, maintaining current positions. If the Darwin-Goose Green isthmus could be taken prior to such a decision, British forces would control access to the entire Lafonia and thus a significant portion of East Falkland.[28] On 25 May Brigadier Julian Thompson, ground forces commander, commanding 3 Commando Brigade, was again ordered to mount an attack on Argentine positions around Goose Green and Darwin.[26]
Argentinian defences
The defending Argentine forces, known as Task Force Mercedes, consisted of two companies of Lieutenant-Colonel Ítalo Piaggi's 12th Infantry Regiment (RI 12)—his third company (Company B) was still deployed on Mount Kent as "Combat Team Solari" and was only to re-join RI 12 after the fall of Goose Green airfield.[29] The task force, in 1982, also contained a company of the ranger-type 25th Infantry Regiment (25th Special Infantry Regiment or RI 25).[30] Air defence was provided by a battery of six 20 mm Rheinmetalls manned by air force personnel, and two radar-guided Oerlikon 35 mm anti-aircraft guns from the 601st Anti-Aircraft Battalion, that would be employed in a ground support role in the last stages of the fighting. There was also one battery of three OTO Melara Mod 56 105 mm pack howitzers from the 4th Airborne Artillery Regiment. Pucarás based at Stanley, armed with rockets and napalm, provided close air support.[31][32] Total forces under Piaggi's commanded numbered 1,083 men.[33]
Piaggi's orders required him to provide a reserve battle group (Task Force Mercedes) in support of other forces deployed to the west of Stanley; to occupy and defend the Darwin isthmus; and to defend Military Air Base Condor located at Goose Green. He assumed an all-round defence posture with Company A IR12 providing the key to his defence, they being deployed along a gorse hedge running across the Darwin isthmus from Darwin Hill to Boca House.[29] Piaggi deployed his Recce Platoon (under Lieutenant Carlos Marcelo Morales) as an advance screen forward of RI 12's A Company towards Coronation Ridge while RI 12's C Company were deployed south of Goose Green to cover the approaches from Lafonia. To replace his B Company left on Mount Kent, he created a composite company from headquarters and other staff and deployed them in Goose Green. RI 25's C (Ranger) Company (under Paratroop-trained First Lieutenant Carlos Daniel Esteban) provided a mobile reserve and were billeted at the school-house in Goose Green.[29] Elements were also deployed to Darwin settlement, Salinas Beach and Boca House and the air force security cadets together with the anti-aircraft elements were charged with protecting the airfield. Minefields had been laid in areas deemed tactically important (refer to map 2) to provide further defence against attack.[34]
On paper Piaggi had a full regiment, but it consisted of units from three separate regiments from two different brigades, none of whom had ever worked together. RI 12 consisted mostly of conscripts from the northern, sub-tropical province of Corrientes, while the RI 25 Company was considered an elite formation and had received commando training.[35]At the start of the battle, the Argentinian forces had about the same number of effective combatants as the British paratroopers.[36] Some elements were well-trained and displayed a high degree of morale and motivation (C Company 25th Regiment and A Battery 4th Airborne Artillery Group); with Lieutenant Ignacio Gorriti of the 12th Regiment's B Company remarking that "there was no need for speeches. From the beginning we knew how important the Malvinas were. It was a kind of love; we were going to defend something that was ours."[37][36] Other units were less well motivated, with the 12th Regiment chaplain, Santiago Mora writing:
The conscripts of 25th Infantry wanted to fight and cover themselves in glory. The conscripts of 12th Infantry Regiment fought because they were told to do so. This did not make them any less brave. On the whole, they remained admirably calm.[38]
Private Esteban Roberto Avalos fought in the Falklands as a sniper in the RI 12's B Company. In all, some fifty 12th Regiment conscripts had received Ranger-type training from Halcón 8 (Falcon 8) Army Commandos in 1981 before returning to their respective companies:
In my particular case, I ended up being a sharpshooter for which I had been preparing since the time we were out in the field, where I had the opportunity to shoot with a FAL. During the 45 days we spent there, we had to practice shooting three or four times a week and those moments were taken advantage of to learn the shooting positions and familiarize ourselves with the weapon.
The dealings with the superiors, in general, were good, although if somebody screwed up we all paid the price The most common punishments were taking us to the showers at night, forcing us to do push-ups or demand from us heaps of frog leaps and crawling. If someone took the wrong step, for example, it was normal to be pulled out of training and they would make you "dance" a little with push-ups on the thistles or on the mud.
Now, going back to the subject of instruction, I would say that it was generally satisfactory, at least as far as our group is concerned, since we had basic training in the use of explosives and we were even given some classes of self-defense.[39]
The Argentine positions were well-selected, and officers were well-briefed.[36] In the weeks before the battle British air strikes, naval bombardments, poor logistic support and inclement conditions had contributed to the reduction of overall Argentine morale,[40] but it remained strong among the 4th Airborne Artillery Regiment gunners present and officers, NCOs and Ranger-trained conscripts of the 12th and 25th Regiments.[41]
British assault force
Thompson ordered 2nd Battalion of the Parachute Regiment (2 Para) to prepare for and execute the operation as they were the unit closest to Goose Green in the San Carlos defensive perimeter.[42] He ordered Lieutenant-Colonel Herbert 'H' Jones, officer commanding 2 Para, to "carry out a raid on Goose Green isthmus and capture the settlements before withdrawing in a reserve for the main thrust to the north". The "capture" component appealed more to Jones than the "raid" component, although Thompson later acknowledged that he had assigned insufficient forces to rapidly execute the "capture" part of the orders.[43]
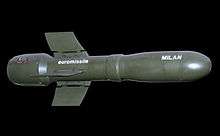
Two Para consisted of three rifle companies, one patrol company, one support company and an HQ company. Thompson had assigned three 105 mm artillery pieces with 960 shells from 29 Commando Regiment, Royal Artillery; one MILAN anti-tank missile platoon and Scout helicopters as support elements. In addition, close air support was available from three Royal Air Force Harriers, and naval gunfire support was to be provided by HMS Arrow in the hours of darkness.[44]
SAS reconnaissance had reported that the Darwin–Goose Green area was occupied by one Argentine company. Brigade intelligence reported that enemy forces consisted of three infantry companies (two from IR12 and one from IR25), one platoon from IR8 plus a possible amphibious platoon together with artillery and helicopter support. Jones was not too perturbed by the conflicting intelligence reports and, incorrectly, tended to believe the SAS reports, on the assumption that they were actually "on the spot" and were able to provide more accurate information than the brigade intelligence staff.[45] Based on this intelligence and the orders from Thompson, Jones planned the operation to be conducted in six phases, as a complicated night-day, silent-noisy attack. C Company was to secure the start line and then A Company was to launch the attack from the start line on the left (Darwin) side of the isthmus. B Company would launch their attack from the start line directly after A Company had initiated contact and would advance on the right (Boca House) side of the isthmus. Once A and B companies had secured their initial objectives, D Company would then advance from the start line between A and B companies and were to "go firm" on having exploited their objective. This would be followed by C Company, who were required to pass through D Company and neutralise any Argentine reserves. C Company would then advance again and clear the Goose Green airfield after which the settlements of Darwin and Goose Green would be secured by A and D companies respectively.[46]
As most of the helicopter airlift capability had been lost with the sinking of Atlantic Conveyor, 2 Para were required to march the 13 miles (21 km) from San Carlos to the forming-up place at Camilla Creek House.[47] C Company and the commando engineers moved out from there at 22:00 on 27 May to clear the route to the start line for the other companies. A fire base (consisting of air and naval fire controllers, mortars and snipers) was established by Support Company west of Camilla Creek, and they were in position by 02:00 on the morning of 28 May.[48] The three guns from 8 Battery, their crew and ammunition had been flown in to Camilla Creek House by 20 Sea King helicopter sorties after last light on the evening of 27 May. The attack, to be initiated by A Company, was scheduled to start at 03:00, but because of delays in registering the support fire from HMS Arrow, only commenced at 03:35.[49]
Initial contact
On 4 May three Royal Navy Sea Harriers operating from HMS Hermes attacked the airfield and installations at Goose Green. During the operation, a Sea Harrier was shot down by Argentine 35mm anti-aircraft fire, killing its pilot.[50]
As part of the diversionary raids to cover the British landings in the San Carlos area on 21 May, which involved naval shelling and air attacks, 'D' Squadron of the SAS from their assembly point on Mount Usborne[51]put in a major raid to simulate a battalion-sized attack on Company A (under First Lieutenant Jorge Antonio Manresa), 12th Regiment that at the time was dug in on Darwin Ridge.[52]
On 22 May, four RAF Harriers were launched from Hermes armed with cluster bombs, their intended targets being the fuel dumps and Pucaras at Goose Green. The formation met intensive anti—aircraft fire during their attack.[53]Captain Pablo Santiago Llanos of 601 Commando Company was present during the strike and observed:
I can assure you, that it was the place I saw the best of people, especially my junior rank colleagues, when it came to fighting spirit. Everyone in Goose Green would leave the houses, they would position themselves behind whatever cover there was, and would fire against the planes. .[54]
On 26 May, Manresa's A Company after a long march, were ready to mount a retaliatory raid on Mount Usborne, but reaching the summit were surprised to find that the SAS had already vacated the feature.[55]The next day, Subteniente Ernesto Orlando Peluffo on Darwin Ridge, spotted with his binoculars and his RI 12 platoon repelled with long-range machine-gun fire a British patrol in the hours prior to the final attack. Throughout 27 May, Royal Air Force Harriers were active over Goose Green. One of them, responding to a call for help from Captain Paul Farrar's C (Patrols) Company, was lost to 35mm fire while attacking Darwin Ridge.[56][57][58] The Harrier attacks, the sighting of the forward British paratroopers as well as the BBC announcing that the 2nd Battalion of the Parachute Regiment were poised and ready to assault Darwin and Goose Green the day before the assault alerted the Argentine garrison to the impending attack.[59]
Battle
Darwin Parks

At 03:35 HMS Arrow opened fire (she was to fire a total of 22 star shell and 135 rounds of 4.5" HE shells in a 90-minute bombardment), signalling the start of the attack.[60] In the ensuing night battle about twelve Argentines were killed.[30] Under heavy fire, the platoons of Sub-Lieutenants Marcelo Martin Bracco and Alejandro Garra withdrew in the initial clashes, reporting the loss of fifty percent of their men, captured, killed or missing. The platoon under Sub-Lieutenant Gustavo Adolfo Malacalza fought a delaying action against the British paratroopers, blooding themselves on Burntside Hill before taking up combat positions again on Darwin Ridge.[30]
Major Philip Neame's D Company was temporarily halted by the Coronation Ridge position. Two of his men, 24-year-old Lance-Corporal Gary Bingley and 19-year-old Private Barry Grayling darted out from under cover to charge the enemy machine gun nest that was holding up the advance. Both were hit 10 metres (11 yd) from the machine gun, but shot two of the crew before collapsing. Bingley "got hit in the head and I got hit in the hip," Grayling recalled in an interview published in 2007. "Unfortunately, he didn't make it."[61] Bingley was posthumously awarded the Military Medal and Grayling was decorated with the Queen's Gallantry Medal. With the enemy machine gun out of action, the paras were able to clear the Argentine platoon position under Lieutenant Horacio Muñoz Cabrera, but at the cost of three Paras killed.[30]
Then 2 Para moved on to the south via Darwin Parks. The Argentines made a determined stand along Darwin Ridge. As A and B companies moved south from Coronation Ridge they were raked by fire from a couple of concealed Argentine FN MAG machine guns. An Argentine senior NCO, Company Sergeant-Major Juan Carlos Coelho, is credited with rallying the IR12's A Company remnants falling back from Darwin Parks, and was later awarded the Medal of Valour in Combat. He was seriously wounded later in the day.
The first British assault was broken up by fire from Sub-Lieutenant Ernesto Orlando Peluffo's IR12 platoon after the platoon sergeant, Buenaventura Jumilla, warned that the British were approaching. Corporal David Abols later said that an Argentine sniper was mainly responsible for holding up A Company and with shooting several paras in the morning fighting.[lower-alpha 1] Nevertheless, the paras called on the Argentines to surrender. The death of Lieutenant-Colonel Jones was attributed to a sniper identified as Corporal Osvaldo Faustino Olmos, who was interviewed by the British newspaper Daily Express in 1996.[62] Olmos, of RI 25, had refused to leave his foxhole and his section fired at Jones and the five paratroopers who accompanied him as he moved forward.[lower-alpha 2]
At this juncture of the battle, 2nd Para's advance had stalled. 'A' Company was in the gorse line at the bottom of Darwin Hill, and against the entrenched Argentines who were looking down the hill at them. As it was now daylight, Jones led an unsuccessful charge up a small gully resulting in the death of the adjutant, Captain Wood, A Company's second-in-command Captain Dent, and Corporal Hardman.[63]
Shortly thereafter Jones was seen to run west along the base of Darwin Ridge to a small re-entrant, followed by his bodyguard. He checked his Sterling submachine gun, then ran up the hill towards an Argentine trench. He was seen to be hit once, then fell, got up and was hit again from the side. He fell metres short of the trench, hit in the back and the groin, and died within minutes.[63][lower-alpha 3]
As Jones lay dying, his men radioed for urgent casualty evacuation. However, the British Scout helicopter sent to evacuate Jones was shot down by an Argentine FMA IA 58 Pucara ground attack aircraft. The pilot, Lieutenant Richard Nunn RM was killed and posthumously received the DFC, and the aircrewman, Sergeant Belcher RM was badly wounded in both legs.[63] Corporal José Luis Ríos, of the 12th Regiment's Reconnaissance Platoon who in the opinion of historian Hugh Bicheno had killed Jones,[64] was later fatally wounded manning a machine-gun in his trench by Abols, firing a 66 mm rocket.[lower-alpha 4]
Jones was posthumously awarded the Victoria Cross.
Darwin Hill
By then it was 10:30 and Major Dair Farrar-Hockley's A Company made a third attempt, but this petered out. Eventually the British company, hampered by the morning fog as they advanced up the slope of Darwin Ridge, were driven back to the gulley by the fire of 1st Platoon of RI 25's C Company, under the command of 2nd Lieutenant Roberto Estévez. During this action Estévez directed Argentine 105 mm artillery and 120 mm mortar fire that posthumously earned him the Argentine Nation to the Heroic Valour in Combat Cross (CHVC). In the meantime, 2 Para's mortar crews fired 1,000 rounds to keep the enemy at bay, and helped stop the Argentines getting a proper aim at the paras.[lower-alpha 5][65]
It was almost noon before the British advance resumed. A Company soon cleared the eastern end of the Argentine position and opened the way forward. There had been two battles going on in the Darwin hillocks – one around Darwin Hill (Black strongpoint) looking down on Darwin Bay, and an equally fierce one in front of Boca Hill (White strongpoint), also known as Boca House Ruins. Sub-Lieutenant Guillermo Ricardo Aliaga's 3rd Platoon of RI 8's C Company held Boca Hill. The position of Boca Hill was reported taken at 13.47 local time[66] after heavy fighting by Major John Crosland's B Company with support from the MILAN anti-tank platoon. Sub-lieutenants Aliaga and Peluffo were gravely wounded in the fighting. Crosland was the most experienced British officer and, as the events of the day unfolded, it was later said that Crosland's cool and calm leadership of his soldiers on the battlefield turned the Boca House section of the front line.
About the time of the final attack on the Boca Hill position, A Company overcame the Argentine defenders on Darwin Hill, finally reporting taking the Black strongpoint at 13.13 local time[67] with the defenders having resisted for nearly six hours,[lower-alpha 6][68]with many Argentine and British casualties. Majors Farrar-Hockley and Crosland each won the Military Cross for their efforts. Corporal David Abols was awarded a Distinguished Conduct Medal for his daring charges which turned the Darwin Hill battle.
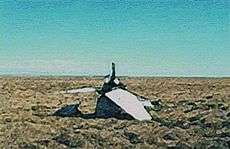
An FMA Pucara, returning from the battle, crashed about 10.00 AM in high ground between Goose Green and Stanley. Lt Gimenez was killed. The cause is apparently not known, either from battle damage or flight accident. It was the 58th Argentine aircraft lost in the war.[69]
Attack on the airfield

After the victory on Darwin Ridge, C and D Companies began to make their way to the small airfield as well as Darwin School, which was east of the airfield, while B Company made their way south of Goose Green Settlement. A Company remained on Darwin Hill. C Company took heavy losses when they became the target of intense direct fire from 35 mm anti-aircraft guns, causing 20 per cent casualties.[70] Private Mark Holman-Smith, a signaller in the company headquarters, was killed by the anti-aircraft guns while trying to recover a heavy machine gun from wounded Private Steve Russell.[71]
Argentine Air Force anti-aircraft gunners under Lieutenant Darío Del Valle Valazza, and the IR12 platoon under Sub Lieutenant Carlos Oslvaldo Aldao, attempted to halt the renewed advance that commenced at 2.25 pm from Boca Hill,[72] but were forced to abandon their positions, including the five remaining 20mm Rheinmetall guns at Cóndor airfield, reporting the loss of two guns and Elta radar to Milan missiles or mortar fire, with three defenders from Grupo 1 de Artillería Antiaérea de la Fuerza Aérea Argentina (G1AA) killed (Privates Mario Ramón Luna, Luis Guillermo Sevilla and Héctor Walter Aguirre from G1AA[73] and Privates Roque Evaristo Sánchez and Avelino Néstor Oscar Pegoraro from Aldao's platoon) and several wounded, including Lieutenant Valazza. A large part of the IR12 platoon was overrun and forced to surrender, but Aldao along with a corporal managed to escape[72][74] in the confusion of the Argentine air strikes that materialized later that afternoon.
Lieutenant James Barry's No. 12 Platoon, D company, saw some fierce action at the airfield. They were ambushed[30] by another platoon of the 25th Regiment but one of his men shot dead two of the attackers, and then reported the events to Major Neame.[lower-alpha 7] The platoon sergeant charged the attacking enemy with his machine gun, killing four of them. Private Graham Carter won the Military Medal by rallying No. 12 Platoon and leading it forward at bayonet point to take the airfield.[30]
The IR25 platoon defending the airfield fled into the Darwin-Goose Green track and was able to escape. Sergeant Sergio Ismael Garcia of IR25 single-handedly covered the withdrawal of his platoon during the British counterattack. He was posthumously awarded the Argentine Nation to the Valour in Combat Medal. Under orders from Major Carlos Alberto Frontera (second in command of IR12), Sub Lieutenant César Álvarez Berro's IR 12 platoon took up new positions and covered the retreat of the Goose Green Airbase-Darwin Schoolhouse defenders.[75] Four Paras of D Company and approximately a dozen Argentines were killed in these engagements. Among the British dead were 29-year-old Lieutenant Barry and two NCOs, Lance-Corporal Smith and Corporal Sullivan, who were killed after Barry's attempt to convince Sub Lieutenant Juan José Gómez Centurión to surrender had been rebuffed.[30][lower-alpha 8][76][77] C Company had not lost a single man in the Darwin School fighting, but Private Steve Dixon, from D Company, died when a splinter from a 35 mm anti-aircraft shell struck him in the chest.[78] The Argentine 35mm anti-aircraft guns under the command of Second Lieutenant Claudio Oscar Braghini reduced the schoolhouse to rubble after sergeants Mario Abel Tarditti and Roberto Amado Fernandez reported to him that sniper fire was coming from there.[2][3]
At around this time three Harriers made an attack on the Argentine 35 mm gun positions; the army radar-guided guns were unable to respond effectively because a piece of mortar shrapnel had earlier struck the generator to the guns and fire-control radar. This greatly lifted morale among the British paras and helped convince Piaggi of the futility of continued resistance. Although it was not known at the time, the Harriers came close to being shot down in their bomb run after being misidentified as enemy aircraft by Lieutenant-Commander Nigel Ward and Flight Lieutenant Ian Mortimer of 801 Squadron.[lower-alpha 9]
Meanwhile, the RI 12 platooon under Sub-Lieutenant Orlando Lucero dug in on Goose Green's outskirts continued to resist and supporting Air Force Pucara and Navy Aeromacchi aircraft struck the forward British companies; they did not have much effect, but suffered two losses: at 5:00, a Macchi 339A (CANA 1 squadron) was shot down by a Blowpipe missile from the Royal Marine Air defence troop, killing Sub-Lieutenant Daniel Miguel.
Just about 10 minutes later, another Pucara was shot down by small arms fire from 2 Para, drenching several paratoopers with fuel and napalm, which fortunately did not ignite.[79] Lieutenant Miguel Cruzado survived and was captured by British forces on the ground.[69]
Situation at last light on 28 May
By last light, the situation for 2 Para was critical. A Company was still on Darwin Hill north of the gorse hedge, B Company had penetrated much further south and had swung in a wide arc from the western shore of the isthmus eastwards towards Goose Green. They were isolated and under fire from an Argentinian platoon and unable to receive mutual support from the other companies.[80] To worsen their predicament Argentine helicopters—a Puma, a Chinook and six Hueys—landed southwest of their position just after last light, bringing in the remaining Company B of IR12 (Combat Team Solari) from Mount Kent.[81] B company managed to bring in artillery fire on these new reinforcements, forcing them to disperse towards the Goose Green settlement, while some re-embarked and left with the departing helicopters.[82] For C Company, the attack had also fizzled out after the skirmish at the school-house with the company commander injured, no radio contact and the platoons scattered with up to 1,200 m between them. The C Company second-in-command was also unaccounted for.[83] D Company had regrouped just before last light, and they were deployed to the west of the dairy; exhausted, hungry, low on ammunition and without water.[84] Food was redistributed to share one ration-pack between two men for A and C Companies, but B and D Companies could not be reached. At this time a British helicopter casualty evacuation flight took place, successfully extracting C Company casualties on the forward slope of Darwin Hill under fire from Argentine positions.[85]
To Keeble, the situation looked precarious: the settlements had been surrounded but not captured, and his companies were exhausted, cold and low on water, ammunition and food. His concern was that the Company B reinforcements dropped by helicopter would either be used in an early morning counter-attack, or used to stiffen the defences around Goose Green. He had seen the C Company assault stopped in its tracks by the antiaircraft fire from Goose Green, and had seen the Harrier strikes of earlier that afternoon missing their intended targets. In an order group with the A and C Company commanders, he indicated his preference for calling for an Argentine surrender rather than facing an ongoing battle the following morning. His alternative plan, if the Argentines did not surrender, was to "flatten Goose Green" with all available fire-power and then launch an assault with all forces possible, including reinforcements he had requested from Thompson. On Thompson's orders, J Company of 42 Commando, Royal Marines, the remaining guns of 8 Battery, and additional mortars were helicoptered in to provide the necessary support.[86]
Surrender
Once Thompson and 3 Brigade had agreed to the approach, a message was relayed by CB radio from San Carlos to Mr. Eric Goss, the farm manager in Goose Green – who in turn delivered it to Piaggi. The call explained the details of a planned delegation who would go forward from the British lines to the Argentine positions in Goose Green bearing a message. Piaggi agreed to receive the delegation.[87] Soon after midnight, two Argentine Air Force warrant officer prisoners of war were sent to meet with Piaggi and to hand over the proposed terms of surrender.[lower-alpha 10] On receiving the terms, Piaggi concluded: "The battle had turned into a sniping contest. They could sit well out of range of our soldiers' fire and, if they wanted to, raze the settlement. I knew that there was no longer any chance of reinforcements from 6th [Compañía 'Piribebuy'] Regiment's B Company and so I suggested to Wing Commander [Vice Commodore] Wilson Pedrozo that he talk to the British. He agreed reluctantly." Taking advantage of the local ceasefire, Second Lieutenant Juan Gómez Centurión at the head of two Air Force stretcher-bearers, Privates David Alejandro Díaz and Reynaldo Dardo Romacho and an accompanying Air Force medical officer, Lieutenant Carlos Beranek, find and rescue Corporal Juan Fernández who had left behind badly wounded behind British lines.[88] The next morning, agreement for an unconditional surrender was reached and Pedrozo held a short parade and those on parade then laid down their weapons. After burning the regimental flag, Piaggi led the troops and officers, carrying their personal belongings, into captivity.[89]
Aftermath
Prisoners and casualties

Between 45[8][90] and 55 Argentines were killed[11] (32 from RI 12, 13 from Company C RI 25, five killed in the Platoon from RI R8, 4 Air Force staff and one Navy servicemen)[10] and about 86 wounded.[11]
The claim in various British books that the 8th Regiment lost five killed defending Boca House is disputed, with other sources claiming that Corporal Juan Waudrik (supposedly killed at Boca House) was mortally wounded in late May after the tractor he was riding detonated a mine at Fox Bay,[91] and that Privates Simón Oscar Antieco, Jorge Daniel Ludueña, Sergio Fabián Nosikoski and Eduardo Sosa, the four conscripts reportedly killed fighting alongside Waudrik, were killed in the same locality on West Falkland during a naval bombardment on 9 May. In all, the 8IR lost 5 killed during the Falklands War.
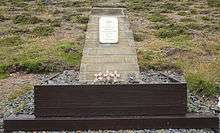
The remainder of the Argentine force were taken prisoner. Argentine dead were buried in a cemetery to the north of Darwin, and 140[92][93] wounded were evacuated to hospital ships via the medical post in San Carlos. Prisoners were used to clear the battlefield; in an incident involving the moving of artillery ammunition, the RI 12 platoon under Subteniente Leonardo Durán were involved in a huge explosion that caused 5 killed and/or missing and 10 seriously wounded.[17][94]After clearing the area and with military chaplain Mora and Sub-Lieutenants Bracco and Gómez Centurión assisting with the burying of the dead, the prisoners were marched to and interned in San Carlos.[95] The British lost 18 killed (16 Paras, one Royal Marine pilot and one commando sapper)[17] and 64 wounded. The seriously wounded were evacuated to the hospital ship Uganda.[96]
Commanders
Lieutenant-Colonel Ítalo Ángel Piaggi surrendered his forces in Goose Green on the Argentinian National Army Day (29 May). After the war he was forced to resign from the army, and faced ongoing trials questioning his competence at Goose Green. In 1986 he wrote a book titled Ganso Verde, in which he strongly defended his decisions during the war and criticised the lack of logistical support from Stanley. In his book he said that Task Force Mercedes had plenty of 7.62mm rifle ammunition left, but had run out of 81mm mortar rounds, and there were only 394 shells left for the 105mm artillery guns.[4] On 24 February 1992, after a long fight in both civil and military courts, Piaggi had his retired military rank and pay reinstated as a full colonel.[97] He died in July 2012.[98]
Lieutenant-Colonel Herbert 'H' Jones was buried at Ajax Bay on 30 May; after the war his body was exhumed and transferred to the British cemetery in San Carlos.[99] He was posthumously awarded the Victoria Cross.[100]
Major Chris Keeble, who took over command of 2 Para when Jones was killed, was awarded the DSO for his actions at Goose Green.[101] Keeble's leadership at Goose Green was one of the key factors which led to the British victory, in that his flexible style of command and the autonomy he afforded to his company commanders was much more successful than the rigid control and adherence to plan exercised by Jones.[102] Despite sentiment among the soldiers of 2 Para for him to remain in command, he was superseded by Lieutenant-Colonel David Robert Chaundler, who was flown in from the UK to take command of the battalion.[103]
Order of battle
All order of battle data from Fitz-Gibbon (2002), unless otherwise stated[44]
| Argentine Forces (Task Force Mercedes) Lieutenant Colonel I. Piaggi | British Forces (2 Para Group) Lieutenant Colonel H. Jones |
| The following forces were present at the start of fighting at circa 06:35 on 28 May 1982 | |
| Infantry | |
| HQ Company (-) Infantry Regiment 12 (Lt. Col. Piaggi) | HQ Company (-) 2 Para (Lt. Col H. Jones) |
| Company A, Infantry Regiment 12 (1st Lt. Manresa) | A Company, 2 Para (Maj. D. Farrar-Hockley) |
| Company C, Infantry Regiment 12 (1st Lt. Fernández) | B Company, 2 Para (Maj. J. Crossland) |
| Company C, Infantry Regiment 25 (1st Lt. Esteban) | C (Patrol) Company, 2 Para [two platoons] (Maj. Roger Jenner) |
| 3 Platoon, Company C, Infantry Regiment 8[104] | D Company, 2 Para (Maj. P. Neame) |
| Support Company, 2 Para (Maj. Hugh Jenner)[105] | |
| Recce Platoon (-) Infantry Regiment 12 | NGFO 4, 148 Commando FO Bty[104] |
| 202 air force personnel from Security Coy, Military Aviation School; Pucará Sqn, Malvinas; 1st Naval Attack Sqn [MB-399] and also including 20m AA crews[104] | |
| Engineers | |
| One section, Engineer Company 9 | Recce Troop, 59 Independent Commando Squadron, Royal Engineers |
| Artillery and support fire | |
| 3× 105mm pack howitzer: Troop from Battery A, Airborne Artillery Regiment 4[104] | 3x 105mm light guns from 8 Commando Battery[104] |
| 1× 120mm Mortar | 2x 81mm Mortars |
| NGS from 1x Type 21 frigate (HMS Arrow: dark hours only) | |
| Anti-tank | |
| 1× 105mm recoilless rifle | 3x Milan ATGM detachments from 43 Battery, 32 Guided Weapons Regiment[104] |
| Air defence | |
| 2× 35mm radar controlled AA: 3 Sec, Battery B, GADA 601[104] | 6x Blowpipe detachments: Air Defence Troop, Royal Marines |
| 6× 20mm AA | |
| Close air support | |
| 3× Pucará operated from Stanley airfield[106] | 3x Harrier GR3s from HMS Hermes[107] |
| Reinforcements received during 28 May 1982 | |
| 106 personnel: Company B, Infantry Regiment 12 | |
| Reinforcements received after fighting ceased | |
| J Company, 42 Commando, Royal Marines | |
| Remaining 3× 105mm light guns from 8 Commando Battery | |
| Mortar locating radar | |
| 2× 120mm Mortars | 6x 81mm Mortars |
| Reserves available as of 29 May | |
| None | 1× Type 21 frigate for NGS |
| Harrier close air support | |


.JPG)
BBC incident
During the planning of the assault of both Darwin and Goose Green, the Battalion Headquarters were listening in to the BBC World Service. The newsreader announced that the 2nd Battalion of the Parachute Regiment were poised and ready to assault Darwin and Goose Green. This caused great trepidation among the commanding officers of the battalion, with fears that the operation was compromised. Lieutenant Colonel Jones became furious with the level of incompetence and told BBC representative Robert Fox he was going to sue the BBC, Whitehall and the War Cabinet.[108]
Brutal field punishments
In the years after the battle, Argentine army officers and NCOs were accused of handing out brutal field punishment to their troops at Goose Green (and other locations during the war).[109] In 2009, Argentine authorities in Comodoro Rivadavia ratified a decision made by authorities in Río Grande, Tierra del Fuego. announcing their intention to charge 70 officers and NCOs with inhumane treatment of conscript soldiers during the war.[110] There were claims, however, that false testimonies were used as evidence in accusing the Argentine officers and NCOs of abandonment, and Pablo Vassel who has made the denouncements, had to step down from his post as president of Human Rights Department of Corrientes province.[111] Other veterans are sceptical about the veracity of the accusations with Colonel José Martiniano Duarte, an ex-601 Commando Company officer and decorated veteran of the Falklands War, saying that it has become fashionable for ex-conscripts to now accuse their superiors of abandonment.[112] Since the 2009 announcement was made, no one in the military or among the retired officers and NCOs has been charged, causing Vassel in April 2014 to comment:
For over two years we've been waiting for a final say on behalf of the courts ... There are some types of crimes that no state should allow to go unpunished, no matter how much time has passed, such as the crimes of the dictatorship. Last year Germany sentenced a 98-year-old corporal for his role in the concentration camps in one of the Eastern European countries occupied by Nazi Germany. It didn't take into account his age or rank.[113]
Meeting between former enemy commanders
In 2016, retired Lieutenant-Colonel Carlos Alberto Frontera traveled to Britain to meet his opposing number at Goose Green. On 23 May, Frontera met with retired Lieutenant-Colonel Chris Keeble, then lecturing at Oxford University. Both made a speech in honour of the fallen on both sides. During dinner that evening and accompanied by their wives, Keeble surprised all those present when he presented Frontera a token of friendship; the battle flag mast of the 12th Regiment his paratroopers had been able to recover from the seabed after the Argentine surrender.[114]
See also
Notes, references and sources
- Notes
- ↑ "This sniper fire was responsible for the deaths of at least seven paratroopers, according to Abols – 'all head shots. That is the main reason A Company were stuck'. He says the sniper was firing from about 500 metres behind the Darwin Hill position." (Not Mentioned in Despatches: The History and Mythology of the Battle of Goose Green (James Clarke & Co., 2006.) p. 79.)
- ↑ "Without telling anyone or looking back, he ran up the gully that Corporal Adams had attacked when A Company was first fired upon, past the seriously wounded Private Tuffen. Sergeant Barry Norman, his close escort, was the first to move, followed by Lance Corporal Beresford, who was part of his escort and had been Jones's driver, Major Rice and two signallers. Jones advanced up a small re-entrant toward a trench, which Corporal Osvaldo Olmos, from Estevez's platoon, later claimed was held by his group." Van Der Bijl, Victory in the Falklands, pp. 108–109
- ↑ According to Dan Snow and Peter Snow, "The Argentine corporal in that trench, Osvaldo Olmos, remembers seeing Jones charge past him alone, leaving his followers in the gully below. Olmos said he was astonished at Jones's reckless bravery: his shots, fired from behind, may have been the ones that brought Jones down." (20th Century Battlefields (Random House, 2012) p. 282.)
- ↑ According to Corporal John Geddes, "Sergeant Norman couldn't do anything under such devastating fire, and lay there in cover unable to help his wounded colonel for over quarter of an hour. But then came a turning point – thanks to an heroic Tom named Corporal Dave 'Pig' Abols. Pig had chipped away to the top of the ridge until he could see the machine gun that had killed H. It was still knocking out bursts at anything that moved. Lying there with less cover than a stripper, Pig bided his time and then, in an inspiring act of courage, he jumped to his feet and stood in the lead storm as if he was bullet-proof. Lifting a 66 rocket to his shoulder, he lined it up on the bunker, breathed out and squeezed down the rubber trigger. Whoomph! The blistering white ball of an explosion enveloped the command bunker for the trenches along the ridge, breaking the linchpin in the overlapping arcs of Argy fire and shattering their resolve. The effect was electric. Soon white flags started appearing all along the Argy line. But it was too late for H." Was Colonel 'H' a mad fool? Part 2
- ↑ "Nevertheless, the section's two mortar crews had fired over 1,000 bombs in the two hours of the A Company action, the mortars themselves sinking further and further into the soft peat until eventually only their muzzles were visible." Harclerode, p. 329.
- ↑ "After nearly six hours, the battle for Darwin Hill was over, but not without grievous loss: the commanding officer, the Adjutant, A Company Second-in-Command and nine non-commissioned officers and soldiers were killed and several wounded." No Picnic: 3 Commando Brigade in the South Atlantic, 1982, Julian Thompson, pp. 79–80, Casemate Publishers, 1992
- ↑ According to historian Mark Adkin, both Lance-Corporal Nigel Smith and Corporal Paul Sullivan were killed fighting: "Lance Corporal Smith aimed his 66mm rocket, but as he did so he was shot at the moment of firing. The rocket exploded in a flash of flame on his back; he died instantly. In the general confusion Corporal Sullivan was also hit and killed." Mark Adkin, p. 326, Goose Green: A Battle Is Fought to Be Won, Leo Cooper 1992
- ↑ "The newspapers inevitably made much of this scrap, however both sides agreed that this was a tragic misunderstanding. The Argentines later claimed that when Second Lieutenant Centurion was offered terms by Barry, he replied, 'Son of a bitch! You have got two minutes to return to your lines before I open fire. Get out!'" Van Der Bijl, Victory in the Falklands, p. 113
- ↑ "I had convinced myself that the three were enemy aircraft. But I also knew that Morts, more than anybody, should be able to recognize a GR 3 even from this height and range. I called the control ship, HMS Minerva. 'Do you have any friendlies in the area at low level?' If there were any, Minerva would know about it. 'Negative. No friendlies in the Sound.' Just at that moment of distraction, I lost sight of the three swept-wing shapes below. They disappeared into the multi-coloured background of the water. 'I've lost the fucking things, Morts. do you hold them?' 'Negative. But I'm sure they were GR 3s.' I was mad as a hatter, and wasn't thinking straight. I was tired, and 'missing' the enemy jets seemed to drain me of all energy. If I hadn't been so tired I might have considered the line 'better safe than sorry', but I was in no mood for that when I landed on board. The debrief was short and to the point: 'GR 3s, my arse!'" Sea Harrier Over the Falklands, Nigel Ward, p. 227, Pen and Sword, 1993
- ↑ The terms of surrender read:
MILITARY OPTIONS We have sent a PW to you under a white flag of truce to convey the following military options:
- That you unconditionally surrender your force to us by leaving the township, forming up in a military manner, removing your helmets and laying down your weapons. You will give prior notice of this intention by returning the PW under a white flag with him briefed as to the formalities by no later than 0830 hrs local time.
- You refuse in the first case to surrender and take the inevitable consequences. You will give prior notice of this intention by returning the PW without his flag (although his neutrality will be respected) no later than 0830 hrs local time.
- In the event and in accordance with the terms and conditions of the Geneva Convention and Laws of War you will be held responsible for the fate of any civilians in Darwin and Goose Green and we in accordance with these terms do give notice of our intention to bombard Darwin and Goose Green.
- References
- ↑ "Goose Green – The first major land victory – 27/28 May 1982". Royal Air Force. RAF. Retrieved 15 February 2015.
- 1 2 "Observé por el visor y confirmé la presencia de los ingleses. Apunté a la base de la estructura de dos pisos y abrí el fuego. Pedazos completos de ella desaparecieron al hacer impacto los proyectiles y se incendió luego." Malvinas: Relatos de Soldados, Martin Antonio Balza, p. 149, Circulo Militar, 1983
- 1 2 La artillería antiaérea terminó haciendo fuego de superficie
- 1 2 Italo Angel Piaggi (2001) GANSO VERDE
- ↑ Fitz-Gibbon, Spencer (2002). Not Mentioned in Despatches: the History and Mythology of the Battle of Goose Green (2nd ed.). Cambridge: The Lutterworth Press. pp. 4–5. ISBN 9780718830168.
- ↑ Adkin, Mark (2003). Goose Green – A battle is Fought to be Won. London: Cassell. p. 23. ISBN 0304354961.
- ↑ "The Argentines lost 45 men killed, 90 wounded and 961 captured." The Falklands 1982: Ground Operations in the South Atlantick, Gregory Fremont-Barnes, p. 43, Osprey Publishing, 2012
- 1 2 "Their fatalities total 45 men ..." Wars of the Americas: A Chronology of Armed Conflict in the Western Hemisphere, 1492 to the Present, Volume 2, David Marley, p. 1073, ABC-CLIO, 2008
- ↑ "According to Eric Goss — the local farm-manager who buried the Argentine dead — only 47 enemy corpses were interred." The Listener, Volume 109, p. 20. British Broadcasting Corporation, 1983
- 1 2 Adkin (2003), pp. 363
- 1 2 3 Boyce (2005), pp. 131
- ↑ "El total de heridos fue 98 (4 oficiales, 22 suboficiales y 72 soldados)." Malvinas: otras historias, Rubén Oscar Palazzi, p. 202, Claridad, 2006
- ↑ "Antonio Jukic falleció junto con siete miembros del personal de atención y otros 14 resultaron heridos." Compilación Malvinas: Actuación de las fuerzas armadas y civiles que participaron en el conflicto, Joaquín A. Boccazzi, p. 352, Ediciones Gráfica Sur, 2004
- ↑ LA BATALLA DE PRADO DEL GANSO
- ↑ "We had previously arranged for a message to be sent to Argentina requesting the Bahia Paraiso to rendezvous with our hospital ship SS Uganda in an area which we have set aside for Hospital Ships some 30 miles north of Falklands Sound. 140 wounded Argentine servicemen — who are receiving medical attention on board the UGANDA — will be transferred to the Argentine ship for an early return home." The Falklands War: The Official History, p.44, Latin American Newsletters, 1983
- ↑ "A total of 961 prisoners were accounted for including 81 held at Camilla Creek House." The Official History of the Falklands Campaign: War and Diplomacy, Volume 2, Lawrence Freedman, p. 493, Psychology Press, 2005
- 1 2 3 Van Der Bijl (1999) pp. 140
- ↑ An Airborne Tribute
- ↑ Dale, Iain (2002). Memories of the Falklands. London: Politico. p. 73. ISBN 9781842750186.
- ↑ "The fourteen-hour battle had cost the British a total of seventeen killed and sixty-four wounded, with the majority from 2 Para." Storming The Falklands, Tony Banks, Little, Brown and Company, 2012
- ↑ "Falkland Islands – Stanley's Sunrise and Sunset on 27 May 1982". TimeZoneGuide. Retrieved 30 January 2015.
- ↑ Leone, Vincent R. Major USMC. "The Falkland Islands War: Winning With Infantry". Globalsecurity.org. Retrieved 30 January 2015.
- ↑ Fitz-Gibbon (2002) pp. 5
- ↑ Moore, Darren Maj. "Rear Admiral Woodward: Political Influences during the Falklands War" (PDF). Australian Defence Force Journal: Issue 165, 2004. Australian Defence Force.
- ↑ Middlebrook, Martin (1985). Operation Corporate: The Falklands War, 1982 (1st ed.). London: Viking: Penguin Books Ltd. p. 249. ISBN 0670802239.
- 1 2 Thompson, Julian (2008). No Picnic: 3 Commando Brigade in the Falklands. Pen and Sword Military. p. 200. ISBN 978-1844158799.
- ↑ Hastings, Max; Jenkins, Simon (1983). The Battle for the Falklands. New York: W.W. Norton & Company. pp. 264–265. ISBN 9780393017618.
- ↑ Freedman, Lawrence Sir (2005). The Official History of the Falklands Campaign, Volume 2: War and Diplomacy. Oxford: Routledge. p. 477. ISBN 978-0714652078.
- 1 2 3 van der Bijl, Nicholas (1999). Nine Battles to Stanley. Barnsley: Pen and Sword. p. 116. ISBN 9780850526196.
- 1 2 3 4 5 6 7 Blood and Mud at Goose Green. David Aldea & Don Darnell, EBSCO Host Connection.
- ↑ Battle order at Goose Green
- ↑ Andrada, pp. 86–90
- ↑ Fitz-Gibbon (2002) pp. 4–5
- ↑ Van der Bijl (1999) pp. 117
- ↑ The men of Co. C/RI 25 fought with courage, perseverance and effectiveness at San Carlos and Goose Green ... a regiment that received a good deal of special forces training under the energetic command of LtCol. Seineldín. The Military Sniper Since 1914, Martin Pegler, p. 63, Osprey Publishing, 2001
- 1 2 3 Boyce (2005) pp.129
- ↑ Argentine Fight for the Falklands, Martin Middlebrook, p.64, Pen & Sword, 2003
- ↑ Nine battles to Stanley, Nicholas Van der Bijl, p.13, Leo Cooper, 30/09/1999
- ↑ Guerra de Malvinas Regimiento de Infanteria 12
- ↑ Fitz-Gibbon (2002) pp. 6
- ↑ Partes de Guerra, Graciela Speranza, Fernando Cittadinil, p. ?, Numa Ediciones, 2000
- ↑ Middlebrook (1985) pp. 252
- ↑ Freedman (2005) pp. 481
- 1 2 Fitz-Gibbon (2002) pp. 8
- ↑ Boyce, D. George (2005). The Falklands War (1st ed.). Hampshire: Macmillan. p. 128. ISBN 9780333753958.
- ↑ Fitz-Gibbon (2002) Appendix 2, pp190-194
- ↑ Middlebrook (1985) pp. 254
- ↑ Fitz-Gibbon (2002) pp. 23
- ↑ Fitz-Gibbon (2002) pp. 25
- ↑ http://www.britains-smallwars.com/Falklands/brit-aircraftlosses.htm
- ↑ We were landed to the East of Mount Usborne carrying huge weights of ammunition just after dark on the night of 20/21 May. Memories of the Falklands, Iain Dale, p. 36 Politico's, 2002
- ↑ Rodríguez Mottino, Héctor (1984). La Artillería Argentina en Malvinas. Ed. Clío, pp. 193–194. ISBN 950-9377-02-3. (in Spanish)
- ↑ "On the late evening of 22 May four Harriers were launched from Hermes armed with CBUs, their intended targets being the POL dumps and Pucaras at Goose Green. The aircraft were subject to intensive anti—aircraft fire during this attack." RAF Strike Command, 1968-2007,Kev Darling, p. 159, Casemate Publishers, 2012
- ↑ Comandos en Acción, Isidoro Jorge Ruiz Moreno, Emecé Editores, 1986
- ↑ "1830 hs – Se lanza el ataque de desarticulación sobre el punto acotado 392 para perturbar, hostigar y desconcentrar al enemigo; es una intención, por cuanto no tengo información fehaciente sobre su presencia y actividad." Ganso Verde, Italo Angel Piaggi, p. 64, Sudamericana/Planeta, 1986
- ↑ Pook, Jerry (2007). RAF Harrier Ground Attack-Falklands. Pen & Sword Books ltd., p. 109. ISBN 978-1-84415-551-4 (in English)
- ↑ Jackson, Robert (1985). The RAF in action: from Flanders to the Falklands. Blandford Press, p. 156. ISBN 0713714190
- ↑ Van der Bijl, Nicholas (1999). Nine battles to Stanley. Leo Cooper, p. 127. ISBN 0850526191
- ↑ Middlebrook (1985) pp. 257
- ↑ Roberts, John (2009). Safeguarding the Nation: The Story of the Modern Royal Navy. Seaforth Publishing. p. 161. ISBN 978-1591148128. Retrieved 4 February 2015.
- ↑ At home on new battle front. An ex-British soldier is putting Pasco High on the state soccer map. By Izzy Gould. Tampa Bay Times. Published 9 February 2007
- ↑ La muerte de un coronel británico en Malvinas. Clarín. 18 June 1996
- 1 2 3 Sama82.org
- ↑ Lost in the fog of war. Robert Fox takes issue with Hugh Bicheno's history of the Falklands conflict, Razor's Edge. By Robert Fox. The Guardian Published Saturday 1 April 2006
- ↑ "Some of them seemed to be looking at us, their dead eyes full of reproach. Few looked peaceful. Some had died trying to escaped back into the foxholes they'd poured from. Many had fallen to the pinpoint shower of mortar shells that had dropped on them." Spearhead Assault, John Geddes, p.12, Random House, 2008
- ↑ "1647 Support Company had reported lots of white flags." Not Mentioned in Despatches: The History and Mythology of the Battle of Goose Green, Spencer Fitz-Gibbon, p. 197, James Clarke & Co., 2006
- ↑ "1613 Enemy have surrendered on BLACK. Now moving to WHITE." Not Mentioned in Despatches: The History and Mythology of the Battle of Goose Green, Spencer Fitz-Gibbon, p. 197, James Clarke & Co., 2006
- ↑ It had taken around six hours to dislodge the Argentinians from their vital ground - which says much for their tenacity. H. Jones VC: The Life and Death of an Unusual Hero, John Wilsey, Hutchinson, 2002
- ↑ Fitz-Gibbon, (2002), pp. 147–148.
- ↑ Reynolds, David (2002). Task force: the illustrated history of the Falklands War. Sutton, p. 150. ISBN 0-7509-2845-X
- 1 2 DEFENSA Y CAÍDA DE DARWIN-PRADERA DEL GANSO, página 12
- ↑ BASE AÉREA MILITAR CÓNDOR
- ↑ Malvinas Banda de Hermanos Regimiento de Infantería 12 (Programa 19 - Martes 19 de Julio 2016)
- ↑ Malvinas Banda de Hermanos Regimiento de Infantería 12 (Programa 19 - Martes 19 de Julio 2016)
- ↑ The fight for the "Malvinas": The Argentine forces in the Falklands War. Martin Middlebrook. p. 189. Penguin, 1990
- ↑ The History of the South Atlantic conflict: The War for the Malvinas. Rubén Oscar Moro. p. 264. Praeger, 1989
- ↑ "Goose Green: The Argentinian Story" Archived 29 October 2013 at the Wayback Machine. by David Aldea. British Small Wars website
- ↑ One aircraft crashed close by, drenching severalmen with fuel and napalm, which fortunately did not ignite. No Picnic, Julian Thompson, Pen & Sword, 2008
- ↑ Adkin (2003), pp. 339
- ↑ Adkin (2003), pp. 340
- ↑ Adkin (2003), pp. 341
- ↑ Adkin (2003), pp. 343
- ↑ Adkin (2003), pp. 345
- ↑ Adkin (2003), pp. 346
- ↑ Adkin (2003), pp. 351
- ↑ Adkin (2003), pp. 353–354
- ↑ El arriesgado rescate de un suboficial herido que quedó detrás de las líneas enemigas
- ↑ Van Der Bijl (1999) pp. 139
- ↑ "The Argentines lost 45 men killed, 90 wounded and 961 captured." The Falklands 1982: Ground Operations in the South Atlantic, Gregory Fremont-Barnes, p. 43, Osprey Publishing, 2012
- ↑ "Pero la lluvia y el barro hizo que el tractor se desplazara fuera de la senda e hiciera estallar una mina que le voló una pierna y dos días después, le produjo la muerte." Malvinas: 20 Años, 20 Héroes, Armando Fernandez, p. 107, Fundación Soldados, 2002
- ↑ "We had previously arranged for a message to be sent to Argentina requesting the Bahia Paraiso to rendezvous with our hospital ship SS Uganda in an area which we have set aside for Hospital Ships some 30 miles north of Falklands Sound. 140 wounded Argentine servicemen — who are receiving medical attention on board the UGANDA — will be transferred to the Argentine ship for an early return home." The Falklands War: The Official History, p.44, Latin American Newsletters, 1983
- ↑ "Towards the end of May Uganda entered Falkland sound to evacuate casualties, and some days later met the Argentine Bahia Paraiso, 30 miles north of Falkland Sound were 140 casualties were transfered." Jane's Merchant Shipping Review, p. 68, A. J. Ambrose, Janes, 1983
- ↑ Se confecciona un acta con las circunstancias y consecuencias del accidente: 2 soldados muertos, 1 oficial y 9 soldados heridos, y 3 soldados desaparecidos. Ganso Verde, Ítalo Ángel Piaggi, p. 145, Sudamericana/Planeta, 1986
- ↑ Van Der Bijl (1999) pp. 141
- ↑ Dale (2002), pp. 73
- ↑ Italo Angel Piaggi (2001) GANSO VERDE
- ↑ "Falleció el Veterano de Guerra Ítalo Ángel Piaggi" (in Spanish). El Malvinense. 1 August 2012. Retrieved 29 August 2012.
- ↑ Middlebrook (1985), pp. 391
- ↑ "No. 49134". The London Gazette (Supplement). 8 October 1982. p. 12831.
- ↑ London Gazette
- ↑ Fitz-Gibbon (2002) pp. 183–184
- ↑ Ferguson, Greg (1998). The Paras, 1940–1984. Oxford: Osprey Publishing. p. 43. ISBN 9780850455731.
- 1 2 3 4 5 6 7 van der Bijl p241
- ↑ Adkin (2003), pp. 36
- ↑ Middlebrook, Martin (2009). Argentine Fight for the Falklands. Barnsley: Pen and Sword Military. p. 186. ISBN 9781844158881.
- ↑ "Goose Green – The first major land victory". Royal Air Force. RAF. Retrieved 26 January 2015.
- ↑ The Falklands War, Paul Eddy, Magnus Linklater, p. 238, André Deutsch, 1982
- ↑ Argentina's Falklands War Veterans. 'Cannon Fodder in a War We Couldn't Win'. By Jens Glüsing, Spiegel.de, 4 March 2007
- ↑ Confirman el juzgamiento por torturas en Malvinas (in Spanish), Clarín, Buenos Aires, 27 June 2009
- ↑ Centro de Ex Soldados Combatientes en Malvinas de Corrientes Archived 7 April 2010 at the Wayback Machine. (in Spanish)
- ↑ Categorized | Feature, Human Rights The Enemy Within: Investigating Torture In The Malvinas. By Marc Rogers.
- ↑ Sigue estancada la investigación por torturas en Malvinas
- ↑ Alberto Frontera, héroe de Malvinas
- Sources
- Adkin, Mark (2003). Goose Green – A battle is Fought to be Won. London: Cassell. ISBN 0304354961.
- Andrada, Benigno (1983). Guerra aérea en las Malvinas. Ed. Emecé. ISBN 950-04-0191-6. (in Spanish)
- Harclerode, Peter (1 May 1993). Para!: Fifty Years of the Parachute Regiment (Reprint ed.). Arms and Armour. ISBN 1-85409-097-6.
- Fitz-Gibbon, Spencer (1995). Not Mentioned in Dispatches: The History and Mythology of the Battle of Goose Green. Lutterworth Press. ISBN 0-7188-2933-6.
- Kenney Oak, David J. 2 Para's Battle for Darwin Hill and Goose Green. Square Press April 2006. ISBN 0-9660717-1-9.
- Falklands War Binderbook – Author Information Pending
- Martin Middlebrook (1989). The Fight For The Malvinas: The Argentine Forces In The Falklands War. Viking. ISBN 0-14-010767-3.
External links
Coordinates: 51°49′43.8″S 58°58′9″W / 51.828833°S 58.96917°W