Siege of Smerwick
The Siege of Smerwick took place at Ard na Caithne (known in English as Smerwick) in 1580, during the Second Desmond Rebellion in Ireland. A 400–500 strong force of Papal freelance soldiers (of Spanish and Italian origin) captured the village but were forced to retreat to nearby Dún an Óir ('the Fort of Gold', possibly a persistent mistranscription for Dún an Áir, 'the Fort of Slaughter'), where they were besieged by the Irish Royal Army. The defenders eventually surrendered and most of them were then summarily executed on the orders of the English commander, The 14th Baron Grey de Wilton, the Lord Deputy of Ireland.[1][2]
Background
James Fitzmaurice Fitzgerald landed a small Papal invasion force in July 1579, initiating the Second Desmond rebellion. This continued for three years, though Fitzmaurice was killed within weeks of the landing, and the following year, on 10 September 1580, a squadron of Spanish ships under the command of Don Juan Martinez de Recalde landed a Papal force of Spanish and Italians at Smerwick, on the Dingle Peninsula, near Fitzmaurice's landing-point. The force numbered 600 men, and brought with it arms for several thousand. It was commanded by Sebastiano di San Giuseppe (aka Sebastiano da Modena), paid for and sent by Pope Gregory XIII, and was a clandestine initiative by Philip II to aid the rebellion. (It was found later that none of the Spanish officers had a commission from King Philip, nor the Italians from Pope Gregory, though the latter had been granted indulgences for taking part.) At the time neither Spain nor the Papacy was formally at war with the Kingdom of Ireland, but the papal bull Regnans in Excelsis of 1570 had released observant Catholics from their allegiance to Queen Elizabeth I.
Leading a rebel force of 4,000 men somewhere to the east, Lord Desmond, Lord Baltinglass and John of Desmond tried to link up to receive the supplies brought by the expeditionary force. English forces under The 10th Earl of Ormond and The 14th Baron Grey de Wilton blocked them, and Richard Bingham's ships blockaded their ships in the bay at Smerwick. San Giuseppe had no choice but to retreat to the fort at Dún an Óir.
From information obtained from prisoners, Lord Ormond ascertained the size of the defending forces to be around 700, but with military equipment that would serve a force of 5,000; the prisoners said the defences of the fort were being strengthened. Ormond retreated, leaving a small party to keep Dún an Óir under surveillance.[3]
Siege and massacre
_-_geograph.org.uk_-_219399.jpg)
On 5 November, a naval force led by Admiral Sir William Winter arrived at Smerwick Harbour, replenishing the supplies of Lord Grey de Wilton, who was camped at Dingle, and landing eight artillery pieces.[3] On 7 November, Lord Grey de Wilton laid siege to the Smerwick garrison. The invading forces were geographically isolated on the tip of the narrow Corca Dhuibhne (Dingle Peninsula), cut off by Cnoc Bréanainn (Mount Brandon), one of the highest mountains in Ireland, on one side, and the much larger English force on the other. The English forces began the artillery barrage on Dún an Óir on the morning of the 8 November, which rapidly broke down the improvised defences of the fort.[3]
After a three-day siege, the commander Di San Giuseppe surrendered on 10 November 1580. Accounts vary on whether they had been granted quarter. Grey de Wilton ordered the summary executions, sparing only the commanders. Grey had also heard that the main Irish rebel army of 4,000 "who had promised to be on the mountains", were somewhere in the hills to his east, looking to be rearmed and supplied by Di San Giuseppe, and they might in turn surround his army; but this army never appeared.
According to Grey de Wilton's account, contained in a despatch to Queen Elizabeth I of England dated 11 November 1580, he rejected an approach made by the besieged Spanish and Italian forces to agree terms of a conditional surrender in which they would cede the fort and leave. Lord Grey de Wilton claimed that he insisted that they surrender without preconditions and put themselves at his mercy, and that he subsequently rejected a request for a ceasefire. An agreement was finally made for an unconditional surrender the next morning, with hostages being taken by English forces to ensure compliance.[4] The following morning, an English force entered the fort to secure and guard armaments and supplies. Grey de Wilton's account in his despatch says "Then put I in certain bands, who straight fell to execution. There were six hundred slain." Grey de Wilton's forces spared those of higher rank: "Those that I gave life unto, I have bestowed upon the captains and gentlemen that hath well deserved..."[4]
Local historian Margaret Anna Cusack (alias MF Cusack) noted (1871) that there is a degree of controversy about Lord Grey de Wilton's version of events to Elizabeth, and identifies three other contemporary accounts, by O'Daly, O'Sullivan Beare and Russell, which contradict it. According to these versions, Grey de Wilton promised the garrison their lives in return for their surrender, a promise which he broke, remembered in the term "Grey's faith". Like Grey himself, none of these commentators can be described as neutral, as they were all either serving the state or opposed to it. Cusack's interpretation of the events could not be described as unbiased, given her position as a Catholic nun and fervent Irish nationalist at the time.
Cusack also confirmed (1868) that Di San Giuseppe (whom she named by the Spanish version, San José) had sold the "Fort del Ore" for a bribe:Colonel Sebastian San José, who proved eventually so fearful a traitor to the cause he had volunteered to defend .. The Geraldine cause was reduced to the lowest ebb by the treachery of José. She explained that:
- In a few days the courage of the Spanish commander failed, and he entered into treaty with the Lord Deputy. A bargain was made that he should receive a large share of the spoils. He had obtained a personal interview in the Viceroy's camp, and the only persons for whom he made conditions were the Spaniards who had accompanied him on the expedition. The English were admitted to the fortress on the following day, and a feast was prepared for them.[5]
Sir Geoffrey Fenton wrote to London on 14 November about the prisoners that a further "....20 or 30 Captains and Alphiaries [were] spared to report in Spain and Italy the poverty and infidelity of their Irish consociates [sic]."[6]
According to Cusack (1871), the few that were spared suffered a worse fate. They were offered life if they would renounce their Catholic faith; on refusal, their arms and legs were broken in three places by an ironsmith. They were left in agony for a day and night and then hanged.[7] In contrast, Grey's report mentioned: "Execution of the Englishman who served Dr Sanders, and two others, whose arms and legs were broken for torture." He did not specify why they were tortured, nor refer to their religion.[8]
According to the English writer John Hooker in his Supply to the Irish Chronicle (an addition to Holinshed's Chronicles) written in 1587, the bands ordered to carry out the executions were led by Captain Raleigh (later Sir Walter Raleigh) and Captain Mackworth.[9][10]
Richard Bingham, future commander of Connacht, was present and described events in a letter to The 1st Earl of Leicester, although he claimed the massacre was perpetrated by sailors.[11] The poet Edmund Spenser, then secretary to the Lord Deputy, is also thought to have been present.[4]
According to the folklore of the area, the execution of the captives took two days, with many of the captives being beheaded in a field known locally in Irish as Gort a Ghearradh (the Field of the Cutting); their bodies later being thrown into the sea. Archaeologists have not yet discovered human remains at the site, although a nearby field is known as Gort na gCeann (the Field of the Heads) and local folklore recalls the massacre.[12]
In Raleigh's trial
Three decades later, when Raleigh had fallen from favour, his involvement with this massacre was brought against him as a criminal charge in one of his trials. Raleigh argued that he was "obliged to obey the commands of his superior officer" but he was unable to exonerate himself.[1] He was executed on 29 October 1618, chiefly for his involvement in the Main Plot.
Monument
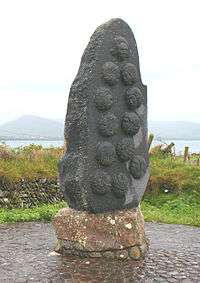
A monument to commemorate the victims of the massacre has now been erected at Smerwick (see illustration).
See also
References
- The Scenery and Antiquities of Ireland. Chapter IV. (1841)
- Tony Pollard, Iain Banks. Scorched Earth: Studies in the Archaeology of Conflict. BRILL, 2007. p.222
- Falls, Cyril (1997) [1950]. "Chapter X The Desmond Rebellion: Last Phase". Elizabeth's Irish Wars. Syracuse University Press. pp. 142–144. ISBN 0-8156-0435-1.
- Church, R. W. (2010) [1879]. Spenser. pp. 41–44. ISBN 978-1-4068-5574-6.
- Cusack MF, An Illustrated History of Ireland from AD 400 to 1800 Dublin, 1868
- Calendar of State Papers Ireland, 14 Nov. 1580.
- Cusack, MF, The History of the Kingdom of Kerry, 1871 p.187–9 ISBN 094-613-012-4
- Calendar of State Papers Ireland, 11 Nov. 1580.
- Saint-John, James Augustus. "Perpetrates the Massacre of Del Oro". Life of Sir Walter Raleigh: 1552 – 1618 : in two volumes, Volume 1. pp. 52–77.
- Nicholls, Mark; Williams, Penry. "The Devon Man". Sir Walter Raleigh: In Life and Legend. p. 15. ISBN 978-1-4411-1209-5.
- Wright, Thomas (ed.). Queen Elizabeth and her times. pp. 120–122.
- David Lister (13 April 2004). "Massacre victims from Raleigh's time return to haunt Irish shore". The Times. UK. Retrieved 18 July 2011.