Operation Totem
| Totem | |
|---|---|
 Obelisk at the Totem One test site | |
| Information | |
| Country | United Kingdom |
| Test site | Emu Field, South Australia, Australia |
| Period | 14–26 October 1953 |
| Number of tests | 2 |
| Test type | tower |
| Max. yield | 10 kilotonnes of TNT (42 TJ) |
| Test series chronology | |
Operation Totem was a pair of British atmospheric nuclear tests which took place at Emu Field in South Australia on 15 October 1953. They followed the Operation Hurricane test of the first British atomic bomb, which had taken place at the Montebello Islands a year previously. The main purpose of the trial was to determine the acceptable limit on the amount of plutonium-240 which could be present in a bomb.
In addition to the two main tests, there was a series of five subcritical tests. These did not produce nuclear explosions, but used conventional explosives, polonium-210, beryllium and natural uranium to investigate the performance of neutron initiators, which the British called Kittens.
Background
During the early part of the Second World War, Britain had a nuclear weapons project, code-named Tube Alloys,[1] which the 1943 Quebec Agreement merged with the American Manhattan Project to create a combined American, British, and Canadian project. The British government expected that the United States would continue to share nuclear technology, which it regarded as a joint discovery, but the United States Atomic Energy Act of 1946 (McMahon Act) ended technical co-operation.[2] Fearing a resurgence of United States isolationism, and Britain losing its great power status, the British government restarted its own development effort,[3] which was given the cover name "High Explosive Research".[4] The first British atomic bomb was tested in Operation Hurricane at the Monte Bello Islands in Western Australia on 3 October 1952.[5]
Purpose and site selection
The main purpose of the trial was to determine the acceptable limit on the amount of plutonium-240 which could be present in a bomb. The plutonium used in the original Hurricane device was produced in the nuclear reactor at Windscale, but the Windscale Piles did not have anything like the capacity to provide sufficient material for the British government's planned weapons programme, and consequently eight more reactors were planned. These were intended to produce both electricity and plutonium, and the design was known as PIPPA, for pressurised pile producing power and plutonium.[6] Although the design produced less plutonium than a Windscale Pile, it also produced electricity which it could put back into the grid, whereas a Windscale Pile consumed £340,000 a year worth of electricity to run its blowers. The electricity produced was more expensive than that of a conventional coal-fired plant, but this was offset by the value of the plutonium produced, which was about £100 per gram (£3,100 per ounce).[7] Construction of the first PIPPA commenced at Calder Hall in March 1953. However, for cost reasons they were to operate in such a way that there would be a higher proportion of plutonium-240 present with the plutonium-239 product than in the Windscale-produced material. This was potentially a problem since plutonium-240 is prone to spontaneous fission, which would both present a criticality accident risk and reduce the likely yield of any weapon containing it. Nuclear testing was required to gauge the effect of increased plutonium-240.[6]
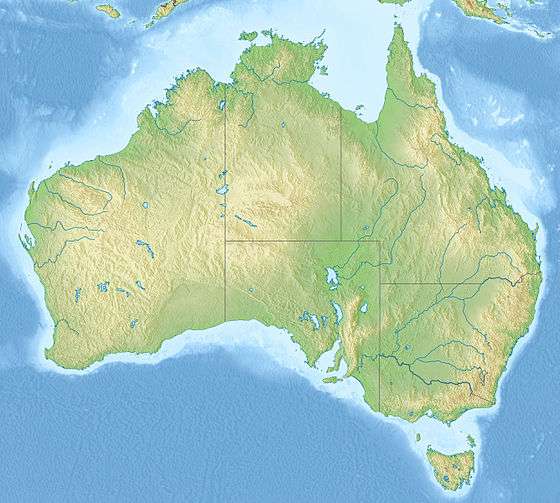
The Royal Navy was unable to provide the level of support it had for the Operation Hurricane test in the time available, so the Montebello Islands were ruled out.[8] A search for an alternative site on the mainland in the vicinity of the Woomera Rocket Range had already begun in June 1952. Surveys of the area were carried out by Len Beadell. Harry Pritchard, the Chief Superintendent of the Long Range Weapons Establishment (LRWE) there, loaned a Bristol Sycamore helicopter for the purpose.[9] A site, originally given the codename X200 but later renamed Emu Field, was selected. It was an isolated dry, flat clay and sandstone expanse in the Great Victoria Desert 480 km north west of Woomera, South Australia. A natural claypan known as the Dingo Claypan provided a ready-made airstrip. In August 1952, Sir William Penney, the Chief Superintendent Armament Research (CSAR) at the British Ministry of Supply, and the head of the British atomic weapon development effort,[10] notified W. A. S. Butement, the Chief Scientist at the Australian Department of Supply, of his intention to visit the site before the Hurricane test. Butement warned Penney that the site was very remote, and that Beadell and his companions might well be the first non-Aboriginal people to see the area.[11]
Sir John Cockcroft, the director of the Atomic Weapons Research Establishment at Harwell personally lodged a formal request for a feasibility study with the Prime Minister of Australia, Robert Menzies, at a meeting on 4 September 1952. Other matters discussed included the attendance of Butement and Leslie Martin at the Hurricane test, the creation of the Australian Atomic Energy Commission, and the supply of Australian uranium to the UK. Cockcroft reported to Sir Roger Makins at the Foreign Office that Menzies had agreed in principle to Penney's reconnaissance of the Emu Site.[12] Penney flew in to the Dingo claypan in a Royal Air Force (RAF) Percival Prince. His party included Pritchard, Butement, Martin, Ben Gates (the range controller), Ivor Bowen from the UK Ministry of Supply staff in Melbourne and Omond Solandt from the Canadian Defence Research Board. The party inspected the area by helicopter and land rover; the light sandy clay soil was easily traversed by motor vehicles. The drawbacks of the Emu site were also discussed. These included the fact there there was no all-weather road from Woomera.[12]
In December 1952, Penney secured ministerial permission from the British government for two tests to take place in October 1953:[6] one of the Blue Danube type but with a smaller fissile charge, and one of a new experimental type.[12] The Prime Minister of the United Kingdom, Winston Churchill, then sought permission from Menzies, who was in London at the time. Churchill's scientific advisor, Lord Cherwell handed Menzies an aide-mémoire on 13 December.[9] Two days later the acting Prime Minister, Arthur Fadden, signalled his approval for the tests from Australia.[13]
Preparations
The test series was given the codename Totem.[14] A Totem Executive (Totex) chaired by Air Marshal Sir Thomas Elmhirst was formed in the UK to coordinate the tests.[14] The UK government agreed to foot the bill for the tests.[9] Penney was appointed the trial director, with Leonard Tyte as scientific director. Tyte was appointed to the National Coal Board in May 1953, and was replaced by Charles Adams.[15] In Australia, a Totem Panel chaired by J. E. S. Stevens, the head of the Department of Supply, was created to coordinate the Australian contribution.[14] With defence money short and Britain picking up the tab for the tests, it was important that all expenditures were correctly recorded and charged.[16] The total cost of the trial was estimated at £799,700.[17] Unlike Hurricane, it was decided that it would be best if a single service was be responsible for the test series, and the Australian Army was so designated.[16]
The task of coordinating the construction phase was given to Brigadier Leonard Lucas.[14] Lucas was an architect who had been the Deputy Engineer in Chief of the Australian Army during the Second World War. When he was given the assignment on 6 January 1953, he was the Regional Director of the Commonwealth Department of Works in Perth. Squadron Leader Kenneth Garden was appointed deputy director and supervisor of construction. The construction force was drawn from the Army, the Royal Australian Air Force (RAAF), and the Departments of Supply and Works.[18] The main units involved were detachments from No. 5 Airfield Construction Squadron RAAF, and the Army's 7 Independent Field Squadron, 17 Construction Squadron, Royal Australian Electrical and Mechanical Engineers, Royal Australian Corps of Signals and the Royal Australian Survey Corps. Civilians came from the LRWEs at Salisbury and Woomera.[19] The RAAF also provided ten Avro Lincoln bombers based at RAAF Woomera and RAAF Richmond for air sampling, and two Dakota transports based at Woomera for ground contamination surveys. The RAF provided a lone Canberra bomber for cloud sampling. The United States Air Force (USAF) had two Boeing B-29 Superfortress bombers and two Douglas C-54 Skymaster transport aircraft based at RAAF Richmond.[20]
A five-man Australian mission consisting of Lucas, Gates, Group Captain Alfred George Pither (the LRWE Range Superintendent), Frank O'Grady (the Superintendent of Engineering at Salibury), and a representative of the Australian Security Intelligence Organisation (ASIO), visited the UK in February 1953 to discuss the arrangements for Totem. There was a week of discussions, culminating in the Australians attending the second meeting of Totex. Lucas informed the people at Fort Halstead, where Penney's High Explosive Research team was based, that their plan for a temporary village of trailers had to be discarded. Lucas told them that the trailers would not be able to make it over the first sand hill. Instead, Australian Nissen huts would be used for the offices and laboratories, and test personnel would be accommodated in tents. Lucas was able to allay fears about the supply of water, which would not only be required for drinking, but also for decontamination of personnel and equipment, and the processing of the film badges which registered how much radioactivity people had been exposed to. Lucas was able to inform them that adequate supplies of bore water would be available, although distillation plant would still be required. The UK team also explained that in addition to the two atomic tests, there would be a series of subcritical tests, which formed part of a series codenamed Kittens.[21]
The isolated location and poor roads meant that only 500 long tons (510 t) of the 3,000 long tons (3,000 t) of equipment needed for the test arrived by road, the bulk arriving via the airstrip, which was quickly constructed on the site about 17 kilometres (11 mi) north west of the test field on a lake bed). This required a much greater air transport effort from the RAF and RAAF than originally envisaged. The main scientific party arrived on 17 August and the device for the first test arrived on 26 September to be followed three days later by by Penney.[8] The British government invited Martin, Butement and Ernest Titterton to be observers.[22] In addition, 45 Australians would participate as part of the test team, including some Royal Australian Navy personnel who had been involved in Operation Hurricane. Ten of them would be part of the Radiation Hazards Group (RH5).[14]
An important concern was the welfare of the local Pitjantjatjara and Yankuntjatjarra Aboriginal people who inhabited the area. They lived through hunting and gathering activities, and moved over long distances between permanent and semi-permanent locations, generally in groups of about 25 or so, coming together for special occasions. The construction of the Trans-Australian Railway in 1917 disrupted their traditional patterns of movement. Walter MacDougall was appointed the Native Patrol Officer at Woomera on 4 November 1947, with responsibility for ensuring that Aboriginal people were not harmed by the LRWE's rocket testing program. He was initially assigned to the Department of Works and Housing but was transferred to the Department of Supply in May 1949. As the range of the rockets increased, so too did the range of his patrols, from 358 miles (576 km) in October 1949 to 2,166 miles (3,486 km) in March and April 1952.[23]
MacDougall found the Aboriginal people reluctant to reveal important details such the location of water holes and sacred sites, but they they did inform him that the Clay Pan area, which was in Jangkuntjara territory, had no particular importance or significance.[24] MacDougall paid personal visits to pastoral stations in August 1953, warning the station managers, and requesting that the warnings be passed on to local Aboriginal people. Warning notices were posted around the perimeter of the test site, and aerial and ground searches, usually within 20 miles (32 km) of the site, were made with increasing frequency as the test firings approached. The 1985 Royal Commission into British nuclear tests in Australia was critical of these efforts, which it deemed inadequate to warn people spread over 10,000 square kilometres (3,900 sq mi).[25][26]
Because the Emu site was on the Australian mainland, the Australian government required much more information than they had for the Hurricane test about nuclear fallout and radioactive contamination. The aide-mémoire that Lord Cherwell had given Menzies offered to provide information to Martin and Titterton on the possible radioactive hazards. Arrangements were made for them to see the full hazards report that the British team had prepared.[27] They were not provided details about the bomb's design,[14] but assurances were given that the Totem devices contained much less fissile material that the Hurricane device. Martin was particularly concerned that balloon flights had indicated that in October there were east and north east winds with speeds of up to 100 knots (190 km/h; 120 mph) between 30,000 and 40,000 feet (9,100 and 12,200 m). Penney reassured Martin and Titterton that while the radioactive cloud might rise above 15,000 feet (4,600 m), it would not reach 30,000 feet (9,100 m). On this basis they reported to Menzies that no people would suffer ill-effects from the trials.[27]
Totem 1
The first Totem test was preceded by three Kitten tests carried out at the Emu site on 26 and 30 September, and 6 October.[28] These were conducted in an area known as the K site, 4 miles (6.4 km) east of the airstrip and about 8 miles (13 km) north west of the main test site.[29] They did not produce nuclear explosions, but used conventional explosive and polonium-210, beryllium and natural uranium to investigate the performance of neutron initiators, which the British called Kittens.[30] They were performed without formal Australian government approval, and without any advice being given to the Australian government by Australian or British scientists.[31] The tests spread toxic beryllium and highly radioactive polonium around the test sites. Care was taken not to contaminate the main test site, and the areas were secured until the polonium decayed to safe levels.[32]
A full-scale rehearsal was held on 1 October, and the countdown commenced on 7 October, but was immediately cancelled due to bad weather. Rain set in on 8 October. Hopes for 10 October soon faded, and the following day was a Sunday, and the Australian government had indicated that it did not want tests to take place on Sundays, so the test was re-scheduled for 12 October, then twice postponed to the next day.[33][34] This time the weather held. VIPs and media representatives were flown in from Adelaide in the early hours of the morning with the aircraft covered in canvas screens so they could not identify the exact location of the test site.[33][35] The test was carried out at 21:30 UTC (7:00 local time) on 14 October. The yield was higher than expected; Penney estimated it at 10 kilotonnes of TNT (42 TJ). The cloud rose to 15,000 feet (4,600 m). The slight wind meant that the cloud maintained its form for 24 hours, and produced a tight fallout pattern in the immediate vicinity of the test site the like of which had not been seen before.[33][34][36]
The five Lincolns assigned to sampling the cloud make 15 traverses in three hours. The filters were found to have radioactivity in excess of the requirements of the radiochemistry team, and were left for twelve hours to cool down. The crews were checked for contamination and, after showering, were found to be clean. The aircraft were parked away from other planes. The hazards team found contamination on the leading edges and tailplanes, although it was within acceptable limits. Ground crews were permitted to work on the aircraft, although they were instructed not to eat or smoke.[33]
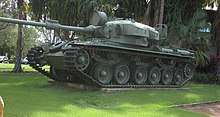
An unmanned Centurion tank, Registration Number 169041,[37] was positioned approximately 350 yards (320 m) from ground zero. After the test the tank's light damage was repaired and it was put back into service. Subsequently nicknamed The Atomic Tank, it was later used in the Vietnam War. In May 1969, during a firefight, 169041 (call sign 24C) was hit by a rocket-propelled grenade (RPG) but remained battle-worthy.[38][39] The Atomic Tank is now located at Robertson Barracks in Holtze, Northern Territory. Although other tanks were subjected to nuclear tests, 169041 is the only tank known to have withstood atomic tests and subsequently gone on for another 23 years of service, including 15 months on operational deployment in a war zone.[40]
Following the Totem 1 test, a black mist rolled across the landscape at the Wallatina and Welbourn Hill stations in the Granite Downs 175 kilometres (109 mi) from the test site, and led to unacceptably high levels of radioactive contamination of these locations. There is controversy surrounding injuries received by Aboriginal People from fallout, and in particular from this mist. Approximately 45 Yankunytjatjara people were reported to have been caught in the mist at Wallatina and fallen ill.[25][41] The 1985 Royal Commission concluded that "Aboriginal people experienced radioactive fallout from Totem 1 in the form of a black mist or cloud at or near Wallatina. This may have made some people temporarily ill. The Royal Commission does not have sufficient evidence to say whether or not it caused other illnesses or injuries".[42]
Totem 2
Two more Kitten tests were carried out on 14 and 17 October.[28][43] The Totem 2 test was scheduled for 24 October, but once again the weather intervened, and it was postponed to 27 October.[44] Penney estimated that the yield of Totem 2 would be between 2 and 3 kilotonnes of TNT (8.4 and 12.6 TJ).[45] It was exploded at 21:30 UTC (7:00 local time) on 27 October.[45][44] Penney estimated the yield at 10 to 18 kilotonnes of TNT (42 to 75 TJ); later measurements showed it to be 8 kilotonnes of TNT (33 TJ). The Totem 2 cloud rose higher that of Totem 1, to 28,000 feet (8,500 m) because of condensation of moisture entrained in it, and whilst the wind direction below 12,000 feet (3,700 m) was an acceptable 10 degrees, at 20,000 feet (6,100 m) it was 270 degrees. However high winds dispersed the cloud so that it had dissipated to the point where it could not be tracked far.[44] The British scientists believed that sufficient data had been collected from Totem 1, so only two Lincolns and the USAF B-29s were used for Totem 2.[46]
Aftermath
With the test series concluded, the Emu site was abandoned. Daily RAAF flights flew personnel out. Penney departed on 2 November, and arrived back in the UK ten days later. Australian service personnel were flown back to their home states for Christmas. All UK staff departed by 17 November, although some remained in Australia at Woomera and Salisbury. The last personnel departed on 29 November, although flights to the claypan to remove equipment continued. Some stores were returned to the UK, while others were stored at Woomera and Salisbury. All that remained were three Commonwealth peace officers to ensure that no one entered Area K.[47] For their services, Lucas was made an Officer of the Order of the British Empire and Garden was made a Member of the Order of the British Empire.[48]
In addition to conclusively answering the questions about plutonium-240 that was their primary purpose, the Totem tests taught the British scientists a great deal about how to conduct trials, and how to measure fallout. For subsequent tests, monitoring stations would be established across Australia.[49] A few days after the conclusion of these tests, the British Government formally requested a permanent testing site from the Australian Government, which led to the agreement on the use of the Maralinga test site in August 1954. However it was not ready for the next trial, which was held back at the Monte Bello Islands in May 1956. Operation Mosaic was a pair of tests as part of the development of thermonuclear weapons.[50] The first trial at Maralinga was held in September 1956, with the Operation Buffalo series.[51]
Summary
| Name | Date time (UTC) | Local time zone | Location | Elevation + height | Delivery | Purpose | Device | Yield | Notes | References |
|---|---|---|---|---|---|---|---|---|---|---|
| T1 | 14 October 1953 21:30 | aCST (+9.5 hrs) | Emu Field, SAU 28°41′55″S 132°22′18″E / 28.69849°S 132.37159°E | 300 m (980 ft) + 31 m (102 ft) | tower | weapons development | Blue Danube | 10 kilotonnes of TNT (42 TJ) | The yield was bigger than expected and only a little below the maximum planned in safety assessments. | [52] |
| T2 | 26 October 1953 21:30 | aCST (+9.5 hrs) | Emu Field, SAU 28°42′44″S 132°22′38″E / 28.7122°S 132.3773°E | 310 m (1,020 ft) + 31 m (102 ft) | tower | weapons development | Modified Blue Danube | 8 kilotonnes of TNT (33 TJ) | The yield was much bigger than the expected 2–3 kilotons, but again less than the estimated maximum of 10 kilotons. | [52] |
Notes
- ↑ Gowing 1964, pp. 108–111.
- ↑ Jones 2017, pp. 1–2.
- ↑ Gowing & Arnold 1974a, pp. 181–184.
- ↑ Cathcart 1995, pp. 24, 48, 57.
- ↑ Jones 2017, p. 25.
- 1 2 3 Arnold & Smith 2006, p. 49.
- ↑ Gowing & Arnold 1974b, pp. 292–294.
- 1 2 Arnold & Smith 2006, p. 50.
- 1 2 3 McClelland 1985a, p. 137.
- ↑ Cathcart 1995, pp. 39–43.
- ↑ Symonds 1985, pp. 115–116.
- 1 2 3 Symonds 1985, pp. 117–118.
- ↑ Symonds 1985, pp. 95–96.
- 1 2 3 4 5 6 McClelland 1985a, p. 139.
- ↑ Arnold & Smith 2006, p. 52.
- 1 2 Symonds 1985, p. 120.
- ↑ Symonds 1985, p. 150.
- ↑ Greville 2002, p. 467.
- ↑ Greville 2002, p. 469.
- ↑ "4.2 Operation Totem (detonations on 15 October 1953 and 27 October 1953 at Emu Field, S.A.)". Department of Veterans' Affairs. Retrieved 2 October 2018.
- ↑ Symonds 1985, pp. 121–123.
- ↑ Arnold & Smith 2006, p. 54.
- ↑ McClelland 1985a, pp. 151–154.
- ↑ "Patrol Report W MacDougall 18. 4.1953". Centre for Indigenous Family History Studies. Retrieved 3 October 2018.
- 1 2 Cross & Hudson 2006, pp. 23–25.
- ↑ McClelland 1985a, p. 153.
- 1 2 Symonds 1985, pp. 124–125.
- 1 2 Arnold & Smith 2006, p. 217.
- ↑ Symonds 1985, p. 157.
- ↑ Arnold & Smith 2006, pp. 215–216.
- ↑ McClelland 1985b, p. 524.
- ↑ Symonds 1985, p. 158.
- 1 2 3 4 Symonds 1985, pp. 160–161.
- 1 2 Arnold & Smith 2006, pp. 57–58.
- ↑ Cameron, James (16 October 1953). "Whewn the Desert Skies Caught Fire". The Age (30, 721). Victoria, Australia. p. 2. Retrieved 2 October 2018 – via National Library of Australia.
- ↑ McClelland 1985a, pp. 146–147.
- ↑ McClelland 1985b, p. 226.
- ↑ Symonds 1985, p. 185.
- ↑ "The Unique History of 169041". Royal Australian Electrical and Mechanical Engineers. Retrieved 30 September 2018.
- ↑ "Australian Centurions in preservation, many photographs". Steel Thunder Original Two. Archived from the original on 26 February 2009.
- ↑ McClelland 1985a, pp. 149–150.
- ↑ McClelland 1985a, p. 194.
- ↑ Symonds 1985, p. 207.
- 1 2 3 Symonds 1985, p. 208.
- 1 2 Arnold & Smith 2006, p. 59.
- ↑ McClelland 1985a, pp. 215–216.
- ↑ Symonds 1985, pp. 214–215.
- ↑ "Awards To Atomic Test Men". The Sydney Morning Herald (36, 217). New South Wales, Australia. 19 January 1954. p. 16. Retrieved 2 October 2018 – via National Library of Australia.
- ↑ Arnold & Smith 2006, pp. 65–67.
- ↑ Arnold & Smith 2006, pp. 106–110.
- ↑ Arnold & Smith 2006, p. 138.
- 1 2 "Britain's Nuclear Weapons – British Nuclear Testing". Nuclear Weapons Archive. Retrieved 4 August 2018.
References
- Arnold, Lorna; Smith, Mark (2006). Britain, Australia and the Bomb: The Nuclear Tests and Their Aftermath. Basingstoke: Palgrave Macmillan. ISBN 978-1-4039-2102-4. OCLC 70673342.
- Cathcart, Brian (1995). Test of Greatness: Britain's Struggle for the Atom Bomb. London: John Murray. ISBN 978-0-7195-5225-0. OCLC 31241690.
- Cross, Roger; Hudson, Avon (2006). Beyond Belief: The British Bomb Tests: Australia's Veterans Speak Out. Kent Town, South Australia: Wakefield Press. ISBN 978-1-86254-660-8.
- Gowing, Margaret (1964). Britain and Atomic Energy 1939–1945. London: Macmillan. OCLC 3195209.
- Gowing, Margaret; Arnold, Lorna (1974a). Independence and Deterrence: Britain and Atomic Energy, 1945–1952, Volume 1, Policy Making. London: Macmillan. ISBN 978-0-333-15781-7. OCLC 611555258.
- Gowing, Margaret; Arnold, Lorna (1974b). Independence and Deterrence: Britain and Atomic Energy, 1945–1952, Volume 2, Policy and Execution. London: Palgrave Macmillan. ISBN 978-0-333-16695-6. OCLC 946341039.
- Greville, P. J. (2002). The Royal Australian Engineers, 1945 to 1972: Paving the Way. Loftus, New South Wales: Australian Military History Publications. ISBN 978-1-876439-74-3. OCLC 223163429.
- Jones, Jeffrey (2017). Volume I: From the V-Bomber Era to the Arrival of Polaris, 1945–1964. The Official History of the UK Strategic Nuclear Deterrent. Milton Park, Abingdon, Oxfordshire: Routledge. ISBN 978-1-138-67493-6. OCLC 1005663721.
- McClelland, James (1985a). The Report of the Royal Commission into British Nuclear Tests in Australia, Volume 1 (PDF) (Report). Canberra: Australian Government Publishing Service. Retrieved 8 August 2018.
- McClelland, James (1985b). The Report of the Royal Commission into British Nuclear Tests in Australia, Volume 2 (PDF) (Report). Canberra: Australian Government Publishing Service. Retrieved 8 August 2018.
- Symonds, J. L. (1985). A History of British Atomic Tests in Australia. Canberra: Australian Government Publishing Service. ISBN 978-0-644-04118-8. OCLC 18084438.