Siege of Berwick (1333)
| Siege of Berwick | |||||||
|---|---|---|---|---|---|---|---|
| Part of the Second War of Scottish Independence | |||||||
 | |||||||
| Belligerents | |||||||
|
|
| ||||||
| Commanders and leaders | |||||||
|
|
| ||||||
| Strength | |||||||
| Unknown | 9,000[1] | ||||||
| Casualties and losses | |||||||
| Unknown. Surviving garrison capitulated and were allowed to leave | Very few | ||||||
The Siege of Berwick took place in 1333 when the Scottish-held town of Berwick-upon-Tweed was captured by an English army commanded by King Edward III (r. 1327–1377) after a siege of four months. The year before, Edward Balliol had seized the Scottish crown, surreptitiously supported by Edward III. He was shortly expelled from the kingdom by a popular uprising. Edward III used this as a casus belli and launched a large-scale assault on Scotland. The immediate target was the strategically important border town of Berwick.
An advance force laid siege to the town in March. Edward III and the main English army joined them in May and pressed the attack. A large Scottish army advanced to relieve the town. After unsuccessfully manoeuvring for position, and knowing that Berwick was on the verge of surrender, the Scots felt compelled to attack the English at Halidon Hill on 19 July. They suffered a crushing defeat. Berwick surrendered on terms the next day. Balliol was reinstalled as King of Scotland after ceding a large part of his territory to Edward III and agreeing to do homage for the balance.
Background
The First War of Scottish Independence between England and Scotland began in March 1296, when Edward I of England (r. 1272–1307) stormed the Scottish border town of Berwick-upon-Tweed and bloodily sacked it as a prelude to his invasion of Scotland.[2] After 30 years of grinding warfare, the English disaster of the Battle of Stanhope Park, where the newly-crowned 14-year-old King Edward III was nearly captured, brought his regents, Isabella and Roger Mortimer, to the negotiating table. They agreed to the Treaty of Northampton with Robert the Bruce (r. 1306–1329) in 1328, but this treaty was widely resented in England and commonly known as turpis pax, "the cowards' peace". A number of Scots nobles refused to swear fealty to Bruce and so were disinherited. They left Scotland to join forces with Edward Balliol, son of King John I of Scotland (r. 1292–1296),[3][4] whom Edward I had deposed in 1296.[5]
Robert the Bruce died in 1329; his heir was 5-year-old David II (r. 1329–1371). In 1331, under the leadership of Edward Balliol and Henry Beaumont, 4th Earl of Buchan, the disinherited Scottish nobles gathered in Yorkshire and plotted an invasion of Scotland. Edward III was aware of the scheme and officially forbade it, in March 1332 writing to his northern officials that anyone plotting an invasion of Scotland was to be arrested. The reality was different, Edward III being happy to cause trouble for his northern neighbour. He insisted that Balliol not invade Scotland overland from England but turned a blind eye to his forces sailing for Scotland from Yorkshire ports on 31 July 1332. The Scots were aware of the situation and were waiting for Balliol. David II's regent was an experienced old soldier, Thomas Randolph, 1st Earl of Moray. Unfortunately for the Scots, he died 10 days before Balliol sailed.[6]
Five days after landing in Fife, Balliol's force of some 2,000 men met the Scottish army of 12–15,000. The Scots were crushed at the Battle of Dupplin Moor. Thousands of Scots died, including much of the nobility of the realm. Balliol was crowned King of Scotland at Scone – the traditional place of coronation for Scottish monarchs[7] – on 24 September 1332.[5] Almost immediately, Balliol granted Edward III Scottish estates to a value of £2,000, which included "the town, castle and county of Berwick".[5] However, Balliol's support was limited, and within six months it had collapsed. He was ambushed at Annan a few months after his coronation by supporters of David II. Balliol fled to England half-dressed and riding bareback and appealed to Edward III for assistance.[8][9] Edward III dropped all pretence of neutrality, recognised Balliol as King of Scotland and made ready for war.[10]
Prelude
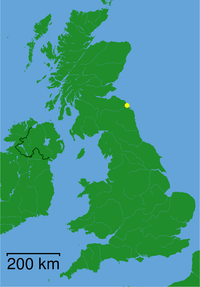
Berwick-upon-Tweed occupied a strategic position on the Anglo-Scottish border, astride the main invasion and trade route in either direction. It was the "gateway from Scotland to the English eastern march".[11] Berwick was a prosperous town; according to William Edington, a bishop and chancellor of England, Berwick was "so populous and of such commercial importance that it might rightly be called another Alexandria, whose riches were the sea and the water its walls".[12] During centuries of war between the two nations its strategic value and relative wealth led to a succession of raids, sieges and takeovers.[13] Pitched battles were uncommon, as the Scots preferred guerrilla tactics and border raiding into England.[14] Berwick had been sold to the Scots by Richard I of England 140 years before in order to raise funds for his crusade.[15] It was captured and sacked by Edward I in 1296, the first significant action of the First War of Scottish Independence. Twenty-two years later it was retaken by treachery by Robert the Bruce, thus expelling the last English garrison from Scottish soil.[16] King Edward II of England (r. 1328–1350) attempted to recapture it in 1319 but abandoned the siege after a Scottish army bypassed him and advanced on York, where his queen was staying, devastated Yorkshire and defeated a hastily assembled army under the Archbishop of York at Myrton.[17]
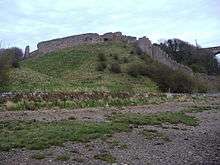
At the beginning of 1333, the atmosphere on the border was tense.[18] The English parliament met at York and debated the situation for five days without conclusion. Edward III promised to discuss the matter with both Pope John XXII and King Philip VI of France (r. 1327–1377). Possibly in an attempt to forestall the Scots from taking the initiative,[19] England began openly preparing for war while announcing that it was Scotland who was preparing to invade England.[20] In Scotland Archibald Douglas was Guardian of the Realm for the underage David. He was the brother of the "Good" Sir James Douglas, a hero of the First War of Independence. He made arrangements for the defence of Berwick-upon-Tweed and weapons and supplies were gathered. Patrick Dunbar, Earl of March was the Keeper of Berwick Castle. He had recently spent nearly £200 on its defences. Alexander Seton was responsible for the defence of the town.[21] The old wooden palisade had been replaced by stone walls by Edward I, which were considerably improved by the Scots in 1318.[22] They stretched for 2 miles (3.2 km) and were up to 3 feet 4 inches (1 m) thick and 22 feet (6.7 m) high, protected by a number of towers, up to 60 feet (18 m) tall.[23][note 1] The wall on the south west was further protected by the River Tweed, which was crossed by a stone bridge and entered the town at a stone gatehouse. Berwick Castle was to the west of the town, separated by a broad moat, making the town and castle independent strongholds.[22] Berwick, well-defended and well-stocked with provisions and materiel, was expected to be able to withstand a long siege.[18][25] Meanwhile, Edward III was finalising preparations for the upcoming campaign by organising the sea transports which would be required for revictualling his and Balliol's armies.[26]
Siege
Balliol crossed the border on 10 March in command of the disinherited Scottish lords and a number of English magnates. Edward III made grants of over £1,000 to the nobles accompanying him on the campaign, and a similar amount was paid to Balliol's companions. Balliol received over £700 personally.[20] He marched through Roxburghshire, burning and pillaging as he went and capturing Oxnam. He reached Berwick in late March and cut it off by land. Edward III's navy had already isolated it by sea. Balliol and the nobles accompanying him are said to have sworn not to withdraw until Berwick had fallen.[27] Edward arrived at Berwick in person with the main English army on 9 May,[28] after leaving Queen Philippa at Bamburgh Castle 15 miles (24 km) south of Berwick. By this time Balliol had been at Berwick for some six weeks and had been able to place the town under close siege. Trenches had been dug, the water supply cut, and all communication with the hinterland ended.[18] A scorched-earth policy was applied to the surrounding area. This ensured that there was minimal food or sustenance available in the region with which to resupply the town even if the opportunity presented itself to do so. The pillaging of the countryside also added to the English army's supplies.[29] The English army included troops raised in the Welsh Marches and the Midlands, as well as levies from the north which had already mustered on account of the earlier Scottish raids. By the end of the month, this force had been augmented by noble retinues, a muster at Newcastle, and the assembly of the English fleet in the River Tyne.[26] Accompanying the army were a variety of craftsmen tasked to build siege engines. 37 masons prepared nearly 700 stone missiles for the siege, which were transported by sea from Hull on 16 May.[30][31]

Douglas had assembled a large army north of the border, but his inactivity contrasts sharply with Robert Bruce's swift response to the siege of 1319. Douglas seems to have spent the time assembling ever more troops, rather than using those he already had in diversionary raids.[18] Minor raiding into Cumberland took place under Sir Archibald Douglas, but this was insufficient to draw English forces away from the siege. They did, however, have the effect of enabling Edward III to justify his invasion retroactively, and his propaganda took full advantage.[25][note 2]
With the arrival of Edward III, the assault on Berwick began in earnest. Commanding the attack was the Flemish soldier-merchant John Crabbe, who had successfully defended Berwick from the English in 1319, but had been captured by them in 1332 and was now using his skills and knowledge of Berwick's defences on England's behalf. Catapults and trebuchets were used to great effect.[18] In late June, in an attempt to repel a naval assault, the defenders launched brushwood soaked in tar which they set alight in order to fire the English ships. This accidentally set the town itself on fire and much of it was destroyed. William Seton, son of the governor, drowned during this episode[33]. The English used some form of firearms during the siege and Berwick was probably "the first town in the British Isles to be bombarded by cannon".[34] Seton carried out a spirited defence; but by the end of June, under repeated attack by land and sea, the town was in a state of ruin and the garrison was close to exhaustion.[18][30][note 3] It is believed that a desire for a respite from the plunging fire of the two large counterweight trebuchets used by the English was a significant factor in Seton requesting a short truce from King Edward.[31] This was granted, but only on the condition that he surrender if not relieved by 11 July. Seton's son, Thomas, who had been captured while leading a sortie by the garrison, was to be a hostage to the agreement,[18][37] along with eleven others.[36]
Relief force
Douglas was now faced with a situation similar to that which the English had faced before Bannockburn:[18][37] "If Berwick were to be saved immediate action on the part of the Scottish guardian was unavoidable".[38] As a matter of national pride he would have to come to the relief of Berwick, just as Edward II had come to the relief of Stirling Castle in 1314. The army the Guardian had spent so much time gathering was now compelled to take to the field, with all initiative lost.[18][37] The Scottish army is estimated to have been some 13,000 strong, significantly larger than the English total of approximately 9,000. Douglas entered England on 11 July, the last day of Seton's truce. He advanced eastwards to the little port of Tweedmouth, which was destroyed in sight of the English army: Edward III did not move.[18]
Sir William Keith, Sir Alexander Gray and Sir William Prenderguest, leading a force of around 200 Scottish cavalry[38] managed with some difficulty to make their way across the ruins of the bridge to the northern bank of the Tweed and then force their way through to the town. Douglas chose to consider this as a technical relief and sent messages to Edward III calling on him to depart.[18] This was accompanied with the threat that if he failed to do so the Scots army would continue south and devastate England. In response, the Scots were challenged to do their worst.[39] Berwick's defenders argued that Keith's 200 horsemen had constituted the required relief according to the truce and that they therefore no longer had to surrender. King Edward III, on the other hand, stated that this was not the case: they had to be relieved directly from Scotland – literally from the direction of Scotland – whereas Keith, Gray and Prenderguest had approached Berwick from the direction of England.[40] As Berwick had not surrendered by the agreed date, and the defenders dug their heels in over the question of the supposed relief, Edward III considered this to be a breach of the agreement. A gallows was constructed directly outside the town walls and, as the highest-ranking hostage, Thomas Seton was hanged while his parents watched.[41] Edward III issued instructions that for every day the town failed to surrender, another two hostages should be hanged.[40][note 4]
Edward III's determination had the desired effect. To save the lives of those who remained Keith, who had taken over the command of the town from Seton, concluded a fresh truce, promising to surrender if not relieved by Tuesday 20 July.[18][37] The truce, in the form of two indentures, one between Edward III and the town of Berwick and the other between Edward III and March, the Keeper of Berwick Castle, defined a myriad of circumstances in which relief would or would not occur. The terms of surrender were not unconditional; the town was to be returned to English soil and law, but any inhabitant was to be allowed to leave, with goods and chattels, under a safe conduct from Edward III. Under the same protection, all members of the garrison would be given free passage and William Keith was to be allowed to immediately leave Berwick, travel to wherever the Guardian of Scotland happened to be, advise him of the change of circumstances, and return safely to Berwick.[42]
Douglas marched south to Bamburgh, perhaps hoping for a repeat of the events of 1319, when Edward II had abandoned a previous siege of Berwick after a Scottish army had advanced on York where his queen was staying and devastated Yorkshire. However, whatever concerns that Edward III had for his queen he knew that Bamburgh was strong and could easily withstand a siege. The Scots did not have the time to construct the kind of equipment that would be necessary to take the fortress by assault. The Scots devastated the countryside, but Edward III ignored this.[18] He positioned the English army on Halidon Hill, a small rise of some 600 feet (180 m), 2 miles (3.2 km) to the north-west of Berwick, which gives an excellent view of the town and surrounding countryside. From this vantage point, he was able to dominate the approaches to the beleaguered port. Receiving Keith's news, Douglas "had little choice but to re-cross the Tweed and face Edward's army".[42] Crossing the Tweed to the west of the English position, the Scottish army reached the town of Duns on 18 July. On the following day it approached Halidon Hill from the north-west, ready to give battle on ground chosen by Edward III. It was a catastrophic decision.[18] King Edward III, on the other hand, not only had to face a Scottish army to the front, but simultaneously guard his flank from a potential attack by the garrison of Berwick.[43]
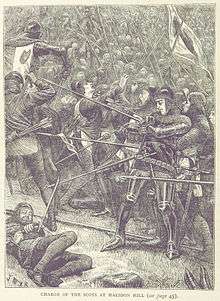
In order to engage the English, the Scots would have to advance downhill, cross a large area of marshy ground, and then climb up the northern slope of Halidon Hill. Although the Scots spearmen had proved their worth against cavalry at Stirling Bridge and Bannockburn, the battles of Dupplin Moor and Falkirk had shown how vulnerable they were to arrows. The prudent course of action would have been to withdraw and wait for a better opportunity to fight, but this would mean the automatic loss of Berwick.[18]
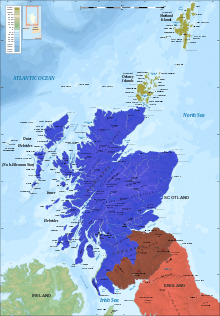
*Brown: Ceded Scottish territory
*Blue: Scottish territory not claimed by England
The two armies encountered each other's scouts around midday on 19 July.[45] Douglas ordered an attack. The Lanercost Chronicle reports:
. . . the Scots who marched in the front were so wounded in the face and blinded by the multitude of English arrows that they could not help themselves, and soon began to turn their faces away from the blows of the arrows and fall.[46]
Casualties were heavy, with the lower reaches of the hill littered with dead and wounded. The survivors continued upwards, through the arrows "as thick as motes in a sun beam"[47] and on to the waiting spears. The Scottish army broke. The camp followers made off with the horses and the fleeing Scots were pursued by the mounted English knights. Their casualties were numbered in thousands, including Douglas and five earls dead on the field.[18] Any Scots who surrendered were put to death on Edward's orders, and some drowned as they fled into the sea.[48] English casualties were reported as 14,[49][18] with some chronicles giving a lower figure of 7.[50] The 100 or so Scots who were taken prisoner were beheaded the next morning, 20 July.[50] This was the date that Berwick's second truce expired. Having witnessed the battle the previous day and the executions just out of bow shot that morning, Sir William Keith and the Earl of March capitulated and surrendered the town and the castle respectively, on the terms agreed earlier in the indentures.[18][51]
Aftermath
Immediately after the town's capitulation, Edward III appointed Henry de Percy, 2nd Baron Percy as Constable, with Sir Thomas Grey of Heaton, father of the chronicler Thomas Grey, as his deputy.[52] Considering his part done and short of money he then left for the south. On 19 June 1344 Balliol did homage to Edward for Scotland, after formally ceding to England the eight counties of south-east Scotland.[44] Balliol ruled a truncated Scotland from Perth, from where he put down the remaining resistance. Sir Alexander Seton in turn did homage to Balliol.[53] Balliol was deposed again in 1334, and restored again in 1335, and finally deposed in 1336 by those loyal to David II. Berwick was to remain the military and political headquarters of the English on the border[54] until 1461 when it was returned to the Scottish by King Henry VI.[55] It "remained a bone of contention throughout the Middle Ages"[11] until its final re-capture by Richard, Duke of Gloucester in 1482.[11]
See also
Notes
- ↑ The surviving town walls are of a later date and are considerably smaller than those of 1333.[24]
- ↑ That Edward III's propaganda was a success is reflected in how contemporary English chronicles portrayed his invasion as being in response to Scottish incursions: propter incursiones Scotorum cum incendijs ac multas alias illatas iniurias regno Anglie ("on account of the incursions of the Scots and the many injuries so inflicted on the realm of England").[32]
- ↑ The Brut Chronicle remarks that the English "made meny assautes with gonnes and with othere engynes to the toune, wherwith thai destroiede meny a fair hous; and cherches also were beten adoune unto the erthe, with gret stones, and spitouse comyng out of gonnes and of othere gynnes."[35] Later petitions from the town to the King also mention churches and houses having been "cast down" during the siege.[36]
- ↑ It has been suggested that Alexander Seton had little to lose: he had "already lost one son fighting against Balliol in 1332 and a second in the defence of the town [so] Sir Alexander Seton did not shrink from sacrificing a third".[40]
- ↑ Based on Sumption[44]
Footnotes
- ↑ Grant 2014, p. 190.
- ↑ Barrow 1965, pp. 99–100.
- ↑ Creighton 1886, p. 219.
- ↑ Weir 2006, p. 314.
- 1 2 3 Nicholson 1961, p. 19.
- ↑ Sumption 1990, pp. 124,126.
- ↑ Rodwell 2013, p. 25.
- ↑ Wyntourn 1907, p. 395.
- ↑ Maxwell 1913, pp. 274–275.
- ↑ Sumption 1990, p. 12.
- 1 2 3 Rogers 2010, p. 144.
- ↑ Robson 2007, p. 234.
- ↑ MacDonald Fraser 1971, p. 38.
- ↑ Prestwich 1988, p. 469.
- ↑ Geldard 2009, p. 58.
- ↑ Brown 2008, p. 151.
- ↑ Foard 2003, p. 3.
- 1 2 3 4 5 6 7 8 9 10 11 12 13 14 15 16 17 18 Sumption 1990, p. 130.
- ↑ McKisack 1991, p. 117.
- 1 2 Nicholson 1961, p. 21.
- ↑ Nicholson 1961, pp. 22–23.
- 1 2 Blackenstall 2010, p. 11.
- ↑ Forster 1907, p. 97.
- ↑ Berwick Elizabethan Town Walls 2018.
- 1 2 Nicholson 1961, p. 23.
- 1 2 Nicholson 1961, p. 24.
- ↑ Nicholson 1961, p. 22.
- ↑ Maxwell 1913, pp. 278–279.
- ↑ Nicholson 1961, p. 26.
- 1 2 Nicholson 1961, p. 27.
- 1 2 Corfis & Wolfe 1999, p. 267.
- ↑ Nicholson 1961, p. 24. n 2.
- ↑ Seton 1939, pp. 91, 95.
- ↑ Nicholson 1961, pp. 26–28.
- ↑ de Brie 1960, p. 281.
- 1 2 Nicholson 1961, p. 28.
- 1 2 3 4 Seton 1939, p. 90.
- 1 2 Nicholson 1961, p. 29.
- ↑ Nicholson 1961, p. 30.
- 1 2 3 Nicholson 1961, p. 31.
- ↑ Seton 1939, p. 91.
- 1 2 Nicholson 1961, pp. 32–33.
- ↑ Nicholson 1961, p. 35.
- 1 2 Sumption 1990, p. 131.
- ↑ Nicholson 1961, p. 37.
- ↑ Maxwell 1913, p. 279.
- ↑ Nicholson 1961, p. 39.
- ↑ Nicholson 1961, p. 41.
- ↑ Strickland & Hardy 2011, p. 188.
- 1 2 Nicholson 1961, p. 42.
- ↑ Seton 1939, p. 93.
- ↑ Maxwell 1913, pp. 282–283.
- ↑ Seton 1939, pp. 93–94.
- ↑ Nicholson 1974, p. 129.
- ↑ Maurer 2003, p. 204.
References
- Barrow, G. W. S. (1965). Robert Bruce and the Community of the Realm of Scotland. London, UK: Eyre and Spottiswoode. OCLC 655056131.
- Tourism, Northumberland. "Berwick Elizabethan Town Walls | Historic sites in Berwick-upon-Tweed | Visit Northumberland". www.visitnorthumberland.com. Retrieved 2018-09-09.
- Blackenstall, Stan (2010). Coastal Castles of Northumberland. Stroud: Amberley. ISBN 9781445601960.
- Brown, Michael (2008). Bannockburn. Edinburgh: Edinburgh University Press. ISBN 978-0-7486-3333-3.
- Corfis, Ivy; Wolfe, Michael (1999). The Medieval City Under Siege. Woodbridge, Suffolk, UK; Rochester, NY: Boydell Press. ISBN 9780851157566.
- Creighton, Mandell (1886). Epochs of English History: A Complete Edition in One Volume. London: Longmans, Green & Co. OCLC 317890455. Retrieved 25 March 2010.
- de Brie, W. W. (1960). The Brut ; Or, The Chronicles of England. Early English Text Society (repr. ed.). Oxford: Oxford University Press. OCLC 15591643.
- Foard, Glenn (3 July 2003). "Myton Battle and Campaign" (PDF). The UK Battlefields Resource Centre. Retrieved 2 September 2018.
- Forster, R. H. (1907). "The Walls of Berwick-upon-Tweed". Journal of the British Archaeological Association. 13: 89–104. ISSN 0068-1288.
- Geldard, Ed (2009). Northumberland Strongholds. London: Frances Lincoln. ISBN 978-0-7112-2985-3.
- Grant, R.R. (2014). 1001 Battles. London: Cassell. ISBN 978-1-84403-696-7.
- MacDonald Fraser, George (1971). The Steel Bonnets. London: Collins Harvil. ISBN 978-0-00272-746-4.
- Maurer, H. E. (2003). Margaret of Anjou: Queenship and Power in Late Medieval England. Woodbridge: Boydell Press. ISBN 978-0-85115-927-0.
- Maxwell, Herbert (1913). The Chronicle of Lanercost, 1272-1346. Glasgow: J. Maclehose. OCLC 27639133.
- Nicholson, R. (1961). "The Siege of Berwick, 1333". The Scottish Historical Review. 40: 19–42. OCLC 664601468.
- McKisack, M. (1991). The Fourteenth Century (repr. ed.). Oxford: Oxford University Press. ISBN 978-0-19285-250-2.
- Nicholson, R. (1974). Scotland: The Later Middle Ages. University of Edinburgh History of Scotland. Edinburgh: Oliver and Boyd. ISBN 978-0-05002-038-8.
- Prestwich, M. (1988). Edward I. Yale Monarchs series. Berkeley: University of California Press. ISBN 978-0-52006-266-5.
- Robson, Eric (2007). The Border Line. London: Frances Lincoln Publishers. ISBN 978-0-71122-716-3.
- Rogers, C. J. (2010). The Oxford Encyclopedia of Medieval Warfare and Military Technology. I. Oxford: Oxford University Press. ISBN 978-0-19533-403-6.
- Rodwell, W. (2013). The Coronation Chair and Stone of Scone: History, Archaeology and Conservation. Oxford: Oxbow Books. ISBN 978-1-78297-153-5.
- Seton, Bruce Gordon (1939). The House of Seton: A Study of Lost Causes, Vol. I (PDF). Edinburgh: Lindsay and MacLeod. OCLC 54562178.
- Strickland, Matthew; Hardy, Robert (2011). The Great Warbow: From Hastings to the Mary Rose. Somerset: J. H. Haynes & Co. ISBN 978-0-85733-090-1.
- Sumption, Jonathan (1990). Trial by Battle. London: Faber and Faber. ISBN 978-0-57120-095-5.
- Weir, Alison (2006). Queen Isabella: Treachery, Adultery, and Murder in Medieval England. New York: Random House. ISBN 978-0-34545-320-4. Retrieved 25 March 2010.
- Wyntourn, A. (1907). Amours, F. J., ed. The Original Chronicle of Scotland. II. Edinburgh: Blackwood. OCLC 61938371.
Further reading, primary sources
- Anonimalle Chronicle, 1333–81, ed. V. H. Galbraith, 1927.
- Bower, Walter, Scotichronicon, ed. D. E. R. Watt, 1987–96.
- Brut, or the Chronicles of England, ed. F. W. D. Brie, 1906.
- Capgrave, John, The Book of the Illustrious Henries, ed. F. Hingeston, 1858.
- Calendar of Documents Relating to Scotland, ed. J. Bain, 1857.
- Fordun, John, Chronicles of the Scottish Nation, ed. W. F. Skene, 1872.
- Gray, Thomas, Scalicronica, ed. H. Maxwell, 1913.
Further reading, modern sources
- Ormrod, W. M. (2012). Edward III. (Yale Medieval Monarchs). Padstow: Yale University Press. ISBN 978-0-30011-910-7.