< RAC Attack - Oracle Cluster Database at Home < RAC Attack 12c
Install Linux (e)
Prev: Prepare Host
Install Linux (e)
- Create VirtualBox VM
- VirtualBox VM Settings
- OS Installation
- Linux Post Installation
- Install VirtualBox Addons
- Configure Bind DNS
- Prepare Linux for Oracle
Next: Create Cluster
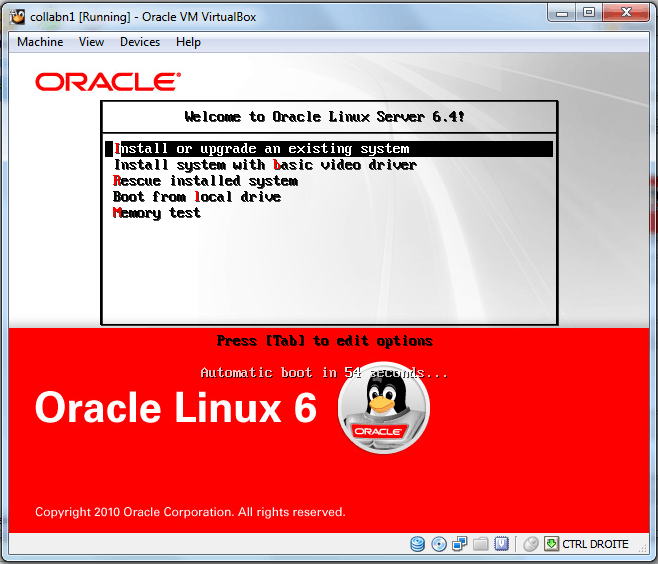
- Click on Start to boot the virtual machine. If asked to select a start-up disk, choose Oracle_Linux_6_64.iso and click Start again.
- The Oracle Linux install screen will automatically come up. Hit enter to begin the install.
- Skip the CD testing by pressing the right arrow key and press enter.
- From this point on you can use the mouse to navigate. To unlock the mouse and keyboard from the VM, hit the right Ctrl key. Click Next.
- Leave English (English) selected and click Next.
- Leave U.S. English selected and click Next (unless you have another preferred keyboard layout).
- Leave Basic Storage Devices selected and click Next.
- Click Yes, discard any data for the warning box stating The storage device below may contain data.
- In the hostname field, type collabn1.racattack.
- Click Configure Network in the bottom left corner.
- Highlight System eth0 and click the Edit... button.
- Click the Connect automatically checkbox.
- Click the IPv4 Settings tab.
- Click the Method: dropdown and select Manual.
- Click Add and type 192.168.78.51 for the address.
- Leave Netmask at 24.
- In the DNS servers: box, type 192.168.78.51, 192.168.78.52.
- In the Search domains: box, type racattack.
- Click the Apply button.
- Highlight System eth1 and click the Edit... button.
- Click the Connect automatically checkbox.
- Click the IPv4 Settings tab.
- Click the Method: dropdown and select Manual.
- Click Add and type 172.16.100.51.
- Change Netmask to 24.
- Click the Apply button.
- Highlight System eth2 and click the Edit... button.
- Click the Connect automatically checkbox.
- Click the IPv4 Settings tab.
- Click the Method: dropdown and select Automatic (DHCP) addresses only.
- Click the Apply button.
- Click Close to close the network configuration menu and click Next.
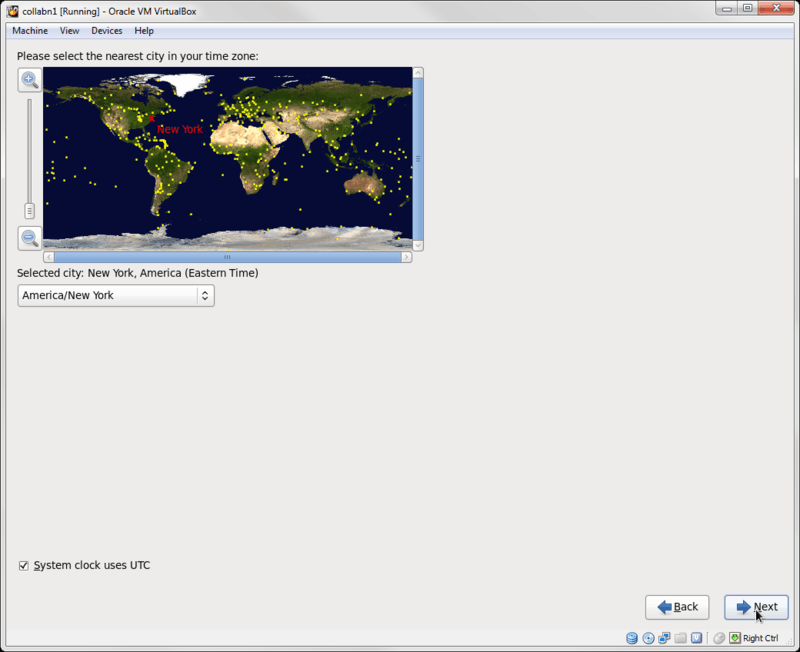
- Leave the timezone settings as they are and click Next.
- Enter the Root Password as racattack and click Next.
- Click Use Anyway when warned about the weak password.
- Click Use All Space for the installation type and click Next.
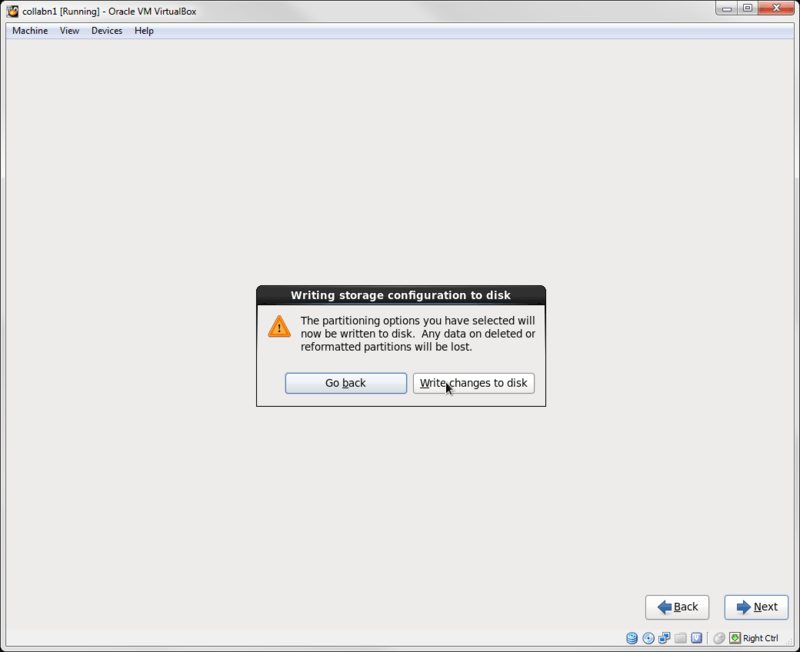
- Click Write changes to disk when warned about Writing storage configuration to disk.
- Leave Basic Server as the default installation type. Click Next.
- The operating system will take a while to install.
- When the installation is complete, click Reboot.
-
The reboot no longer shows messages, just a progress bar.
- You can see the progress by hitting F8 while the server is booting.
- The system should boot to a command line login prompt.


This article is issued from
Wikibooks.
The text is licensed under Creative
Commons - Attribution - Sharealike.
Additional terms may apply for the media files.