< RAC Attack - Oracle Cluster Database at Home < RAC Attack 12c
Install Linux (e)
Prev: Prepare Host
Install Linux (e)
- Create VirtualBox VM
- VirtualBox VM Settings
- OS Installation
- Linux Post Installation
- Install VirtualBox Addons
- Configure Bind DNS
- Prepare Linux for Oracle
Next: Create Cluster
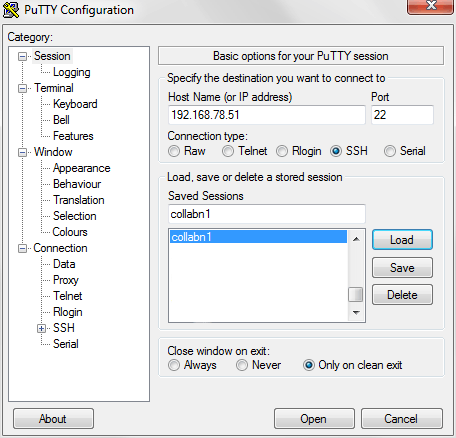
- To connect to the new created virtual machine, create a connection in Putty for the new VM called collabn1 with the IP Address of 192.168.78.51.
- Optionally, create another connection for collabn2 with the IP Address of 192.168.78.52 that will be created later as a clone of collabn1.
-
Open the collabn1 connection by clicking Open.
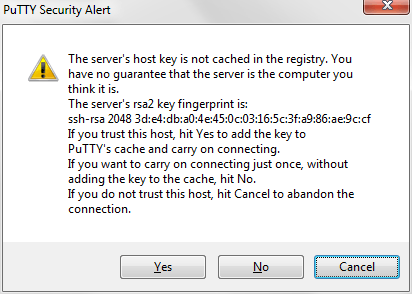
- Click Yes on the Security Alert dialog box.
- Enter root at the login as: prompt and racattack at the password: prompt.
- Turn off and disable the firewall IPTables.
- Disable SELinux. Open the config file and change the SELINUX variable from enforcing to disabled. [root@collabn1 ~]# vim /etc/selinux/config # This file controls the state of SELinux on the system. # SELINUX= can take one of these three values: # enforcing - SELinux security policy is enforced. # permissive - SELinux prints warnings instead of enforcing. # disabled - No SELinux policy is loaded. SELINUX=disabled # SELINUXTYPE= can take one of these two values: # targeted - Targeted processes are protected, # mls - Multi Level Security protection. SELINUXTYPE=targeted
- Verify that all the network interfaces are up. [root@collabn1 ~]# ip l 1: lo: <LOOPBACK,UP,LOWER_UP> mtu 16436 qdisc noqueue state UNKNOWN link/loopback 00:00:00:00:00:00 brd 00:00:00:00:00:00 2: eth0: <BROADCAST,MULTICAST,UP,LOWER_UP> mtu 1500 qdisc pfifo_fast state UP qlen 1000 link/ether 08:00:27:4f:8a:0b brd ff:ff:ff:ff:ff:ff 3: eth1: <BROADCAST,MULTICAST,UP,LOWER_UP> mtu 1500 qdisc pfifo_fast state UP qlen 1000 link/ether 08:00:27:99:7e:95 brd ff:ff:ff:ff:ff:ff 4: eth2: <BROADCAST,MULTICAST,UP,LOWER_UP> mtu 1500 qdisc pfifo_fast state UP qlen 1000 link/ether 08:00:27:e2:63:7f brd ff:ff:ff:ff:ff:ff
- Add the DVD as repository. Go to the VBOX menu => Storage => Add the DVD device to the server Device -> CD/DVD Devices -> Oracle_Linux_6_4.iso
- Install the database preinstall package oracle-rdbms-server-11gR2-preinstall. This package installs all the package requirements for Oracle 11g (but will work also for 12c), configures kernel parameters, creates oracle user and groups and sets the user limits. [root@collabn1 ~]# yum install -y oracle-rdbms-server-11gR2-preinstall .... Transaction Summary ======================================================================== Install 21 Package(s) Upgrade 2 Package(s) Total download size: 43 M .... Installed: oracle-rdbms-server-11gR2-preinstall.x86_64 0:1.0-8.el6 .... Complete!
- Install additional RPMs that will be used to install and administer the servers. [root@collabn1 ~]# rpm -ivh /media/cdrom/Packages/kernel-uek-devel-$(uname -r).rpm [root@collabn1 ~]# yum install -y tigervnc-server.x86_64 xclock man parted.x86_64 unzip.x86_64 xterm lsof bind xorg-x11-twm oracleasm-support Install 12 Package(s) .... Total download size: 22 M .... Complete!
- Uninstall NTP. [root@collabn1 ~]# yum remove -y ntp .... Removed: ntp.x86_64 0:4.2.4p8-3.el6 .... Complete! [root@collabn1 ~]#
- Unmount the DVD before continuing with the next steps. [root@collabn1 ~]# umount /media/cdrom

Run the following commands:
mkdir /media/cdrom mount /dev/cdrom /media/cdrom/ cd /etc/yum.repos.d mkdir /tmp/old.yum.repos.d mv * /tmp/old.yum.repos.d cat <<EOF > ol64.repo [OL64] name=Oracle Linux 6.4 x86_64 baseurl=file:///media//cdrom gpgkey=file:///etc/pki/rpm-gpg/RPM-GPG-KEY gpgcheck=1 enabled=1 EOF
This article is issued from
Wikibooks.
The text is licensed under Creative
Commons - Attribution - Sharealike.
Additional terms may apply for the media files.