Capitulation of Diksmuide
The Capitulation of Diksmuide, or Dixmuide, then in the Spanish Netherlands, took place from 26 to 28 July 1695, during the 1689 to 1697 Nine Years' War. An Allied garrison of around 4,000 men surrendered to a superior French force.

After six years of war, both sides were financially exhausted; the focus of the 1695 campaign was the Allied siege of Namur, captured by the French in 1692. By attacking garrisons like Diksmuide, the French commander sought to prevent the Allies resupplying their army outside Namur.
Its capitulation after only two days resulted in the court martial of garrison commander Major General Ellenberg, and other senior officers. While the cause remains disputed, Ellenberg was executed, and a number of officers dismissed.
Namur surrendered to the Allies in September; although fighting did not formally end until 1697, this was the last major event of the war. After the Treaty of Ryswick, the French withdrew from Diksmuide.
Background
By 1694, the war in Flanders was at a stalemate. France had failed to force the Dutch Republic out of the war, despite victories at Steinkirk and Landen, and the capture of fortresses like Namur, Mons, Huy and Charleroi. The enormous costs exhausted the French economy, while crop failures in 1693 and 1694 caused widespread famine in France and Northern Italy; after 1693, Louis XIV assumed a largely defensive posture in Flanders.[1]
Under William's leadership, the Alliance held together through four years of war, with losses that were damaging, but not critical. By 1694, they held a numerical advantage in Flanders, and had recaptured towns like Huy and Diksmuide. However, they were also struggling with the economic and social costs of the war. The 1690s marked the lowest point of the so-called Little Ice Age, a period of cold and wet weather affecting Europe in the second half of the 17th century. Famine in France and Italy was mirrored elsewhere, including Spain and Scotland, where the harvest failed in 1695, 1696, 1698 and 1699 and an estimated 5-15% of the population starved to death.[2]
Most campaigns in this theatre took place in the Spanish Netherlands, a compact area 160 kilometres wide, the highest point only 100 metres above sea level, and dominated by canals and rivers. In the 17th century, goods and supplies were largely transported by water and the war was fought for control of rivers such as the Lys, Sambre and Meuse.[3]
Namur's position on the intersection of the Sambre and Meuse rivers made it vital to defending the Netherlands against French invasion, and its recapture became the main Allied objective for 1695. Due to the limited number of crossing points, even Deinze, little more than a large village, but the site of a bridge across the Lys, was of greater significance than size indicates.[4]
In April 1695, Louis ordered Boufflers to build entrenchments between the Scheldt and Lys, from Coutrai or Kortrijk to Avelgem.[5] William marched on these in June, with the bulk of the Allied forces, but secretly detached Frederick of Prussia to Namur. Once Frederick was in place on 2 July, William joined him; the Allies were now split into a besieging force of 58,000 at Namur and a field army of 102,000 under Prince Vaudémont to cover Villeroi.[6]
Siege

Vaudémont's task was to keep his army between Villeroy and Namur; Villeroy tried to tempt him out of position by attacking Allied-held towns like Knokke and Beselare, now Zonnebeke, but he refused to be drawn. It was accepted even places like Namur would fall given enough time, so the garrisons in Diksmuide and Deinze were expected to delay Villeroy for as long as possible.[7]
Diksmuide sits on the Yser River, which begins in France, then runs through the town before entering the North Sea at Nieuwpoort. French defences followed the Yser via Ypres and Comines to Espierres and hardly changed between 1689-1694; its enduring strategic significance led to this line being fought over in both 1914 and 1940, while Diksmuide itself was attacked by the Germans in October 1914.[8]
The garrison commander at Diksmuide was Major-General Ellenberg, an experienced Dane who served William in Ireland and elsewhere. The town was taken by the Allies in 1694, and although the defences were in a poor state, it was held by a strong garrison of eight battalions of infantry plus several squadrons from Lloyd's Dragoons.[9]
Vaudémont's covering army had been reduced by the need to bolster the assault forces at Namur; by stripping garrisons from Ypres and Menin, Villeroi achieved local superiority of 90,000 to 37,000. However, an attack on 14 July failed to break the Allied line; Vaudémont was able to conduct an orderly retreat, using the bridge across the Lys at Deinze.[10]
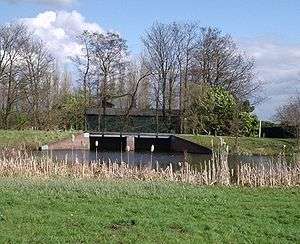
Shortly after this, a force under the Comte de Montal appeared before Diksmuide; Ellenberg opened the sluice gates, while the Allied commander at Nieuwpoort broke the dykes, flooding the area around the town. This meant Diksmuide could only be assaulted from the east and while this was the weakest part of the defences, the position was considered 'serious but not desperate.'[11]
Surrender
On 26 July, Montal began firing on the town; after only two days, Ellenberg held a council with his senior officers, and proposed they surrender the town, arguing further resistance was pointless.[12] Eight officers signed the articles of surrender, including Colonel Graham, commander of a regiment in the elite Scots Brigade; the only exception was Major Robert Duncanson of Lorne's.[13] [lower-alpha 2] On 29 July, Colonel O'Farrell, commander of the garrison at Deinze, also capitulated to a French force under Feuquières without a shot being fired.[14]
By now, siege warfare was an exact art, the rules of which were so well understood wagering on the outcome and duration of a siege became a popular craze; in 1691, the then enormous sum of £200,000 was alleged to have been bet on the outcome of the Siege of Limerick.[15] Professional honour demanded a defence, but so long as they surrendered once 'a practicable breach' had been made, garrisons were given generous terms.[16] Contemporaries felt Diksmuide should have been held for at least eight days; its rapid capitulation was extremely unusual, especially as Ellenberg opened negotiations with the besiegers.[13]
The terms of surrender meant the garrison became prisoners, rather than being allowed to keep their weapons, and free passage to Allied lines.[17] One suggestion is that Ellenberg was a capable and reliable subordinate who could not exercise command on his own.[18] This seems unlikely for an experienced senior officer, since taking or holding fortifications was the dominant form of warfare in this period.[19]
Graham and O'Farrell had served in the Scots Brigade since the 1670s and accompanied William to England in 1688; Deinze was held by O'Farrell's 'Fusiliers,' a designation reserved for elite units and fought at Walcourt, Steinkirk and Landen.[20] While Deinze was simply a fortified village, William was furious neither of the garrisons had 'done their duty.'[14] In his Diary entry for 8 December 1695, Constantijn Huygens, William's Secretary for Dutch affairs, suggests Ellenberg was bribed by the French.[21]
Aftermath
.jpg)
Desertion and ill-discipline among enlisted men were ongoing issues in this period, due to poor conditions and irregular payment of wages; a lapse of commitment among senior officers was a much more serious problem. Evidence presented at the court martial indicates both Ellenberg and O'Farrell simply took the wrong decisions, but the defection of a group of experienced senior officers possibly indicates a wider issue of war weariness, or low morale.[22]
Prisoners were normally exchanged as soon as possible, but the French refused William's demand in August for the return of the 6,000 - 7,000 troops captured at Diksmuide and Deinze, due to a dispute over the terms.[23]
All sides were short of manpower by this stage of the war; deserting to receive a signing-on bonus was common, particularly as these were paid immediately while wages were often months in arrears. Since the recruiters were paid a bounty for each enlistee, the financial benefits to the French officers involved were considerable.[24]
One suggestion is this was a factor in the surrender; nearly 3,000 of the prisoners were forced into French regiments, and sent to fight in Italy or Catalonia.[25] In retaliation, despite the garrison of Namur being allowed to surrender on terms, its commander Boufflers was not released until the remaining Allied prisoners were returned in September.[17]
After their release, Duncanson was promoted for refusing to sign the surrender; the others were tried by a court martial, held between 10 and 25 October, headed by Sir Henry Belasyse.[26] O'Farrell, Graham, and the others were either dismissed or sanctioned, but quickly reinstated; O'Farrell ended as a Major-General. Ellenberg was sentenced to death by beheading, and executed in Ghent on 30 November.[27]
Notes
- Dates are per the Gregorian rather than the Julian calendar used in Britain which was ten days behind.
- Walton mistakenly refers to him as Doncaster.
References
- Young 2004, p. 229.
- White 2011, pp. 542–543.
- Childs 1991, pp. 32–33.
- Childs 1991, p. 30.
- Lynn 1999, p. 247.
- Hume 1848, p. 609.
- Childs 2012, p. 159.
- Shelby 2018, pp. 200–201.
- Cannon 1846, p. 17.
- Childs 1991, pp. 276–277.
- Childs 1991, p. 295.
- Manning 2006, pp. 422–423.
- Walton 1894, p. 303.
- Childs 1991, p. 287.
- Manning 2006, pp. 413–414.
- Childs 2012, p. 160.
- Stapleton 2007.
- Bright 1836, p. 294.
- Childs 1991, p. 2.
- Cannon 1849, p. 5.
- Dekker 2013, p. 104.
- Childs 1991, p. 288.
- Childs 1991, p. 40.
- Manning 2006, pp. 326-332.
- Bright 1836, p. 295.
- Winn 2014, p. 680.
- Walton 1894, p. 304.
Sources
- Bright, James Pierce (1836). A History of England;Volume III (2016 ed.). Palala Press. ISBN 135856860X.CS1 maint: ref=harv (link)
- Cannon, Richard (1846). Historical Records of the Third, or the King's Own Regiment of Light Dragoons (2018 ed.). Forgotten Books. ISBN 1330442202.CS1 maint: ref=harv (link)
- Cannon, Richard (1849). Historical Record of the Twenty-First Regiment, or the Royal North British Fusiliers (2015 ed.). Sagwan Press. ISBN 1340166801.CS1 maint: ref=harv (link)
- Childs, John (2012). "Surrender and the Laws of War in Western Europe, c. 1660–1783". In Afflerbach, Holger; Strachan, Hew (eds.). How Fighting Ends: A History of Surrender. Oxford University Press. ISBN 9780199693627.
- Childs, John (1991). The Nine Years' War and the British Army, 1688-1697: The Operations in the Low Countries (2013 ed.). Manchester University Press. ISBN 0719089964.CS1 maint: ref=harv (link)
- Dekker, Rudolf M (2013). Family, Culture and Society in the Diary of Constantijn Huygens Jr, Secretary to Stadholder-King William of Orange. Brill. ISBN 978-9004250949.CS1 maint: ref=harv (link)
- Childs, John; The British Army of William III, 1689-1702 (Manchester University Press, 1990);
- Hume, David (1848). The History of England 1609-1714. p. 609.CS1 maint: ref=harv (link)
- Lynn, John (1999). The Wars of Louis XIV, 1667-1714 (Modern Wars In Perspective). Longman. ISBN 0582056292.CS1 maint: ref=harv (link)
- Manning, Roger (2006). An Apprenticeship in Arms: The Origins of the British Army 1585-1702. OUP. ISBN 0199261490.CS1 maint: ref=harv (link)
- Shelby, Karen (2018). Westfront Nieuwpoort; the collected memory of the Belgian Front in The Great War in Belgium and the Netherlands: Beyond Flanders Fields. Palgrave Macmillan. ISBN 978-3319731070.CS1 maint: ref=harv (link)
- Stapleton, John M (2007). "Prelude to Rijswijk: William III, Louis XIV, and the Strange Case of Marshal Boufflers". The Western Society of French History. 35. hdl:2027/spo.0642292.0035.006.CS1 maint: ref=harv (link)}
- Walton, Clifford (1894). History of the British Standing Army; 1660 to 1700 (2012 ed.). Nabu Press. ISBN 1149754761.CS1 maint: ref=harv (link)
- White, Ian (2011). Rural Settlement 1500-1770 in The Oxford Companion to Scottish History. OUP. ISBN 978-0199693054.CS1 maint: ref=harv (link)
- Winn, James Anderson (2014). Queen Anne; Patroness of Arts. OUP. ISBN 978-0199372195.CS1 maint: ref=harv (link)
- Young, William (2004). International Politics and Warfare in the Age of Louis XIV. iUniverse. ISBN 0595329926.CS1 maint: ref=harv (link)