Battle of Intombe
The Battle of Intombe (also Intombi or Intombi River Drift) was an action fought on 12 March 1879, between Zulu troops and British soldiers defending a supply convoy.
| Battle of Intombe | |||||||
|---|---|---|---|---|---|---|---|
| Part of the Anglo-Zulu War | |||||||
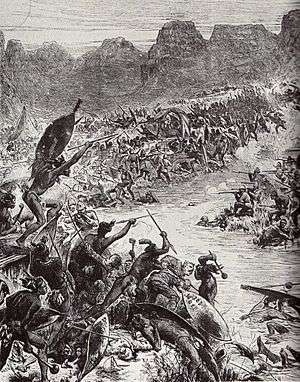 Battle of the Intombe river (Illustrated London News) | |||||||
| |||||||
| Belligerents | |||||||
|
| Zulu Kingdom | ||||||
| Commanders and leaders | |||||||
| David Moriarty † | Mbilini waMswati | ||||||
| Strength | |||||||
| 104 troops[1] | 500–800 | ||||||
| Casualties and losses | |||||||
| 62–80 killed[lower-alpha 1] | 30[3] | ||||||
Background
The village of Lüneberg, situated at 27°19′1″S 30°36′57″E in the disputed territories to the north of Zululand, had been laagered by its 120 white settlers after news arrived of the disaster at Isandlwana. In the hot weather, conditions in the laager were poor and diseases spread.[4][lower-alpha 2] The Zulus posed a serious threat to the area which was attacked on the night of 10/11 February. Fearing a repeat of the attack, the British dispatched four companies of the 80th Regiment of Foot (Major Charles Tucker) to garrison the village.[5]
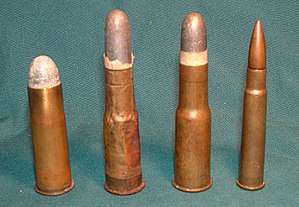
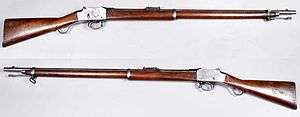
In late February 1879, a convoy of eighteen wagons carrying 90,000 rounds of Martini-Henry ammunition, mealies (coarse maize flour), tinned food, biscuits, a rocket battery and other weapons for the 80th Regiment, was sent from Lydenburg to supply the garrison and from the Transvaal border, escorted by D Company (Captain Anderson accompanied by Lieutenant Daubeney) of the 80th Regiment, from Lüneberg, which rendezvoused on the road from Derby on 1 March. By 5 March, the convoy was still 5 mi (8 km) short of Meyer's Drift, 8 mi (13 km) from Lüneberg, having been hampered by rains which caused the rivers to swell and the ground to soften.[6]
The wagons being shoved most of the way and fearing a Zulu attack, Tucker sent an order to Anderson to reach Lüneberg that night 'at any cost'. The company commander took this literally, abandoned the wagons and returned to Lüneberg. The Swazi pretender Mbilini waMswati and his Zulu irregulars were watching the convoy and as soon as the escort departed the wagons were attacked by looters, the drivers and voorloopers running for Derby. Soon afterwards, an advanced party from Hamu arrived and drove off the looters in turn, who came back as soon as Hamu's men departed; the raiding party lifted stores and forty oxen.[6]
Prelude
When Anderson reached Lüneberg without the supplies, Tucker was aghast and sent Captain David Moriarty and 106 men to bring in the convoy.[7] The escort had got six wagons to the far bank of the Intombe, 4 mi (6 km) from Lüneberg. Six other wagons were 3 mi (5 km) further back. By the time the Moriarty party reached Meyer's Drift the river had risen; a camp was established on the Lüneberg side and the men began to lash a raft of planks and barrels together with rope. A few men at a time were ferried across, except for a party of 35 commanded by Lieutenant Lindop. On the far side, Moriarty and the rest of the party went to recover the wagons but found that most had been emptied by the looters.[7]
It took until around noon on 11 March to get all of the wagons to the Derby side of the river, by when two wagons had been transported to the Lüneberg side. The Intombi had risen again and was flowing at 7 kn (8 mph; 13 km/h) and far too fast to cross. Moriarty ordered the wagons to be laagered for the night. The Moriarty party, out for five nights, soaked through and unable to cook food did not laager the wagons as tightly as possible, leaving gaps between them, in a "V" with the ends at the river. By the afternoon, the river had subsided, leaving the laager wide open at both end of the "V".[7][lower-alpha 3]
On 11 March, Tucker inspected the laager at the river but found it to be poorly constructed. He was not impressed with the inverted 'V' shape in which the wagons were arranged, with the base at the river. The amount of water in the river had diminished and there was a gap of several yards between river and base. There were other flaws in the arrangement; all in all, Tucker considered that it afforded 'no protection whatever in the event of the Zulus attacking in numbers'. The garrison was weakened by being divided by a river, with thirty of its number laagered on the other bank.[8]
Battle
On the night of 11 March 1879, two sentries were stationed 20 yd (18 m) from the laager but a50 yd (46 m) rise in front of them limited their range of vision. At 3:30 a.m. on 12 March, a shot was heard close to the camp. The men returned to their beds after Moriarty decided that it was of no consequence. An hour and a half later, a sentry on the far bank saw, through a clearing in the mist, a huge mass of Zulus advancing silently on the camp.
"He at once fired his rifle and gave the alarm", Tucker recorded. "The sentries on the other side did the same. Of course the men were up in a moment, some men sleeping under the wagons and some in the tents; but before the men were in their positions the Zulus had fired a volley, thrown down their guns ... and were around the wagons and on top of them, and even inside with the cattle, almost instantly. So quickly did they come, there was really no defence on the part of our men; it was simply each man fighting for his life, and in a few minutes all was over, our men being simply slaughtered.
— Tucker
Moriarty charged out of his tent with his revolver at the ready and killed three Zulus before being shot from the front and stabbed with an assegai from behind and was said to have shouted "Fire away boys, death or glory! I'm done" as he fell.[9] Few of his comrades managed to put up any resistance and many were cut down. Survivors fled into the river, still in spate, flowing at 7 kn (8 mph; 13 km/h) hoping to be washed to the far bank. The troops on the far bank provided as much covering fire as possible. Upon what survivors they could see reaching the Lüneberg side of the river, Lieutenant Henry Hollingworth Harward, Moriarty's second-in-command, gave the order to withdraw as several hundred Zulus were crossing the river. No sooner had he done this, when he grabbed the first horse he spotted and fled, abandoning his men.[9]
This survivors were left under the command of Sergeant Anthony Booth. For 3 mi (5 km), the Zulus pursued the group of around forty survivors. Whenever they drew closer, several of the bolder troops along with Booth, stopped to deliver a volley, which dispersed their pursuers. Four men who split up from the group to take a short cut to Lüneberg were overtaken and killed. The others made it to Raby's Farm, around 2 mi (3 km) from Lüneberg where the Zulus broke off their pursuit. Booth was later awarded the Victoria Cross.[10] The wagons at the laager were looted and all the ammunition and supplies were carried off by the Zulus or destroyed.[11]
Harward arrived at Lüneberg and told Tucker of what had happened; Tucker ordered all his mounted troops to accompany him to the camp and 150 infantry to follow. Tucker and his mounted force spotted 'dense masses' of Zulus leaving the scene of the battle as they approached. At the camp, they discovered one soldier who had made a miraculous escape by being carried down the river and then making his way back to the camp. He and two African wagon drivers were the only survivors.
Aftermath
Analysis
The result of Intombe was a far cry from that of Rorke's Drift. At Intombe a force of some 500 to 800 Zulu were able to overrun and defeat over 100 British regular infantry in laager in short order while at Rorke's Drift over 100 British regular infantry were able to stand off 3,000 to 4,000 Zulu from behind hastily-constructed but sturdy fortifications for nearly a day. Intombe demonstrated the vulnerability of the slow and awkward supply lines that the British army was utterly dependent on. If the Zulus continued to exploit this vulnerability any and all invading British columns could be halted or turned back.
Harward
Eight months after the incident, Harward was brought from England, under arrest, charged with "misbehaviour before the enemy and shamefully abandoning a party of the regiment under his command when attacked" and other lesser charges. Harward was acquitted, supposedly because he left to get reinforcements which, by their promptitude, prevented Harward's party from annihilation. Sir Garnet Wolseley was so appalled at the verdict that he added adverse comments to it, which were read to every regiment in the army. Harward resigned his commission in May 1880.[12]
Casualties
In 1988, Donald Morris wrote that the bodies of Captain Moriarty, Surgeon Cobbins, three conductors, fifteen African voorloopers and sixty troops were found in the encampment.[13] In 1995, John Lock wrote that there were only around fifty survivors out of the 150 men; for weeks afterwards, as the river rose and fell with the rains, corpses were found in the water and along the banks. Rifles, the 90,000 rounds of Martini-Henry ammunition and 225 lb (102 kg) of gunpowder were also lost.[14] In 1998, Morris wrote of eighty men killed, 62 of the dead being British soldiers along with three conductors and 15 African voorloopers.[15] In 2009, John Laband wrote that one officer and sixty men, a civilian surgeon, two wagon conductors and fifteen African drivers were killed; thirty Zulu dead were found on the banks of the Ntombe.[16] In 2012, Adrian Greaves wrote that the British and their local allies had suffered casualties of an officer, a doctor, 64 other ranks and fifteen Africans killed and twenty missing, presumed drowned.[17]
See also
Notes
- Morris gives 80 killed: 62 British soldiers, 3 conductors and 15 African voorloopers.[2]
- In the next few weeks, more people died of typhoid or malaria than the mortality of the previous three years, far more than died at the hands of the Zulu.[4]
- Moriarty was no novice, being 42 years old, having campaigned in India, fought against Sekhukhune and had three years' service in South Africa with the 80th Regiment.[7]
References
- Colenso & Durnford 1880, p. 348.
- Morris 1998, p. 474; Theal 1919, p. 305.
- Laband 1992, p. 137.
- Lock 1995, pp. 94–95.
- Lock 1995, pp. 94, 100, 102.
- Lock 1995, p. 104.
- Lock 1995, p. 105.
- Lock 1995, pp. 105–106.
- Lock 1995, p. 109.
- Lock 1995, pp. 111, 207.
- Morris 1998, p. 474.
- Lock 1995, p. 111; Morris 1998, p. 475–476.
- Morris 1988, p. 487.
- Lock 1995, p. 110.
- Morris 1998, p. 478.
- Laband 2009, p. 204.
- Greaves 2012, p. 88.
Bibliography
- Colenso, Frances Ellen (1880). History of the Zulu War and its Origin. Assisted by Edward Durnford. London: Chapman & Hall. OCLC 469318357. Retrieved 17 September 2019.
- Greaves, A (2012). Forgotten Battles of the Zulu War. Barnsley: Pen & Sword Military. ISBN 978-1-84468-135-8.
- Greaves, A (2012) [2005]. Crossing the Buffalo: The Zulu War of 1879 (pbk. Cassell ed.). London: Weidenfeld & Nicolson. ISBN 978-1-4091-2572-3.
- Laband, John (2009). Historical Dictionary of the Zulu Wars. Historical Dictionaries of War, Revolution, and Civil Unrest (ebook ed.). Lanham, Maryland: Scarecrow Press. ISBN 978-0-8108-6300-2. No. 37.
- Lock, R. (1995). Blood on the Painted Mountain: Zulu Victory and Defeat, Hlobane and Kambula, 1879. London: Greenhill Books. ISBN 1-85367-201-7.
- Morris, Donald R. (1988). The Washing of the Spears. London: Abacus. ISBN 0-7474-0194-2.
- Morris, Donald R. (1998). The Washing of the Spears. Boston, MS: Da Capo Press. ISBN 0-306-80866-8.
- Theal, George McCall (1919). History of South Africa, from 1873 to 1884: Twelve Eventful Years, with Continuation of the History of Galekaland, Tembuland, Pondoland, and Bethshuanaland until the Annexation of those Territories to the Cape Colony, and of Zululand until its Annexation to Natal (two volumes). London: Allen. OCLC 1067058319. Retrieved 9 December 2009.
Further reading
- Barthorp, Michael (2002). The Zulu War: Isandhlwana to Ulundi. London: Weidenfeld & Nicolson. ISBN 0-304-36270-0.
- Brookes, Edgar H.; Webb, Colin de B. (1965). A History of Natal. Brooklyn, NY: University of Natal Press. ISBN 0-86980-579-7.
- David, Saul (February 2009). "The Forgotten Battles of the Zulu War". BBC History Magazine. 10 (2). pp. 26–33. ISSN 1469-8552.
- David, Saul (2005). Zulu, The Heroism and Tragedy of the Zulu War of 1879. London: Penguin Books. ISBN 0-14-101569-1.
- Gump, James O. (1996). The Dust Rose Like Smoke: The Subjugation of the Zulu and the Sioux. Lincoln, Nebraska: Bison Books. ISBN 0-8032-7059-3.
- Knight, Ian (2003). The Anglo-Zulu War. Oxford: Osprey. ISBN 1-84176-612-7.
- Laband, John (1992). Kingdom in Crisis: The Zulu Response to the British Invasion of 1879. Manchester: Manchester University Press. ISBN 0-71903-582-1.CS1 maint: ref=harv (link)
- Laband, John; Knight, Ian (1996). The Anglo-Zulu War. Stroud: Sutton. ISBN 0-86985-829-7.
- Martineau, John (1895). The Life and Correspondence of the Right Hon. Sir Bartle Frere, bart., G. C. B., F. R. S., etc. (two volumes). London: John Murray. OCLC 933031763.
- Raugh, Harold E. Jr. (2011). Anglo-Zulu War 1879: A Selected Bibliography. Lanham, Maryland: Scarecrow Press. ISBN 978-0-8108-7227-1.
- Spiers, Edward M. (2006). The Scottish Soldier and Empire, 1854–1902. Edinburgh: Edinburgh University Press. ISBN 978-0-7486-2354-9.
- Thompson, Paul Singer (2006). Black Soldiers of the Queen: The Natal Native Contingent in the Anglo-Zulu War. Tuscaloosa, Alabama: University of Alabama Press. ISBN 0-8173-5368-2.