Grab (software)
 | |
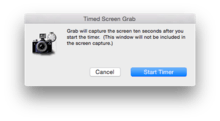
 Grab's timed screenshot dialogue box | |
| Developer(s) | Apple Computer |
|---|---|
| Stable release |
1.10 (141)
/ July 9, 2018[1] |
| Operating system | OS X |
| Type | screen capture |
| Website |
www |
Grab was a utility for taking screenshots in macOS (and its progenitors and OPENSTEP and NeXTSTEP). It supported capturing a marquee selection, whole window, whole screen, and timed screen.
This application was preinstalled on Macintosh systems running macOS 10.13 or earlier. It was replaced by the Screenshot utility in macOS 10.14.[2]
macOS
Grab was found in the Utilities folder under Applications. It could be quickly opened by using the Spotlight function (by invoking the keyboard shortcut ⌘ Cmd+Space and typing grab) or by pressing ⌘ Cmd+⇧ Shift+G and typing in /Applications/Utilities/Grab.app in Finder. It was previously also found in the Finder menu under Services > Grab. As of Mac OS X v10.4, Preview had a Grab submenu in the File menu, with selection, window, and timed screen. This submenu is named Take Screenshot in more recent versions of macOS.[2]
The only image format for screenshots taken by Grab is TIFF. In macOS, it is also possible to save screenshots directly to the Desktop in PDF format (earlier versions of macOS) or PNG format (later versions), using keystrokes shown below. For DRM reasons, it is not possible to use this software while DVD Player is open.
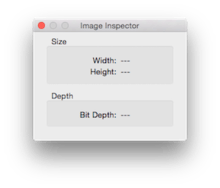
Grab helps determine the size of an element on the screen. After using the selection feature and capturing the screen, one can select Inspector from the menu or press ⌘ Cmd+1 (or ⌘ Cmd+I); a dialog box will appear with the dimensions of the selected area.

Capture Options
- Selection - takes a picture of a part of the screen that you select.[3]
- Window - takes a picture of a window you select.[3]
- Screen - takes a picture of the entire screen.[3]
- Timed - screen lets user start a timer and activate part of the screen (such as a menu), and then takes a picture of the screen.[3]
Shortcuts
| Action | Shortcut |
|---|---|
| Take a picture of the whole screen | ⌘ Cmd+⇧ Shift+3 (Holding Ctrl saves the image to the clipboard instead of to a file on the disk.) |
| Take a picture of part of the screen | ⌘ Cmd+⇧ Shift+4, then drag to select the area desired in the picture. (Holding Ctrl saves the image to the clipboard.) Escape cancels the procedure. |
| Take a picture of a window, a menu, the menu bar, or the Dock. | Press ⌘ Cmd+⇧ Shift+4, then press the Space bar. Move the pointer over the area desired so that it is highlighted, then click. To drag to select the area instead, press the Space bar again. Escape cancels the procedure. |
References
- ↑ "macOS 10.13.6 release date". Retrieved 7 October 2018.
- 1 2 "How to take a screenshot on your Mac". Retrieved 7 October 2018.
- 1 2 3 4 https://www.apple.com/macosx/what-is-macosx/apps-and-utilities.html#grab