Hammer and anvil
The hammer and anvil is a military tactic involving the use of two primary forces, one to pin down an enemy, and the other to smash or defeat the opponent with an encirclement maneuver. It may involve a frontal assault by one part of the force, playing a slower-moving or more static role. The second phase involves a more mobile force that maneuvers around the enemy and attacks from behind or the flank to deliver a decisive blow.[1] The "hammer and anvil" tactic is fundamentally a single envelopment, and is to be distinguished from a simple encirclement where one group simply keeps an enemy occupied, while a flanking force delivers the coup de grace. The strongest expression of the concept is where both echelons are sufficient in themselves to strike a decisive blow. The "anvil" echelon here is not a mere diversionary gambit, but a substantial body that hits the enemy hard to pin him down and grind away his strength. The "hammer" or maneuver element succeeds because the anvil force materially or substantially weakens the enemy, preventing him from adjusting to the threat in his flank or rear.[2] Other variants of the concept allow for an enemy to be held fast by a substantial blocking or holding force, while a strong echelon or hammer, delivers the decisive blow. In all scenarios, both the hammer and anvil elements are substantial entities that can cause significant material damage to opponents, as opposed to light diversionary, or small scale holding units[3]
Examples of hammer and anvil tactics
World War II: Battle of Caen- 1944

The strategy of British land forces commander General Bernard Montgomery when the allies landed at Normandy was to confront the feared German panzers with constantly attacking British Armies on the eastern flank of the beachhead. The role of British forces would be to act as a great shield for the Allied landing, constantly sucking the German armour on to a great anvil on the left (east), and constantly grinding it down with punishing blows from artillery, tanks and Allied heavy bombers.[4] As the anvil held the bulk of the German armor fast, this would open the way for the Americans to wield a great hammer in the west, on the right of the Allied line, breaking though the German defenses, where the Americans led by such commanders as Patton, could run free. The British role would thus not be a glamorous one, but a tough battle in a punishing cauldron of attrition, in and around the key city of Caen.[5]
The Germans had initially counterattacked the Normandy beachhead with powerful panzer and mobile forces hoping to drive to the sea by creating a wedge between the US and British armies. Failing this, they were then faced with a large, menacing British advance towards the strategic city of Caen, that threatened to collapse a great portion of their front, presenting a credible and very dangerous breakthrough threat. The British and Canadian divisions were not a secondary, defensively-oriented holding force, but aggressively sought to penetrate and destroy the German position. The Germans were thus forced to commit their strongest echelons in the theatre, the mobile panzer and SS units to avoid this peril. These were pulled deeper and deeper against the attritional anvil on the eastern flank, that slowly ground down their strength and capability. The bitter confrontation tied down and weakened the Wehrmacht, thus eventually paving the way for a crushing American breakthrough in the west.
As General Montgomery signalled on June 25, 1944:
- "When the American attack went in west of St Lo at 1100 hours on 25 July, the main enemy armoured strength of six panzer and SS divisions was deployed on the eastern flank facing the British Army. This is a good dividend. The Americans are going well and I think things will now begin to move towards the plan outlined in M512."[6]
Montgomery's overall "hammer and anvil" conception of the battle eventually bore fruit, but it took two months of bitter fighting in and around the city of Caen, as documented in such books as Alexander McKee's Caen: Anvil of Victory.[7]
The Ashanti versus the British - 1874
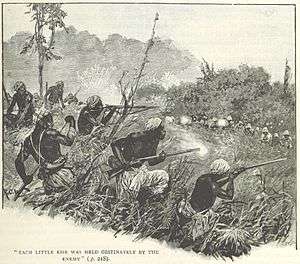
The colonial wars of the 1800s saw some African armies deploy hammer and anvil tactics. In 1874 a strong British force under Sir Garnet Wolseley, armed with modern rifles and artillery, invaded the Ashant territory. The Ashanto did not confront the invaders immediately, and made no major effort to interdict their long, vulnerable lines of communication through the jungle terrain. Their plan appeared to be to draw the British deep into their territory, against a strong defensive anvil centred at the town of Amoaful. Here the British would be tied down, while manoeuvring wing elements circled to the rear, trapping and cutting them off. Some historians (Farwell 2001) note that this was approach was a traditional Ashanti battle strategy, and was common in some African armies as well.[8] At the village of Amoaful, the Ashantis succeeded in luring their opponents forward, but could not make any headway against the modern firepower of the British forces, which laid down a barrage of fire to accompany an advance of infantry in squares. This artillery fire took a heavy toll on the Ashanti, but they left a central blocking force in place around the village, while unleashing a large flanking attack on the left, that almost enveloped the British line and successfully broke into some of the infantry squares. Ashanti weaponry however, was poor compared to the modern weapons deployed by the redcoats, and such superior arms served the British well in repulsing the dangerous Ashanti encirclements.[9] As one participant noted:
- "The Ashantees stood admirably, and kept up one of the heaviest fires I ever was under. While opposing our attack with immediately superior numbers, they kept enveloping our left with a constant series of well-directed flank attacks."[10]
Wolesey had studied and anticipated the Ashanti "horseshoe" formations, and had strengthened the British flanks with the best units and reinforced firepower. He was able to shift this firepower to threatened sectors to stymie enemy maneuvers, defeating their hammer and anvil elements and forcing his opponents to retreat.[11] One British combat post-mortem pays tribute to the slain Ashanti commander for his tactical leadership and use of terrain:
- "The great Chief Amanquatia was among the killed. Admirable skill was shown in the position selected by Amanquatia, and the determination and generalship he displayed in the defence fully bore out his great reputation as an able tactician and gallant soldier."[12]
Soviet sweep operations in Afghanistan
See also
References
- Gat, Azar. War In Human Civilisation. Oxford: Oxford University Press, 2006. 340.
- Allan Millet and Williamson Murray, ed. 2010. Military Effectiveness, vol 3. p 302
- Millet and Williamson, Military Effectiveness, vol 3
- Nigel Hamilton, 1983. Master of the Battlefield pg 628-769
- Hamilton, 1983. Master of the Battlefield pg 628-769
- Hamilton, Master of the Battlefield, p757
- Alexander McKee's Caen: Anvil of Victory, 2012.
- Byron Farwell. 2001. The encyclopedia of nineteenth-century land warfare. WW Norton. p 56.
- The Victorians at war, 1815–1914: an encyclopedia of British military history. By Harold E. Raugh. ACL-CLIO: pp. 21–37
- Charles Rathbone Low, A Memoir of Lieutenant-General Sir Garnet J. Wolseley, R. Bentley: 1878, pp. 57–176
- The Victorians at war, 1815–1914: pp. 21–37
- Charles Rathbone. A Memoir of Lieutenant-General Sir Garnet J. Wolseley. 1878, pg 174