Newcomers to LaTeX often feel disappointed by the lack of visual customization offered by the system. Actually this is done on purpose: the LaTeX philosophy takes a point at doing the formatting while the writer focuses on the content.
In this chapter, we will show what we can achieve with some efforts.
Introduction
In the following we will write the theme, a package that will only change the appearance of the document, so that our document will work with or without the theme.
Note that if it may look eye-candy, this is absolutely not a model of typography. You should not use such theme for serious publications. This is more a technological example to exhibit LaTeX capabilities.
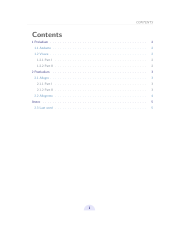 Custom theme (TOC)
 Custom theme
 Custom theme (red)
Package configuration
Nothing much to say here. This is a direct application of the Creating Packages chapter.
We load the required packages.
- needspace is used to prevent page break right after a sectioning command.
- tikz is used to draw the fancy material.
We define a color option, you may use as much as you want. Defining colors with specific names makes it very flexible. We also use an option to toggle the fancy reflection effect which might be a little too much!
\NeedsTeXFormat{LaTeX2e}
\ProvidesPackage{theme-fancy}[2013/01/13 v1.0 fancy theme]

%%%%%%%%%%%%%%%%%%%%%%%%%%%%%%%%%%%%%%%%%%%%%%%%%%%%%%%%%%%%%%%%%%%%%%%%%%%%%%%%
%% Packages

\RequirePackage{geometry}
\RequirePackage{needspace}
\RequirePackage[svgnames]{xcolor}

\RequirePackage{hyperref}
\hypersetup{colorlinks=true}

\RequirePackage{fancyhdr}

\RequirePackage{tikz}
\usetikzlibrary{
  calc,
  decorations.pathmorphing,
  fadings,
  shadows,
  shapes.geometric,
  shapes.misc,
}

%%%%%%%%%%%%%%%%%%%%%%%%%%%%%%%%%%%%%%%%%%%%%%%%%%%%%%%%%%%%%%%%%%%%%%%%%%%%%%%%
%% Options

%% Toggle reflection.
\newif\if@mirrors\@mirrorsfalse
\DeclareOption{mirrors}{
  \@mirrorstrue
}

%% Colors.
\newif\if@red\@redfalse
\DeclareOption{red}{
  \@redtrue
}

\ExecuteOptions{}
\ProcessOptions\relax

%%%%%%%%%%%%%%%%%%%%%%%%%%%%%%%%%%%%%%%%%%%%%%%%%%%%%%%%%%%%%%%%%%%%%%%%%%%%%%%%
%% Configuration

\renewcommand{\familydefault}{\sfdefault}
\setlength{\parskip}{0.5\baselineskip}

%% Colors
\colorlet{toctitle}{DarkGray!50!black}
\colorlet{titlebg}{MidnightBlue}
\colorlet{titlefg}{LightBlue}
\colorlet{titletxt}{MidnightBlue}
\colorlet{sectionfg}{MidnightBlue}
\colorlet{subsectionfg}{SteelBlue}
\colorlet{subsubsectionfg}{LightSteelBlue!60!black}

\if@red
\colorlet{toctitle}{DarkGray!50!black}
\colorlet{titlebg}{DarkRed}
\colorlet{titlefg}{FireBrick!50}
\colorlet{titletxt}{DarkRed}
\colorlet{sectionfg}{DarkRed}
\colorlet{subsectionfg}{Crimson!50!black}
\colorlet{subsubsectionfg}{LightSteelBlue!60!black}
\fi
|
Header and footer
We use TikZ to draw a filled semicircle.
fancyhdr is used to set header and footer. We take care of using the fancy style and to start from scratch by erasing the previous header and footer with \fancyhf{}.
%%%%%%%%%%%%%%%%%%%%%%%%%%%%%%%%%%%%%%%%%%%%%%%%%%%%%%%%%%%%%%%%%%%%%%%%%%%%%%%%
%% Header and Footer

\tikzstyle{foliostyle}=[fill=Lavender, text=MidnightBlue, inner sep=5pt, semicircle]

\pagestyle{fancy}
\fancyhf{}
\fancyfoot[C]{
  \vskip 3pt
  \begin{tikzpicture}
    \node[foliostyle]
    {\bfseries\thepage};
  \end{tikzpicture}
}

\renewcommand{\headrulewidth}{0.8pt}
\addtolength{\headheight}{\baselineskip}
\renewcommand{\headrule}{\color{LightGray}\hrule}
\fancyhead[LE]{ \textcolor{gray}{\slshape \rightmark} }
\fancyhead[RO]{ \textcolor{gray}{\slshape \leftmark} }
|
Table of contents
We redefine commands used by \tableofcontents.
%%%%%%%%%%%%%%%%%%%%%%%%%%%%%%%%%%%%%%%%%%%%%%%%%%%%%%%%%%%%%%%%%%%%%%%%%%%%%%%%
%% Table of contents

\newcommand{\sectiontoccolor}{sectionfg}
\newcommand{\subsectiontoccolor}{subsectionfg}
\newcommand{\subsubsectiontoccolor}{subsubsectionfg}

\renewcommand*\l@section{\color{\sectiontoccolor}\def\@linkcolor{\sectiontoccolor}\@dottedtocline{1}{1.5em}{2.3em}}
\renewcommand*\l@subsection{\color{\subsectiontoccolor}\def\@linkcolor{\subsectiontoccolor}\@dottedtocline{1}{2.3em}{3.1em}}
\renewcommand*\l@subsubsection{\color{\subsubsectiontoccolor}\def\@linkcolor{\subsubsectiontoccolor}\@dottedtocline{1}{3.1em}{3.9em}}
\def\contentsline#1#2#3#4{%
  \ifx\\#4\\%
  \csname l@#1\endcsname{#2}{#3}%
  \else
  \csname l@#1\endcsname{\hyper@linkstart{link}{#4}{#2}\hyper@linkend}{%
    \hyper@linkstart{link}{#4}{#3}\hyper@linkend
  }%
  \fi
}

%% New title format -- 'section' is used by default.
\newcommand{\tocformat}[1]{{\Huge\bf#1}}

\renewcommand\tableofcontents{%
  \tocformat{
    \textcolor{toctitle}{\contentsname}
    \@mkboth{\MakeUppercase\contentsname}{\MakeUppercase\contentsname}
  }%
  \@starttoc{toc}%
}
|
Sectioning
This is definitely the most complex part. It is not that hard since the code is almost the same for \section, \subsection and \subsubsection.
We use \needspace to make sure there is no line break right after a sectioning command. We enclose the command in a group where we set a font size since the space we need is \baselineskip which depends on the font size.
Starred commands will not set the counters (LaTeX detault behaviour). You can choose to handle starred command differently by resetting the counters for instance.
We preceed the section printing by a \noindent.
We make sure to end the section printing by a \par command to make sure following text gets printed properly.
For \subsection we make use of the mirrors option to change the appearance accordingly.
To handle the PDF bookmarks properly we need the following lines at the end of the definitions.
\phantomsection
\addcontentsline{toc}{section}{\thesection~#1}
|
Finally, for \section only, we want it to print in the header, so we call the \sectionmark command. Here we changed the behaviour of the starred command over the original LaTeX version, since we define and use the \sectionmarkstar command.
%%%%%%%%%%%%%%%%%%%%%%%%%%%%%%%%%%%%%%%%%%%%%%%%%%%%%%%%%%%%%%%%%%%%%%%%%%%%%%%%
%% Section style

\renewcommand\section{
  \@ifstar
  \my@sectionstar
  \my@section
}

%% Note: to justify, text width must be set to \textwidth - 2*(inner sep).
\tikzstyle{sectionstyle}=[
  inner sep=5pt,
  text width=\textwidth-10pt,
  left color=sectionfg!100!white,
  right color=sectionfg!50!white,
  rounded corners,
  text=Ivory,
  rectangle
]

\newcommand\my@section[1]{
  \stepcounter{section}
  {\Large\needspace{\baselineskip}}
  \noindent
  \begin{tikzpicture}
    \node[sectionstyle] {\bfseries\Large\thesection\quad#1};
  \end{tikzpicture}
  \par
  \phantomsection
  \addcontentsline{toc}{section}{\thesection~#1}
  \sectionmark{#1}
}

\newcommand{\sectionmarkstar}[1]{\markboth{\MakeUppercase{#1}}{}}

\newcommand\my@sectionstar[1]{
  {\Large\needspace{\baselineskip}}
  \noindent
  \begin{tikzpicture}
    \node[sectionstyle] {\bfseries\Large#1};
  \end{tikzpicture}
  \par
  \phantomsection
  \addcontentsline{toc}{section}{#1}
  \sectionmarkstar{#1}
}


%%%%%%%%%%%%%%%%%%%%%%%%%%%%%%%%%%%%%%%%%%%%%%%%%%%%%%%%%%%%%%%%%%%%%%%%%%%%%%%%
%% Subsection style

\renewcommand\subsection{
  \@ifstar
  \my@subsectionstar
  \my@subsection
}

\tikzstyle{subsectionstyle}=[
  left color=subsectionfg!50!white,
  right color=subsectionfg!100!white,
  text=Ivory,
  ellipse,
  inner sep=5pt
]

\newcommand\my@subsection[1]{
  \stepcounter{subsection}
  {\Large\needspace{\baselineskip}}
  \noindent
  \begin{tikzpicture}
    \node[subsectionstyle,anchor=west] (number) at (0,0) {\bfseries\Large\thesubsection};
    \if@mirrors
    \node[above right,subsectionfg,anchor=south west] at ($(number.east)+(0.1,-0.1)$) {\large\bfseries#1};
    \node[yscale=-1, scope fading=south, opacity=0.4, above, anchor=south west, subsectionfg] at ($(number.east)+(0.1,0.1)$) {\large\bfseries#1};
    \else
    \node[above right,subsectionfg,anchor=west] at ($(number.east)+(0.1,0)$) {\large\bfseries#1};
    \fi
  \end{tikzpicture}
  \par
  \phantomsection
  \addcontentsline{toc}{subsection}{\thesubsection~#1}
}

\newcommand\my@subsectionstar[1]{
  {\Large\needspace{\baselineskip}}
  \noindent
  \begin{tikzpicture}
    \node[subsectionstyle,anchor=west] (number) at (0,0) {\bfseries\Large\phantom{1}};
    %
    \if@mirrors
    \node[above right,subsectionfg,anchor=south west] at ($(number.east)+(0.1,-0.1)$) {\large\bfseries#1};
    \node[yscale=-1, scope fading=south, opacity=0.4, above, anchor=south west, subsectionfg] at ($(number.east)+(0.1,0.1)$) {\large\bfseries#1};
    \else
    \node[above right,subsectionfg,anchor=west] at ($(number.east)+(0.1,0)$) {\large\bfseries#1};
    \fi
  \end{tikzpicture}
  \par
  \phantomsection
  \addcontentsline{toc}{subsection}{#1}
}

%%%%%%%%%%%%%%%%%%%%%%%%%%%%%%%%%%%%%%%%%%%%%%%%%%%%%%%%%%%%%%%%%%%%%%%%%%%%%%%%
%% Subsubsection style

\renewcommand\subsubsection{
  \@ifstar
  \my@subsubsectionstar
  \my@subsubsection
}

\tikzstyle{subsubsectionstyle}=[
  left color=subsubsectionfg!50!white,
  right color=subsubsectionfg!100!white,
  text=Ivory,
  shape=trapezium,
  inner sep=5pt
]

\newcommand\my@subsubsection[1]{
  \stepcounter{subsubsection}
  \noindent
  \begin{tikzpicture}
	\node[subsubsectionstyle] (number) {\bfseries\large\thesubsubsection};
	\node[subsubsectionfg, right of=number, anchor=west] {\large\bfseries#1};
  \end{tikzpicture}
  \par
  \phantomsection
  \addcontentsline{toc}{subsubsection}{\thesubsubsection~#1}
}

\newcommand\my@subsubsectionstar[1]{
  \noindent
  \begin{tikzpicture}
	\node[subsubsectionstyle] (number) {\bfseries\large\vphantom{1}};
	\node[subsubsectionfg, right of=number, anchor=west] {\large\bfseries#1};
  \end{tikzpicture}
  \par
  \phantomsection
  \addcontentsline{toc}{subsubsection}{#1}
}

\endinput
|