Although quite demanding, many modelers savor the control poly-by-poly modeling allows. However, its demanding nature makes many modelers, beginners and experts alike, try to avoid it. Still, poly-by-poly modeling, if properly used, is a powerful tool.
Before we start
For this work flow, being ready is of great importance. Have several references of your subject, especially a front and side view. Also, have minutes of study on the subject and try to make out an approach in modeling it. Being ready is crucial for this.
 |
| Image used as a reference available at the commons |
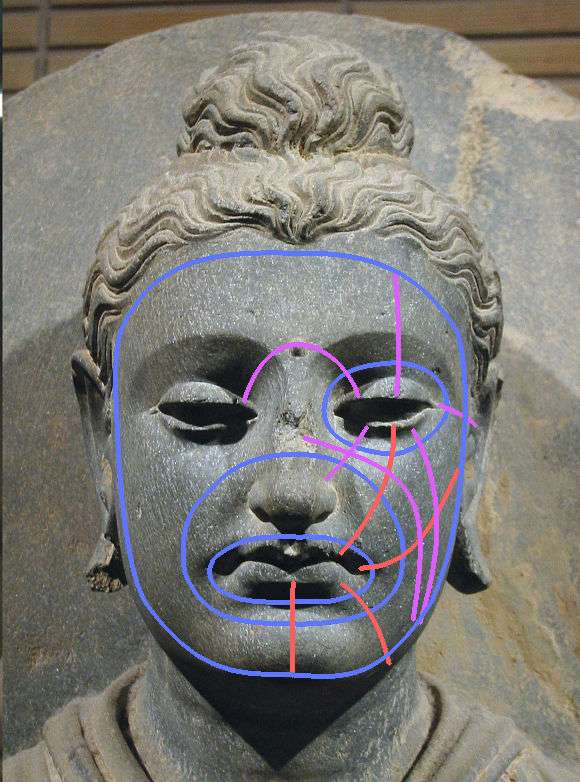 |
| Loop plans for the model |
The Workflow
Poly-by-poly modeling provides the most free modeling workflow ever. This freedom, however, causes confusion on how to approach modeling the subject. Searching the internet for tutorials on modeling the face using this method, you will find hundreds and each will be different from each other. Some start with the eyes, others with the mouth, others the ridge of the nose. And then each will proceed differently from that. No wonder its confusing.
Even though poly-by-poly modeling is such a free form method and constitutes a very vogue way to start and continue, a general guideline is provided in the hope that it will help modelers in using this approach.
To Start
Poly-by-poly modeling rather sets you free on choosing how and where to start. The only requirement is that you have a geometry, a vertex or a plane to start with. Many beginners are stumped by this. Somehow such liberty leaves them undecided.
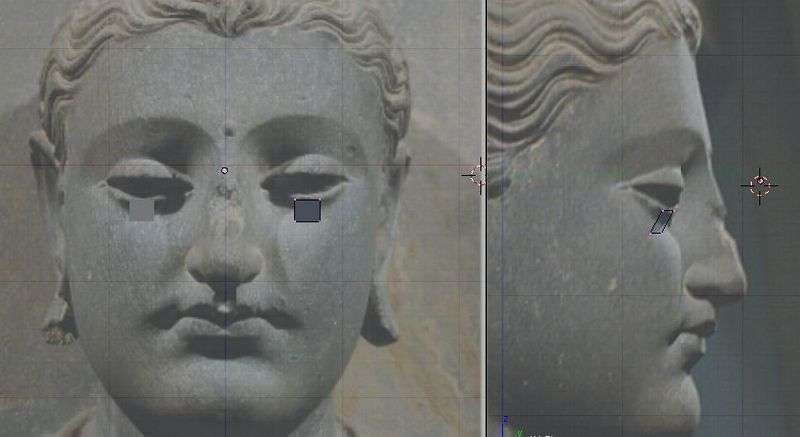 |
| Starting geometry |
A very good approach is to start by creating the important loops first. For example, in modeling the face, you could start by creating the eye, mouth and face loops. With the loops in place, it is easy to build other geometries around them.
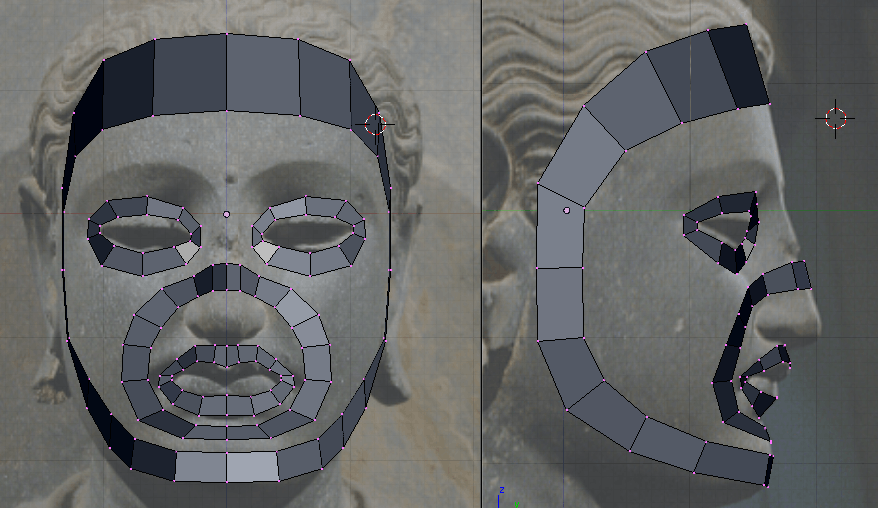 |
| Starting with important loops |
Another good approach is to start with the most important part of the subject. For the face, this is the eyes and the mouth. You could model these parts first and then proceed adding geometry from there.
 |
| Starting with the mouth |
As said, poly-by-poly modeling lets you free, so if you would like to start on other parts first, say the nose, then you could do so.
To Continue
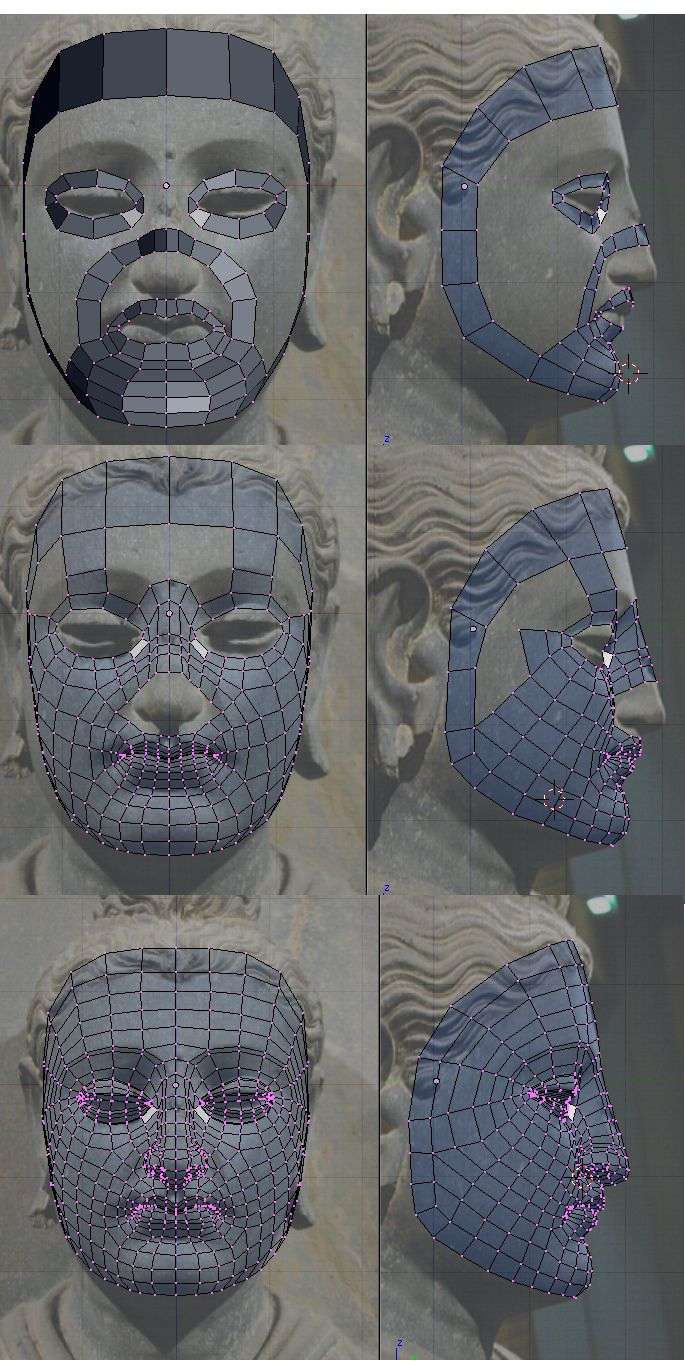 |
| Continue Adding more geometry. Notice how the loops are placed |
Continuing from your beginnings is not as easy as connecting-the-dots as it first appears to be. Rather than proceeding in a connect the dots fashion, proceed by thinking of edge and face loops of your model first then creating and adjusting geometry to fit them. Such view would ease decision on placing your geometry.
To Finish
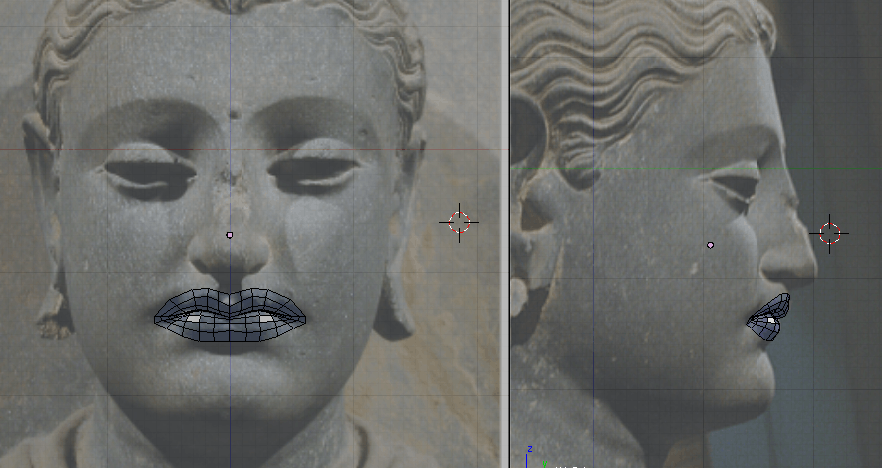
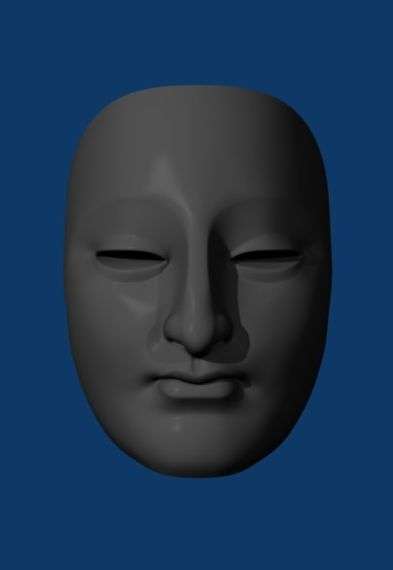 |
| Rendered face after few adjustments |
When you find that you don't need to add more geometry, you can call it quits. But still, its a good practice to take another look of your model and make trial renders of it. There might be an awry edge loop, geometries that mess the model, or triangles that you wanted out. Do some fixing and adjusting and when you finally have the model good, give yourself a pat on the back.